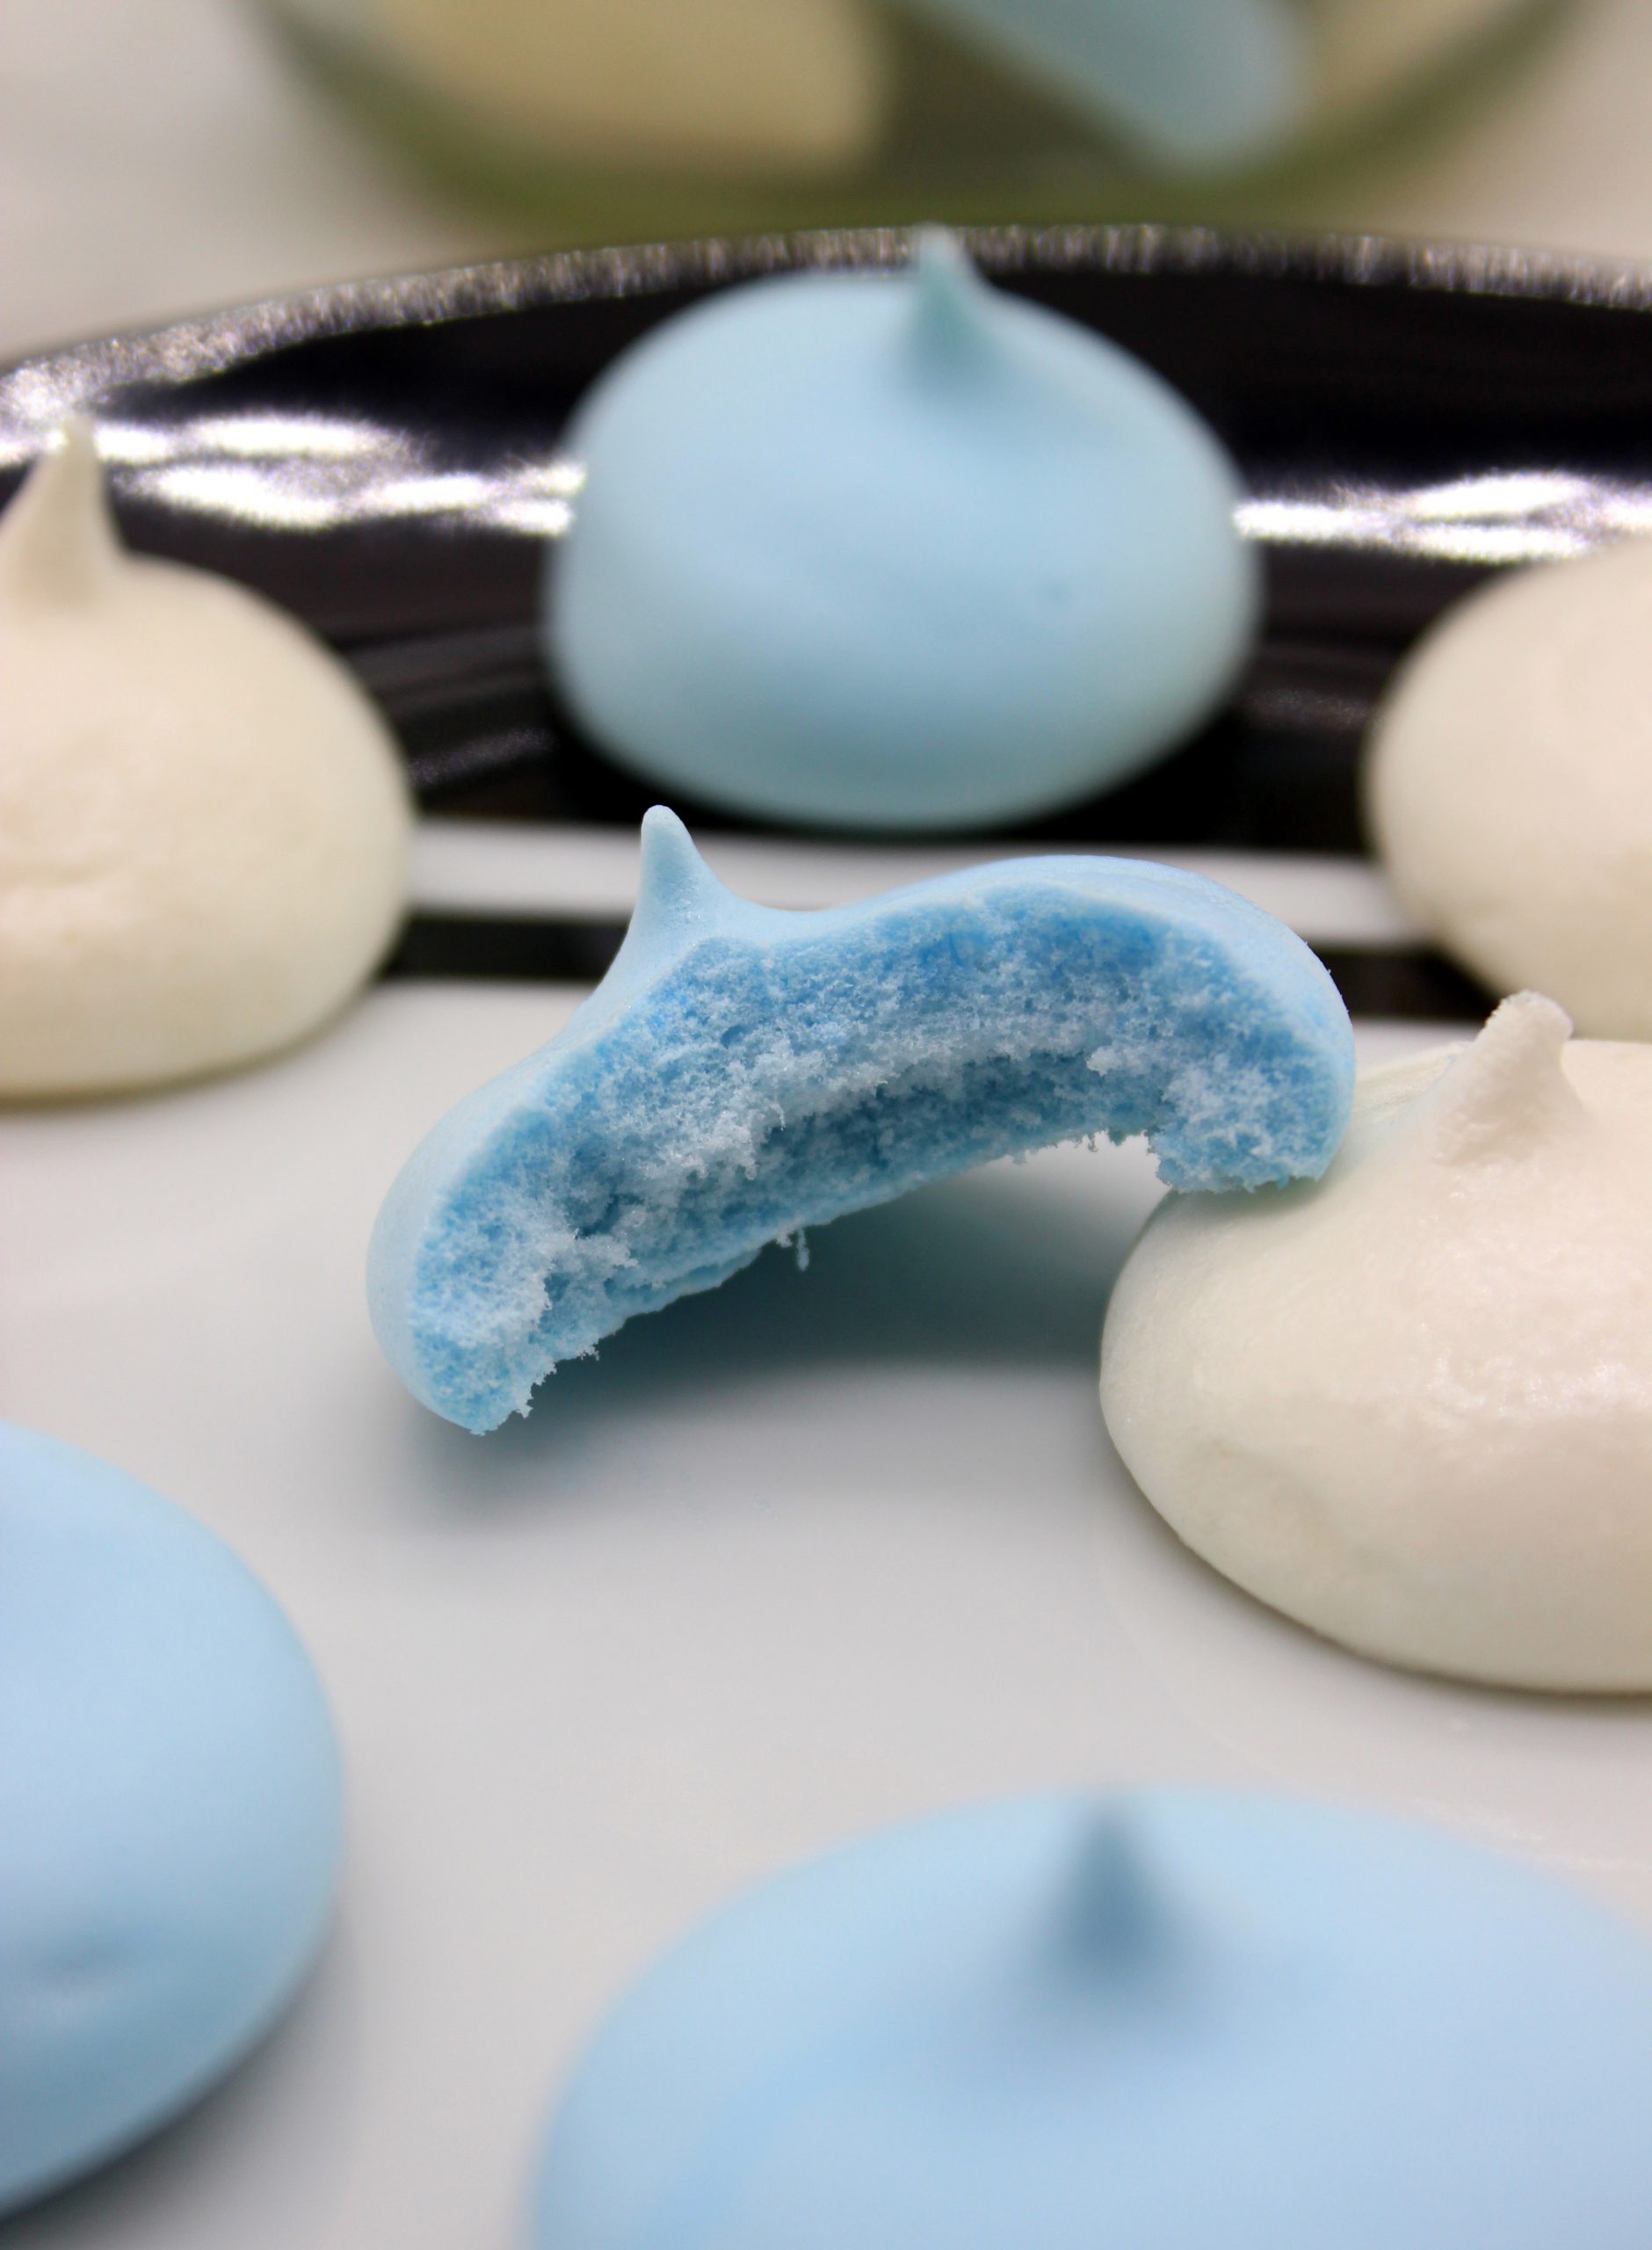
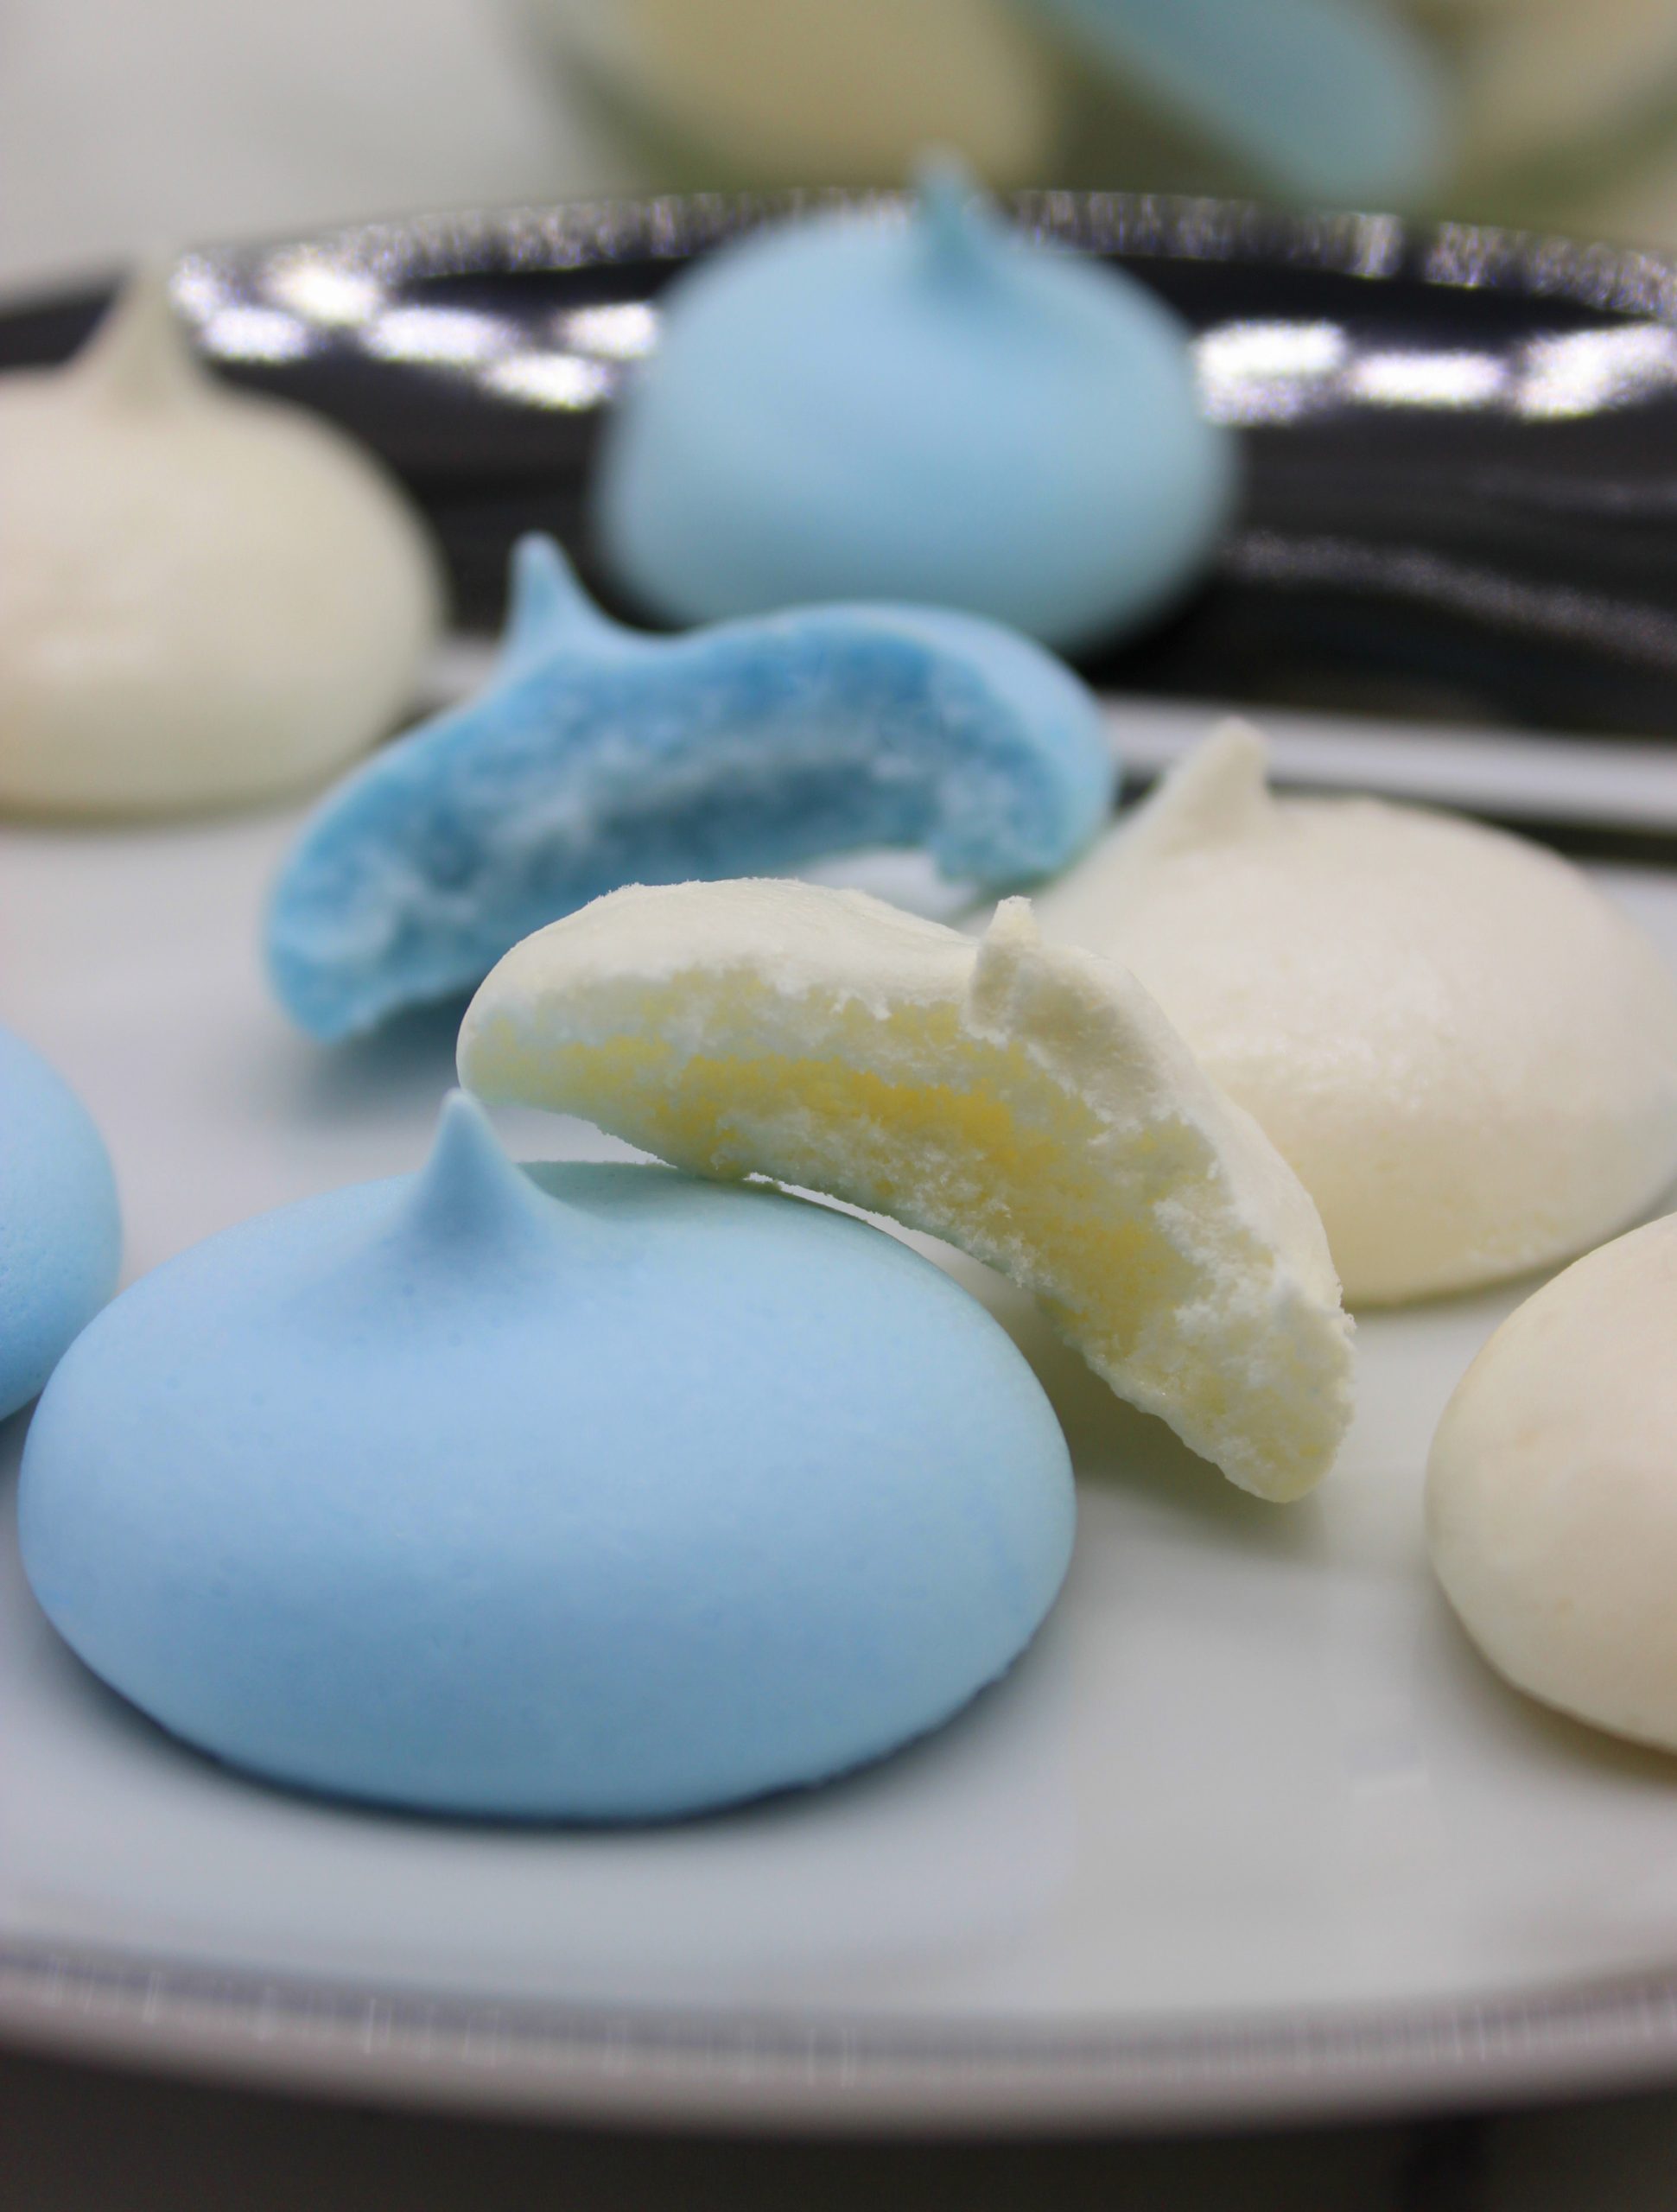
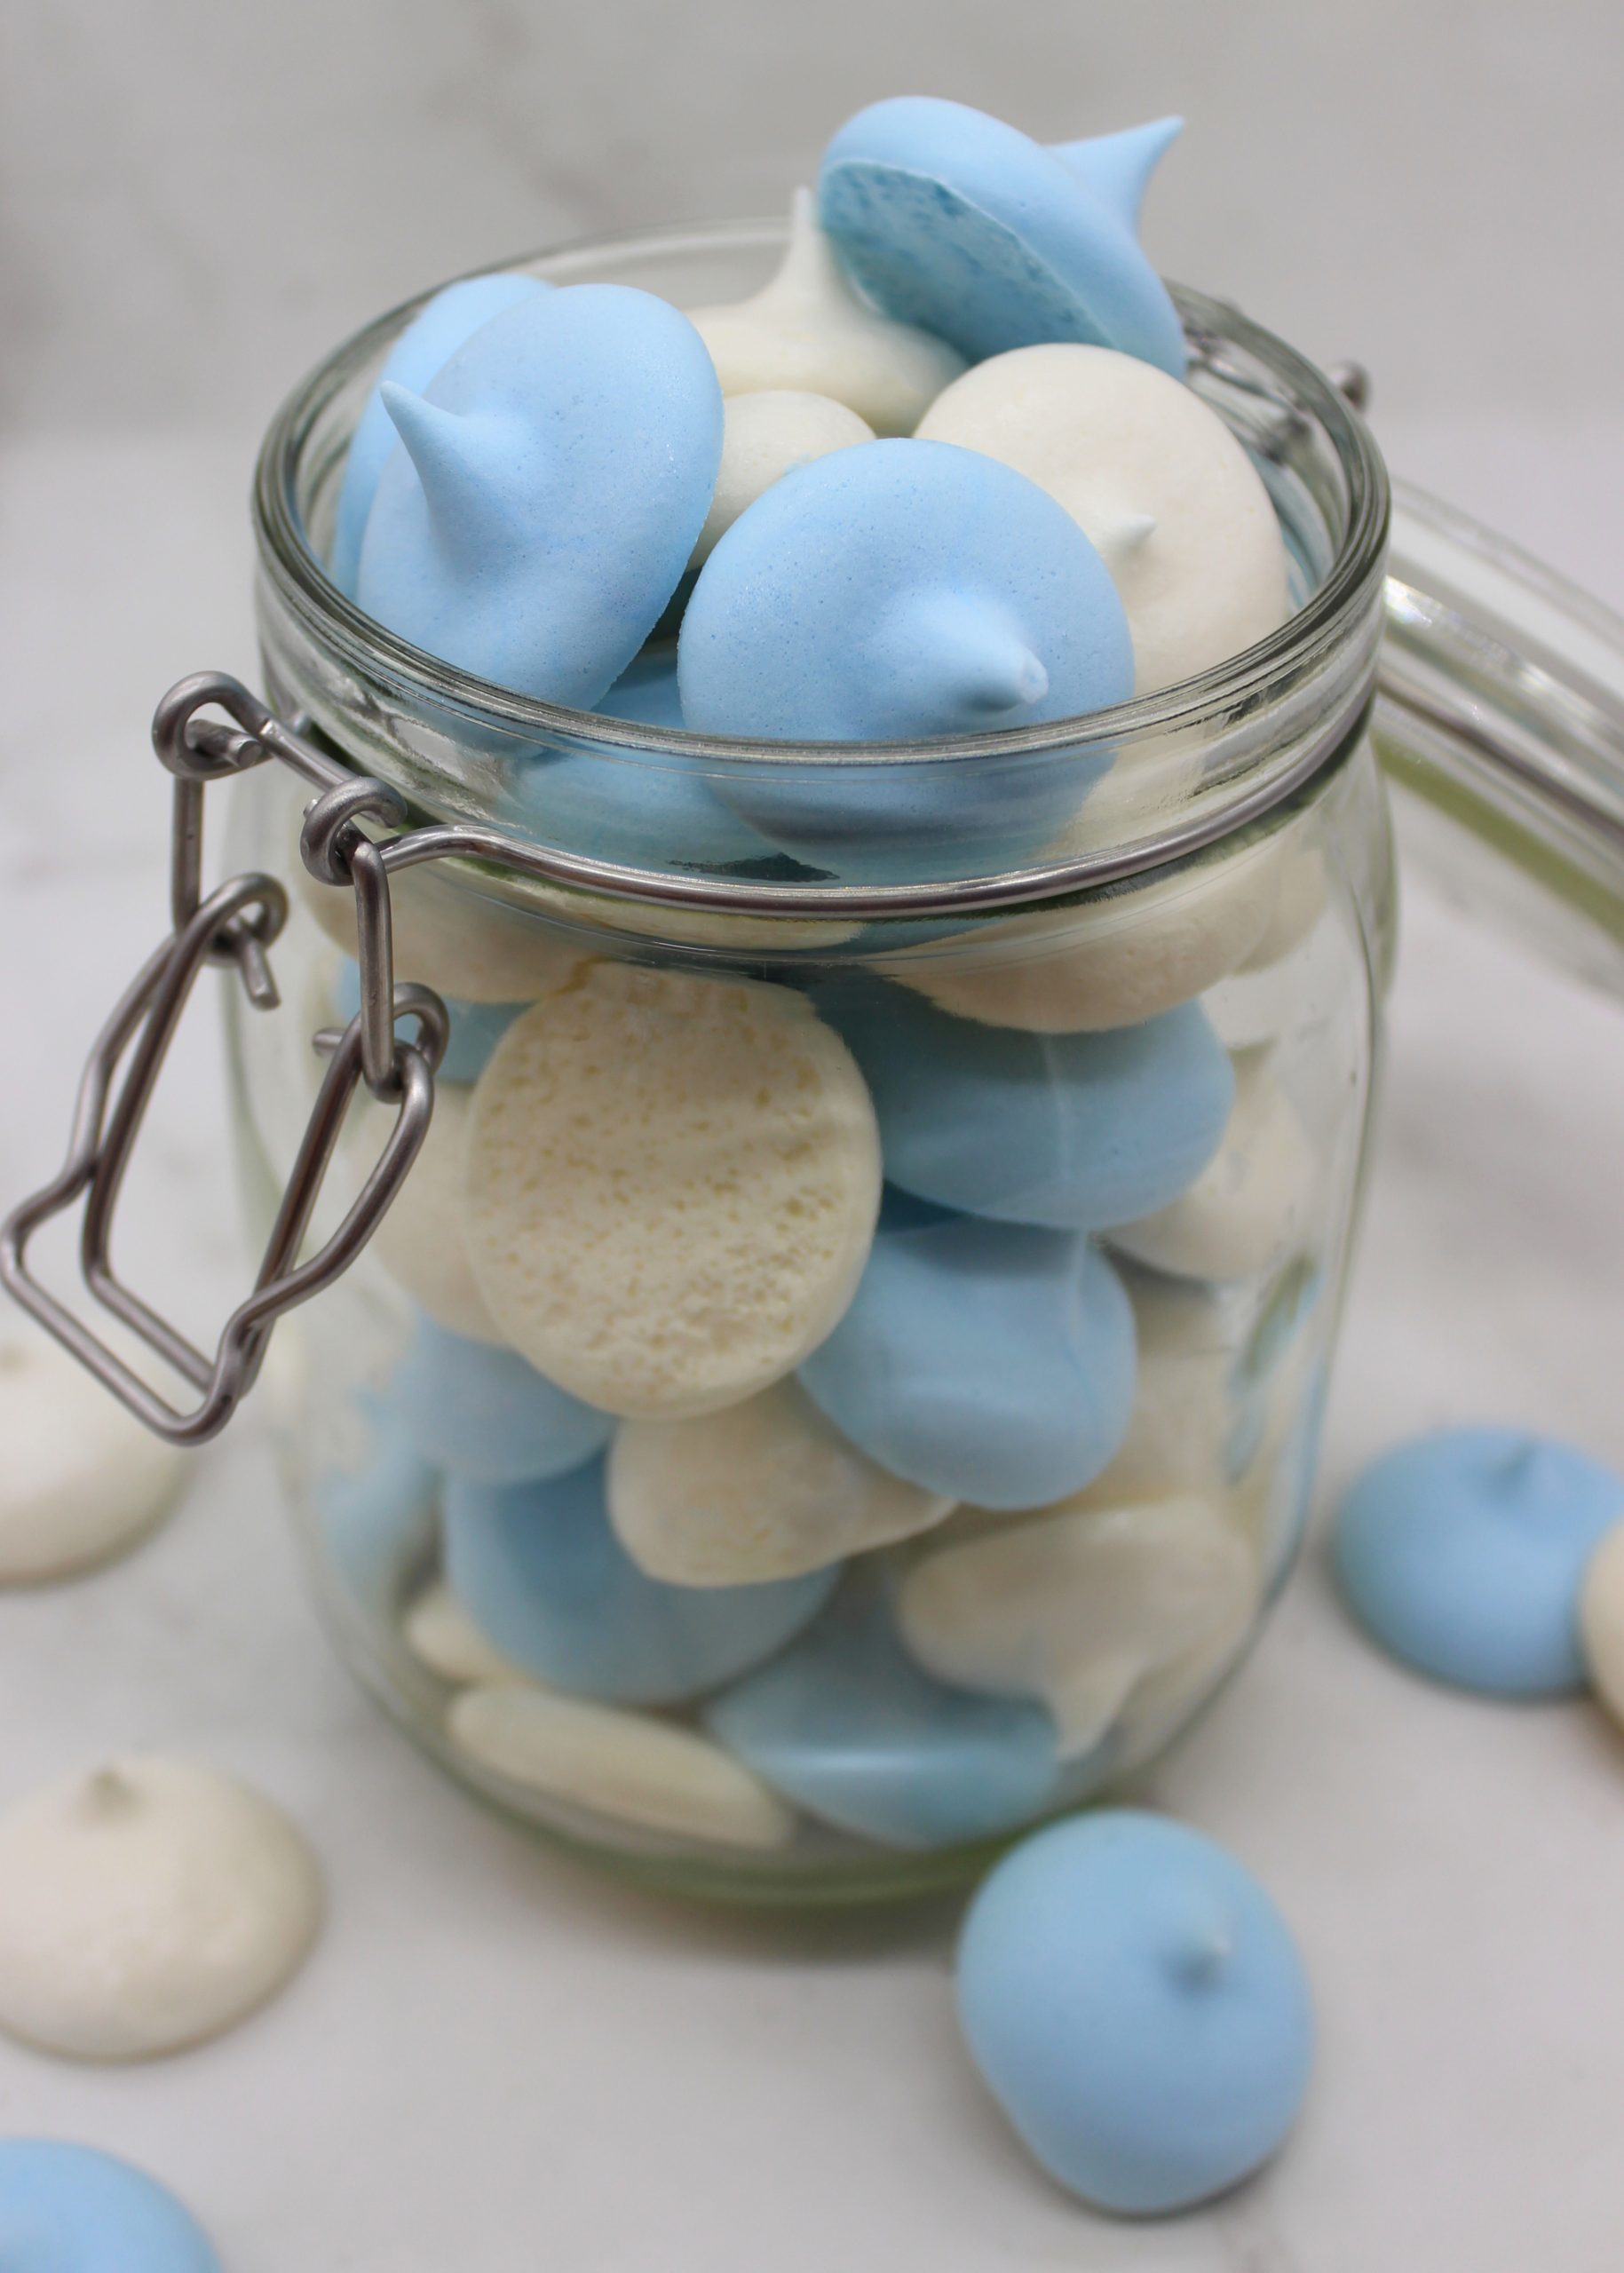
Who has not tried meringues, right? Those tiny, fluffy sweets that literally melt in your mouth… Delicious! But not vegan. At least the original meringues are not, since they’re made with egg whites. But once again I’m here to prove you that there’s almost nothing that you couldn’t veganize! So, let me introduce you to my easy vegan meringue cookies made without cream of tartar!
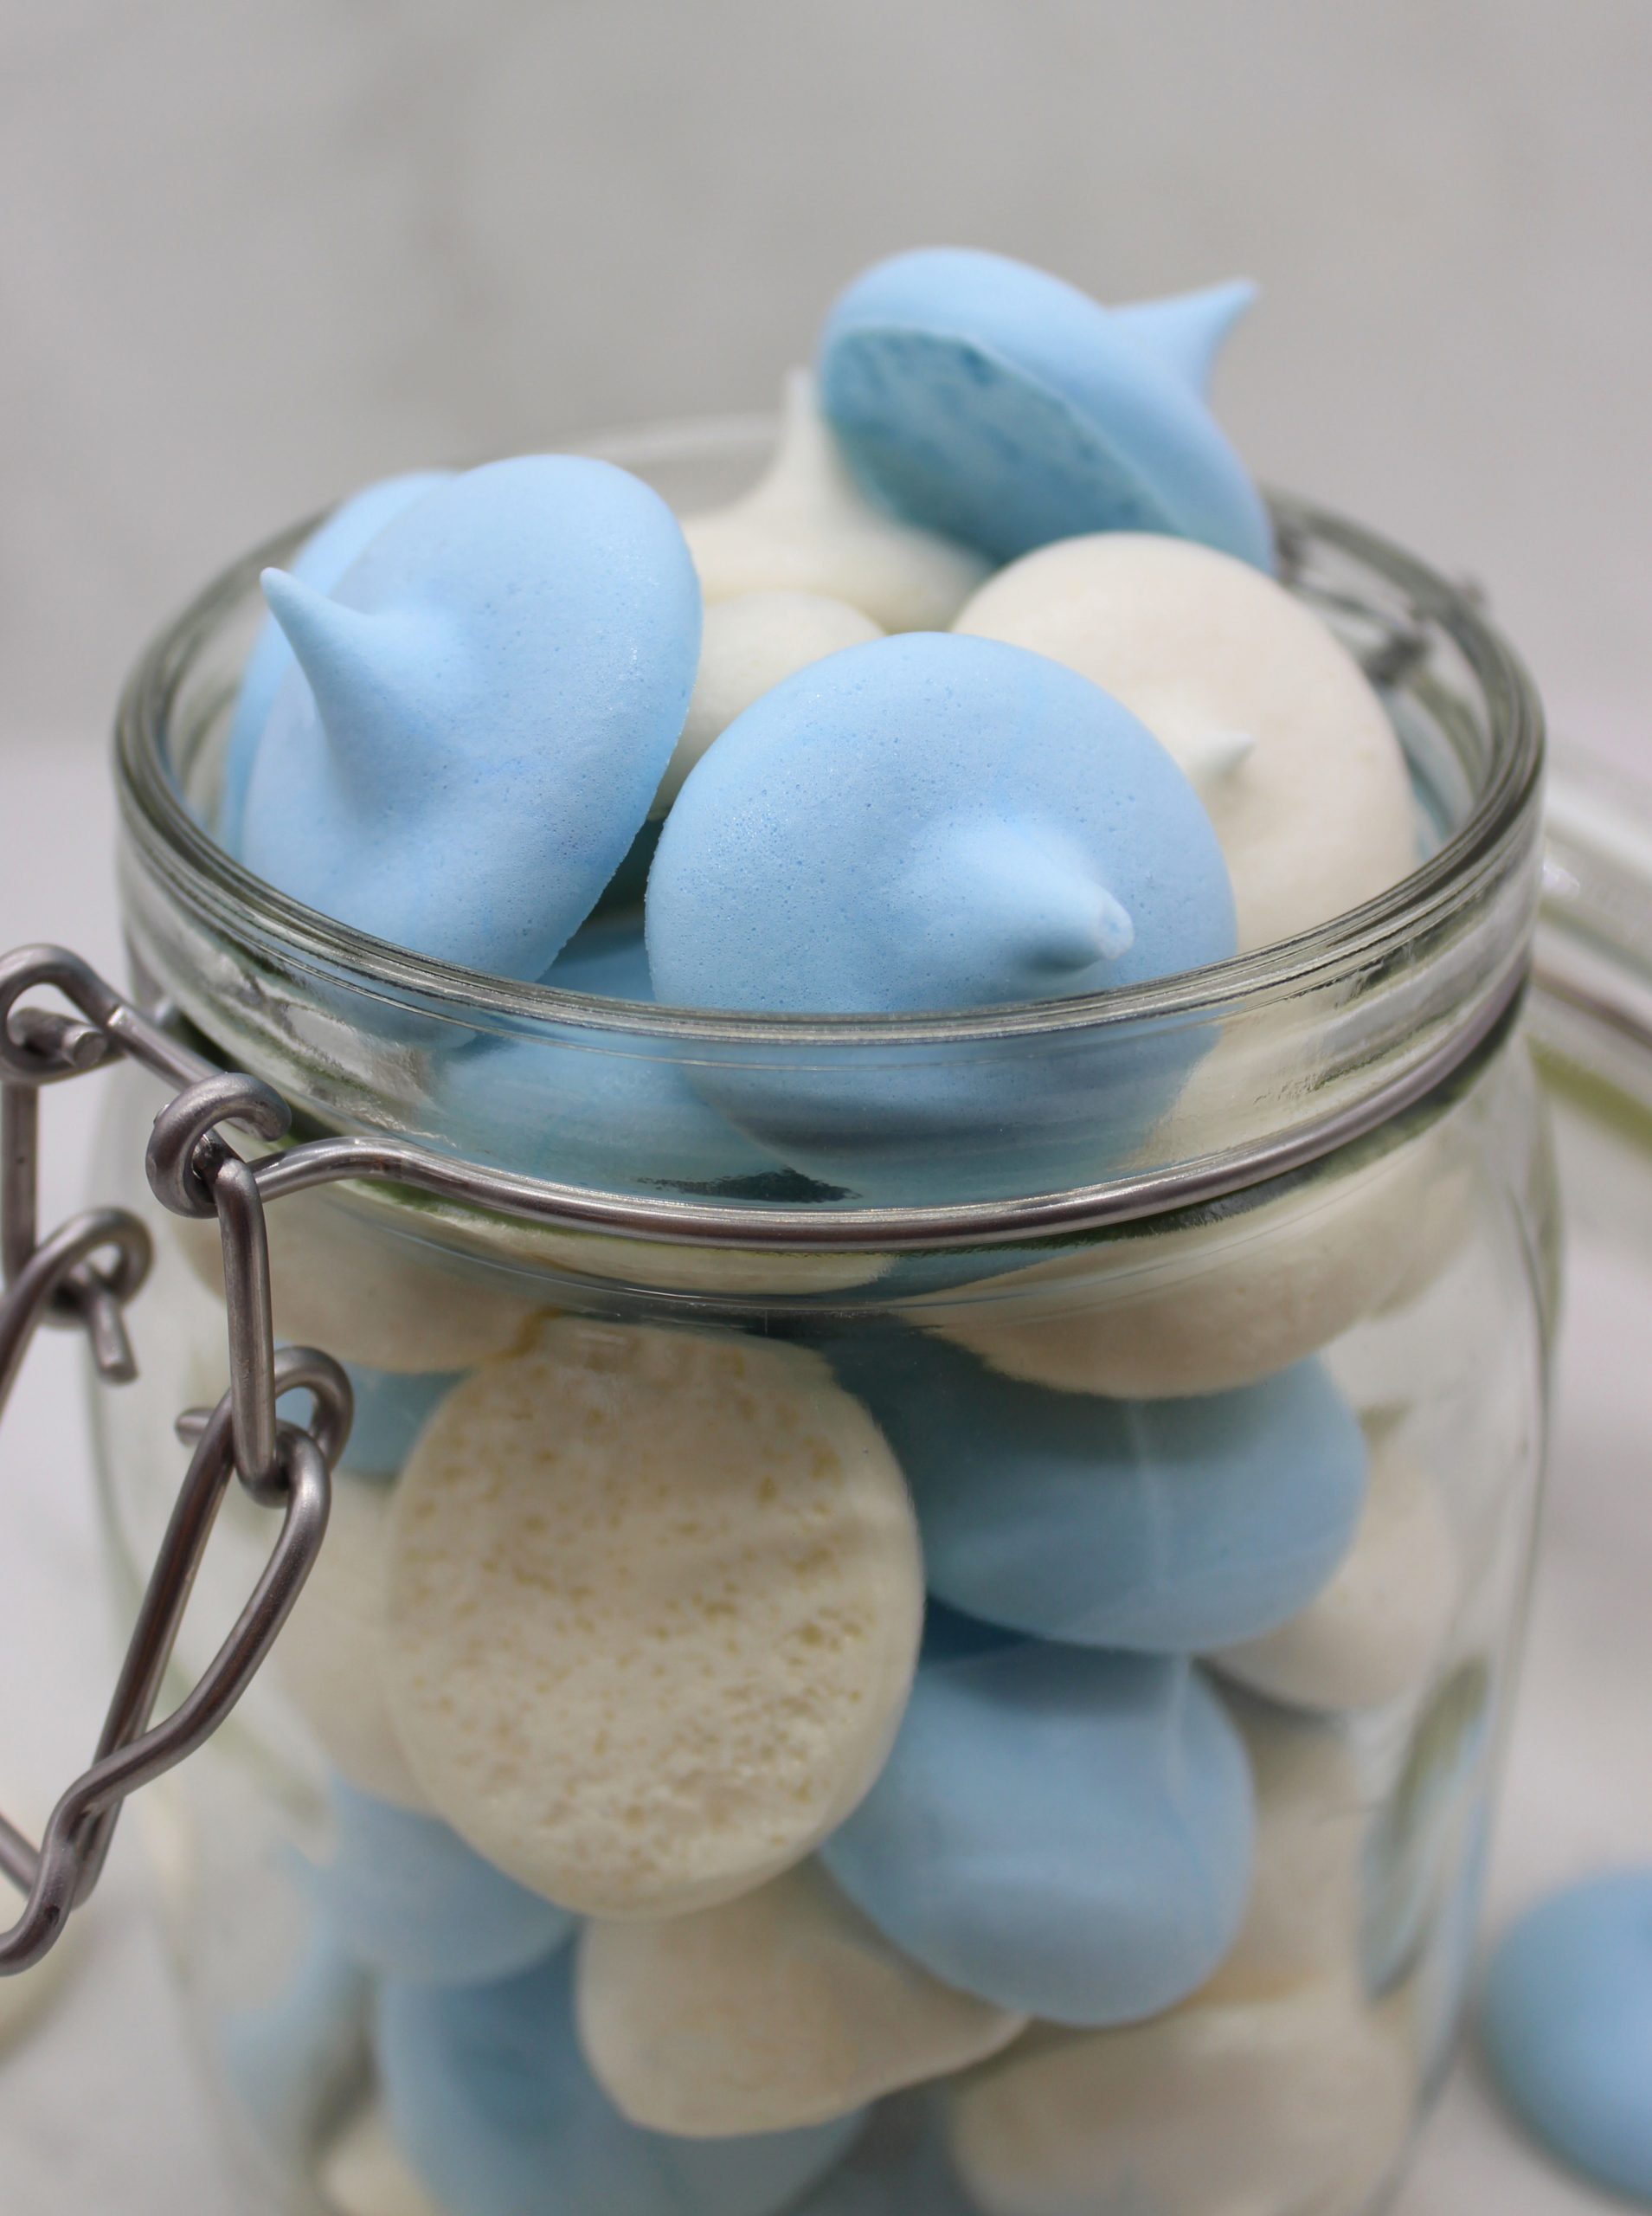
The ingredient that in this recipe substitutes the egg whites is aquafaba, which is the liquid from cooked or canned chickpeas. You might think that this simply sounds wrong and that the liquid, that you usually throw away, cannot actually turn into delicious cookies. But it’s true! You simply need to try my easy vegan meringue cookies to see it for yourself! You might think that the meringues have some chickpea aftertaste. But I can reassure you that they don’t, if you follow step by step my recipe!
Useful tips on preparing the easy vegan meringue cookies
Even though the baking and afterwards the waiting time are quite long, the preparation process itself is very quick and easy. But how could it be any different, since these vegan meringues contain only 3 ingredients! You can always reduce the list of ingredients to only two. But if this is your first time in making meringues, I advise you to stick to my recipe for success! Basically, the ingredients are aquafaba, caster sugar and white wine vinegar. Even though the vinegar is the ingredient that you could eventually skip, it helps to obtain beautiful stiff peaks. In case you don’t have vinegar, you can also try to add lemon juice instead. Very often you’ll find vegan meringue recipes that require also cream of tartar. But I reassure you that by simply paying attention to some small details you can easily make beautiful vegan meringues without cream of tartar.
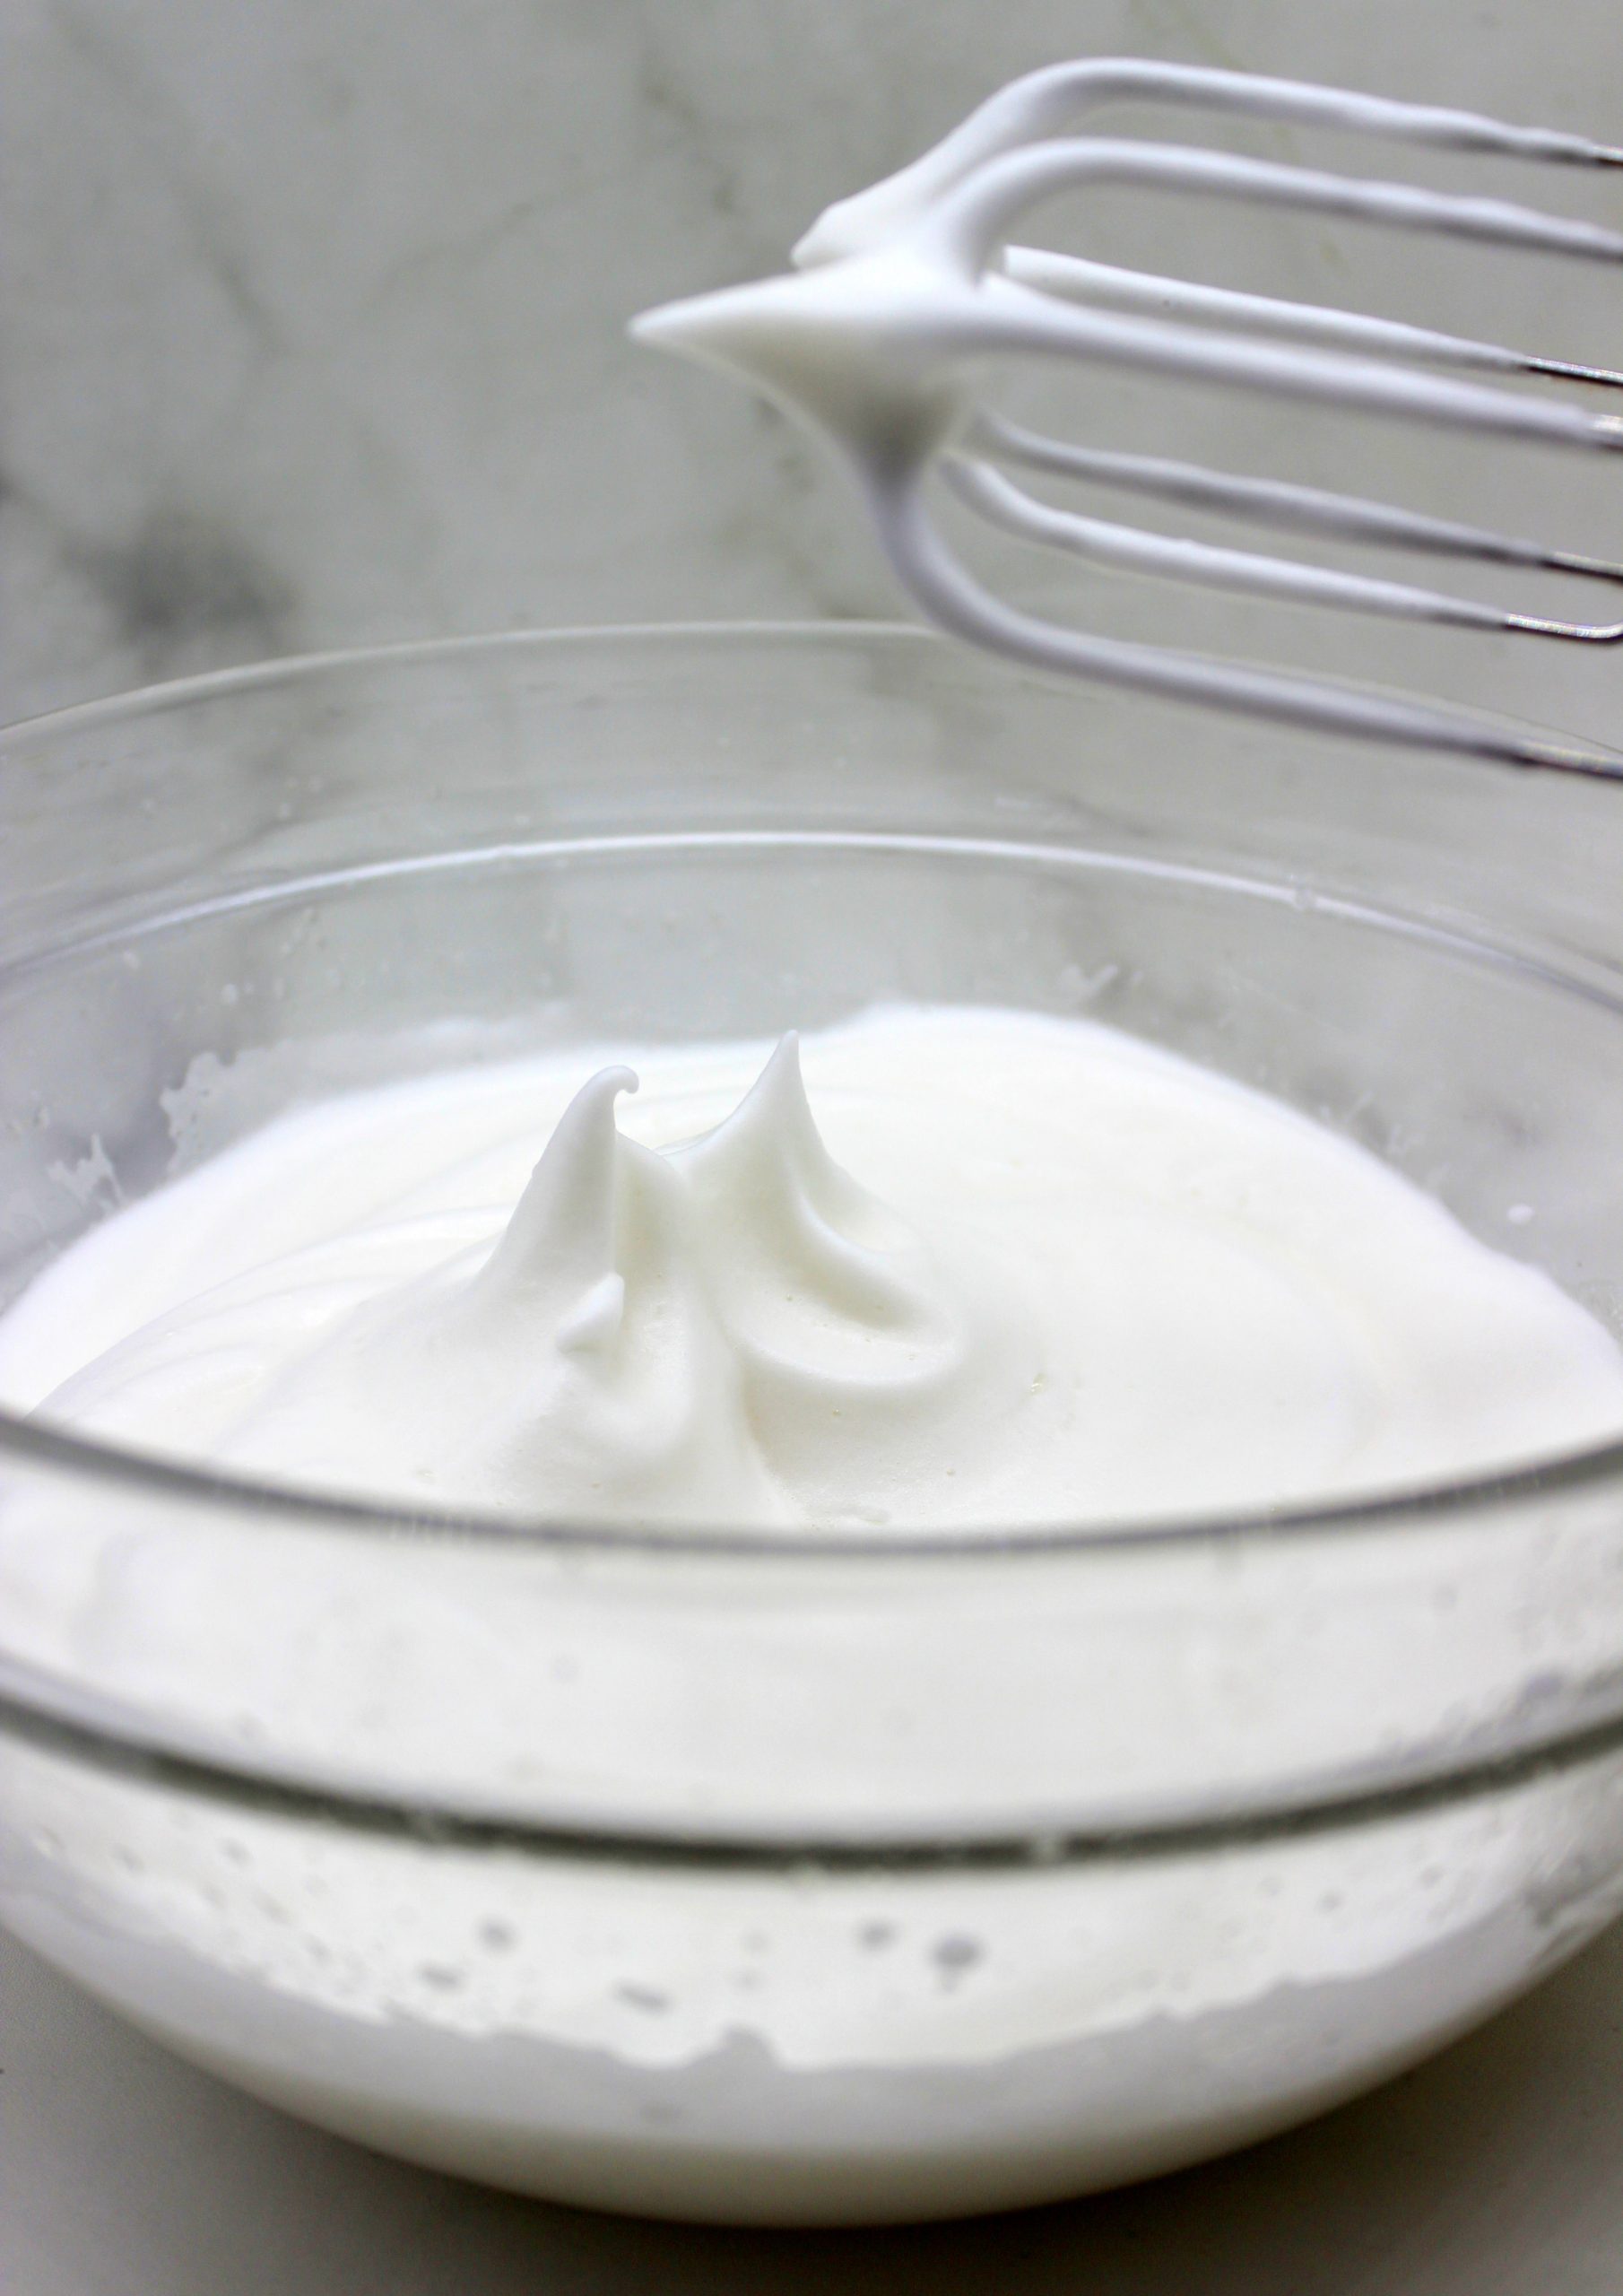
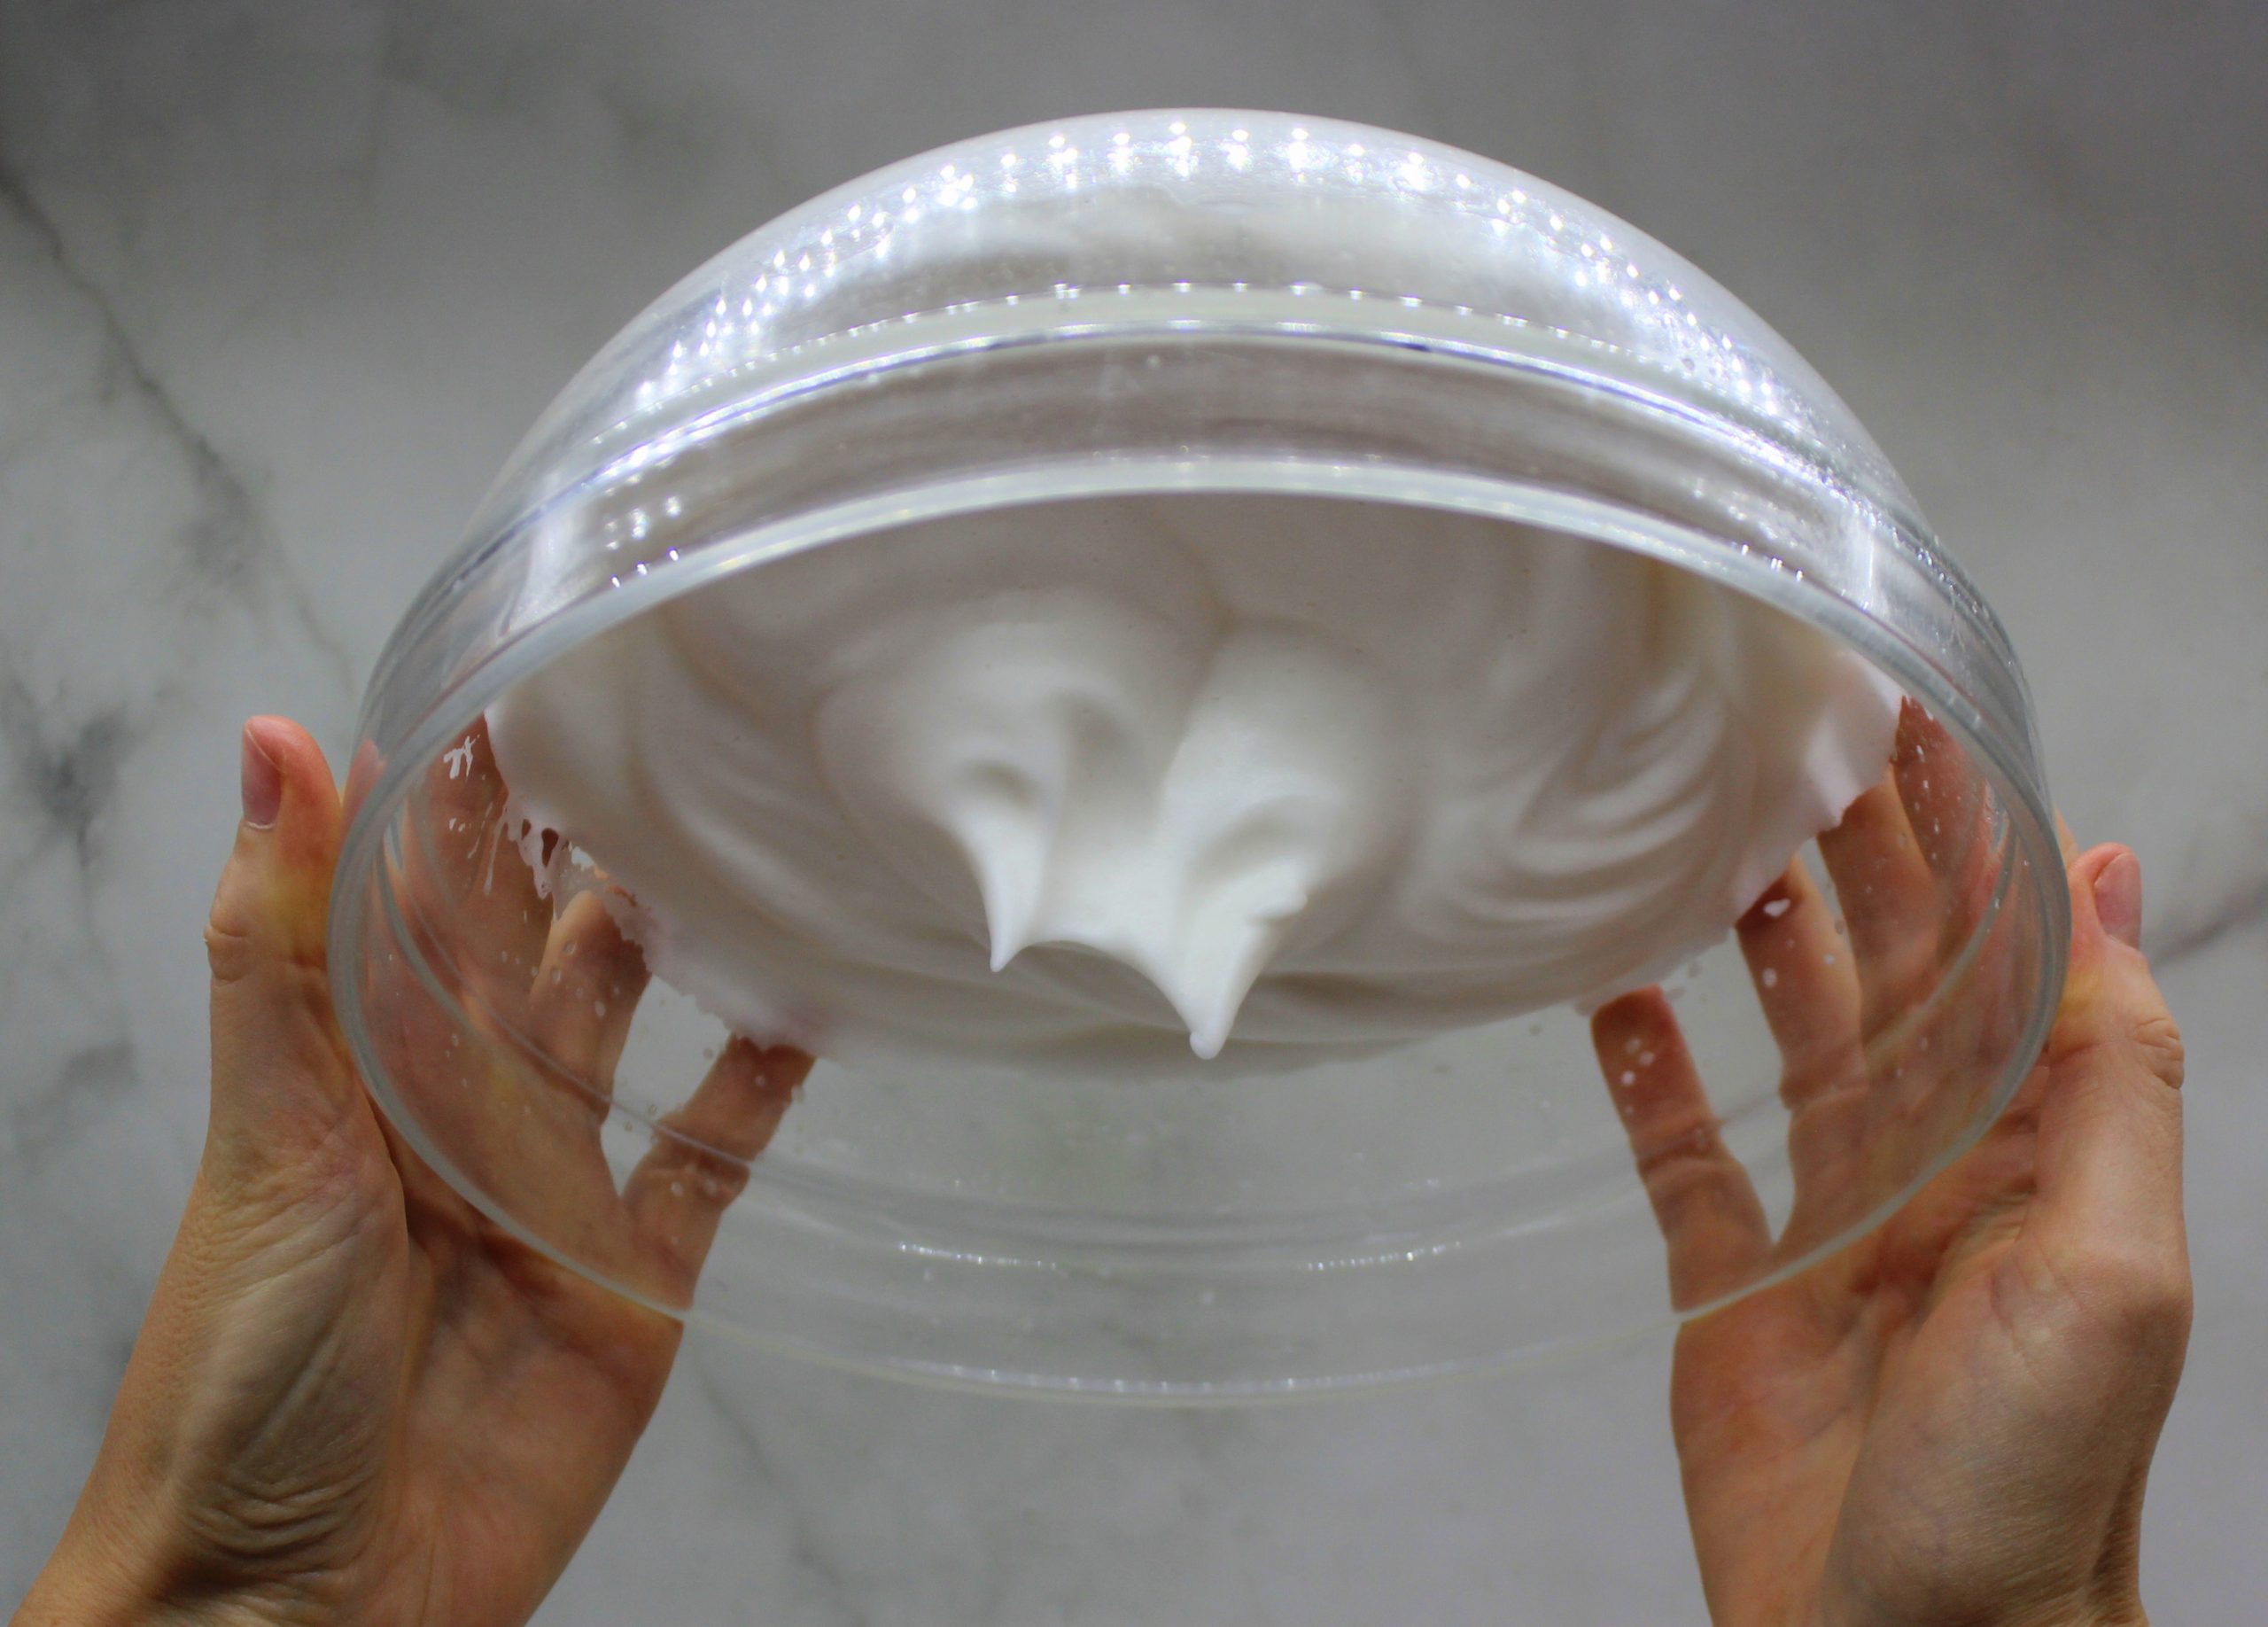
For this recipe I used aquafaba from canned chickpeas. Of course, it contains some salt, but once again – you don’t feel it, while eating the meringue cookies. If you want to avoid salt completely, make your own aquafaba by boiling soaked dry chickpeas and then reducing the liquid to the consistency that resembles raw egg whites. It takes some time, but in such a way you’ll skip the added salt. On the internet you can find many advices on how to make your own aquafaba. But anyway, I repeat – you can easily use the brine from canned chickpeas and the result will be equally delicious! Another thing that is important – all the utensils and the bowl, in which you’ll beat the aquafaba, must be completely clean. There cannot be any greasy residue, otherwise you won’t be able to whip it.
Ideas on how to use the leftover chickpeas
No matter if you make your own aquafaba or use the one in a can, there will be some leftover chickpeas. And I have several ideas how you can use them! To name a few: you can make delicious eggplant and sundried tomato burgers or some juicy savoy cabbage rolls. If you like creamy soups, you’ll definitely appreciate my potato and leek soup. Or, if you want something more snack-like, my colorful beetroot and spinach hummus rolls will be the right choice for you! No matter, what you’ll decide to prepare with chickpeas, the delicious and easy vegan meringue cookies will wait you for dessert! Sweet and fluffy – just like my fluffball Specky!

Now that you also have ideas on what to do with chickpeas, not just the brine, there’s no escape! You simply must prepare these meringues that are:
-
vegan
- easy to make
- fluffy
- sweet
- silky smooth
- cloud-like
- gluten-free
- egg-free
- and simply yummy!
Let me know, if you try this recipe! Leave a comment or even more – make Specky happy! Snap a picture of your masterpiece and post it on Instagram or Facebook by tagging @bunnymommycooks. And feel free to let your animal family members join in the picture!
Vegan Dalgona coffee cups
This recipe was posted on: 28/08/2020
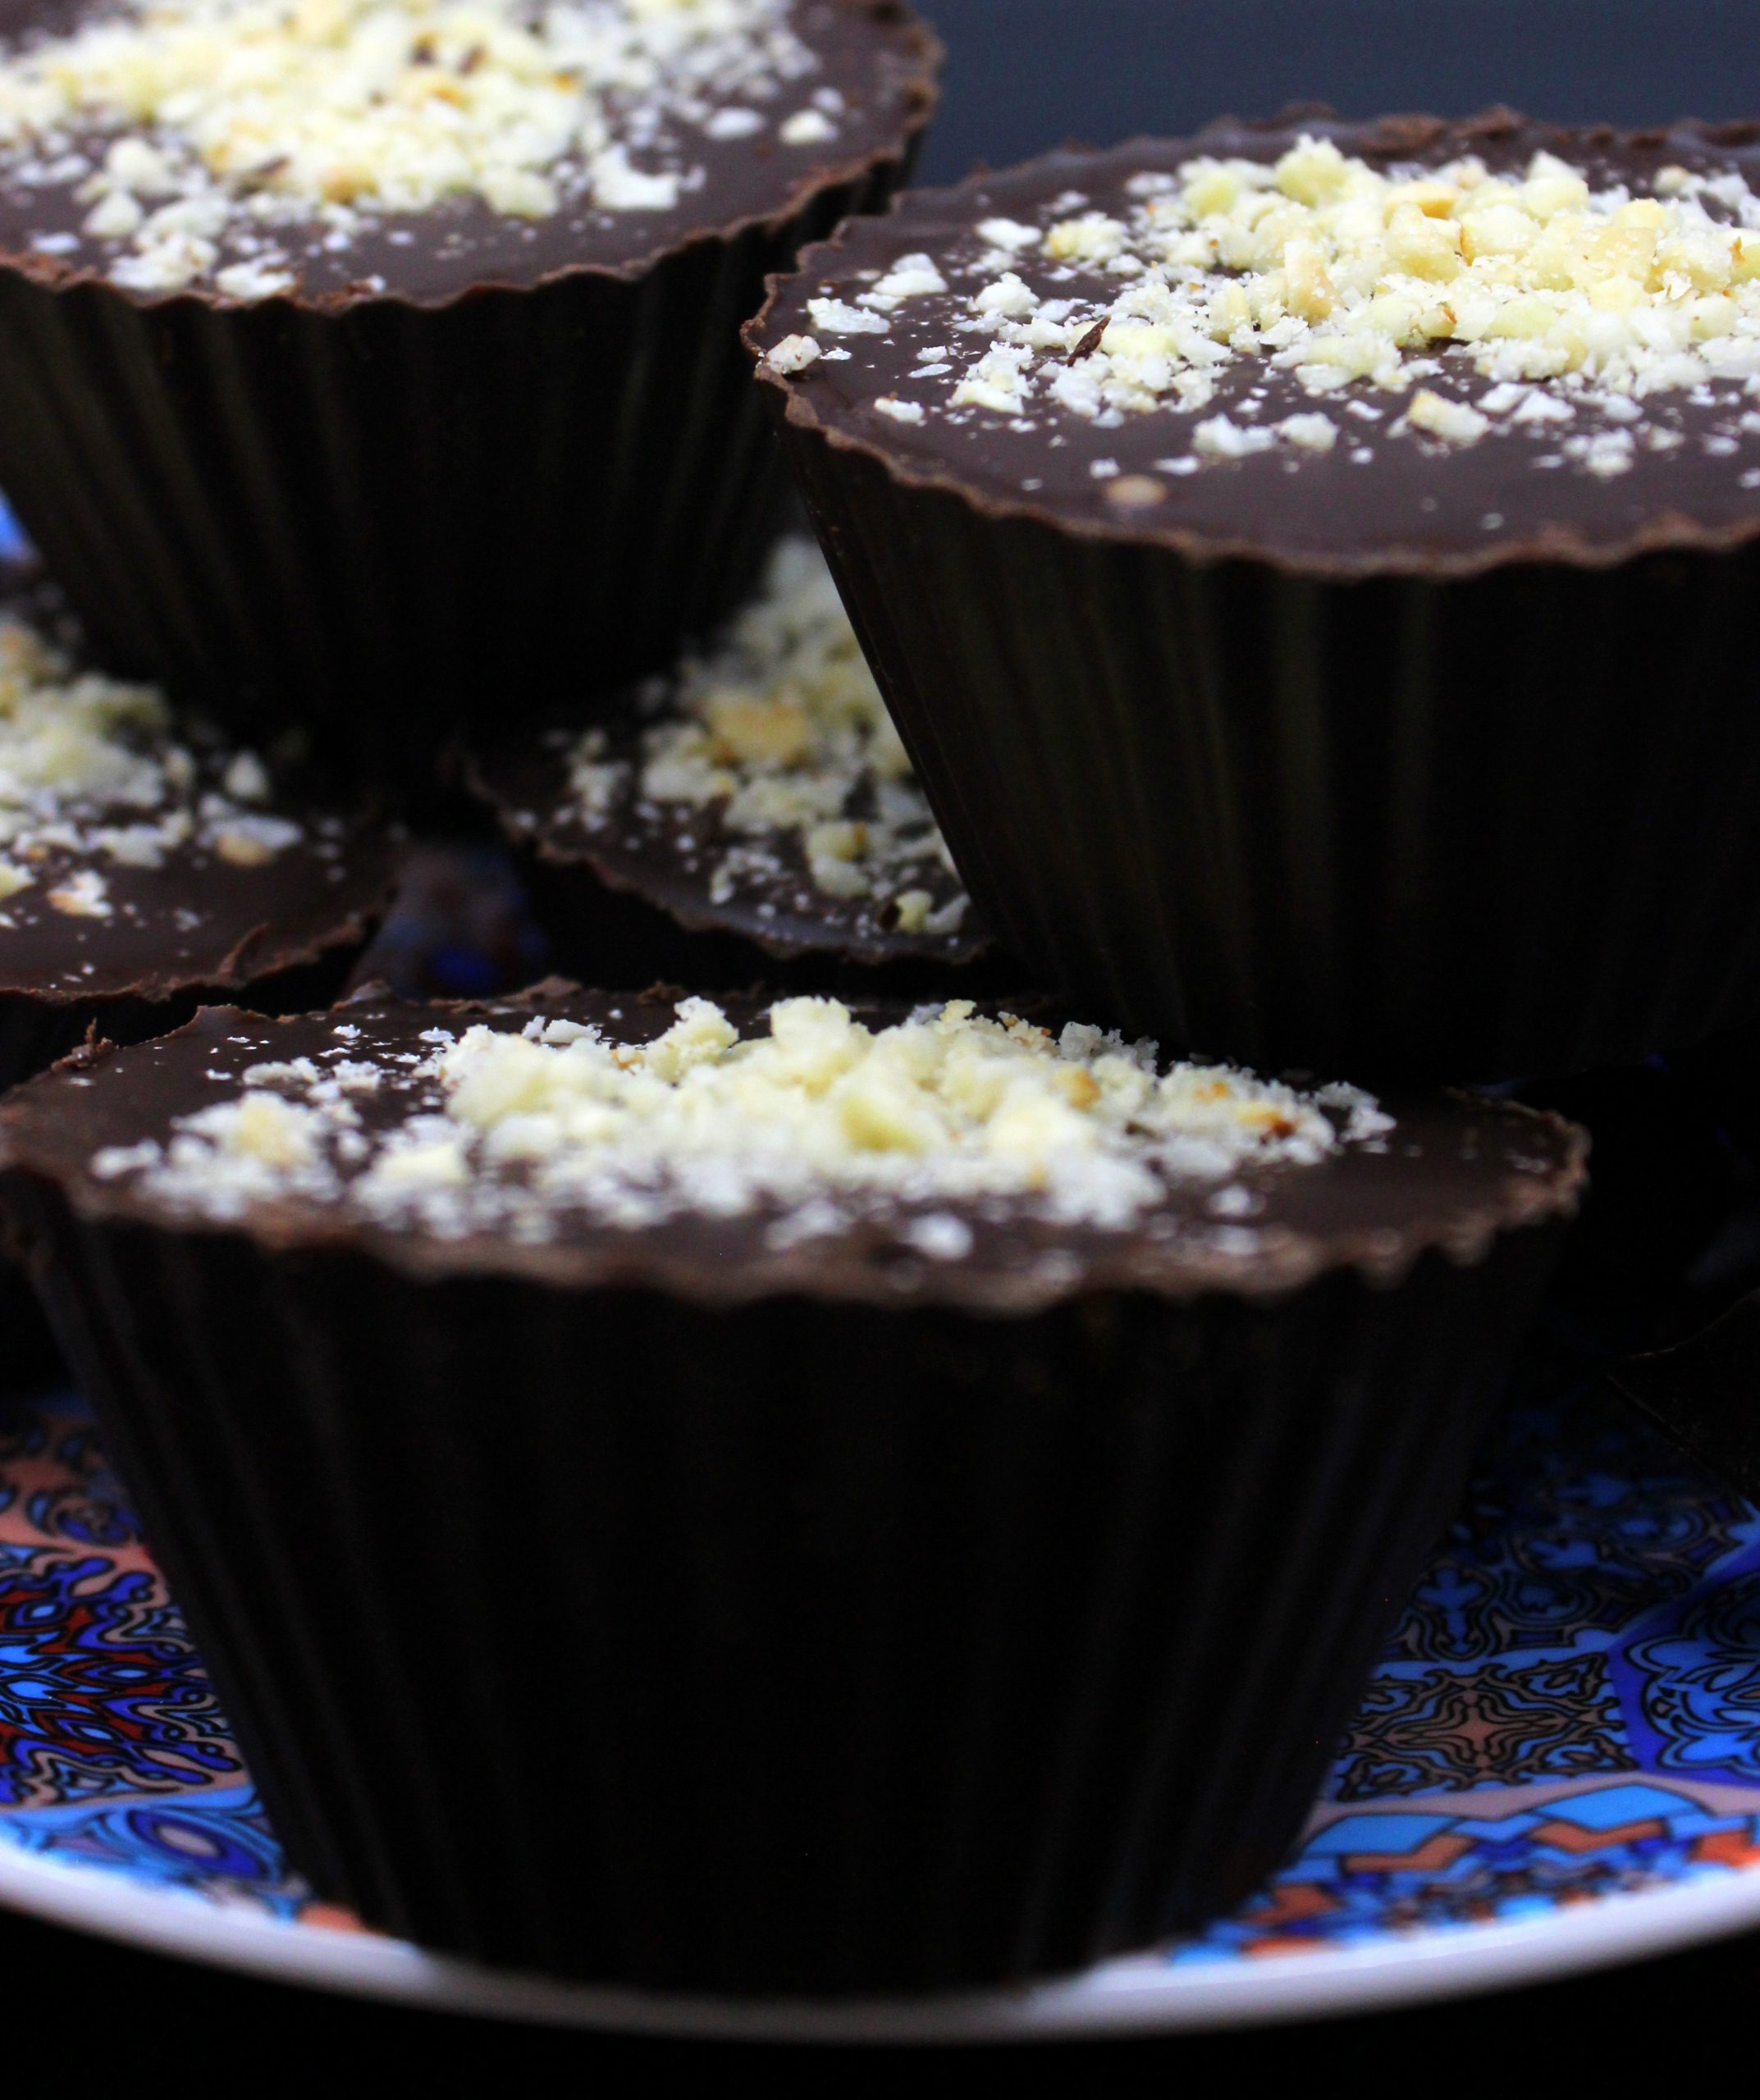
Just like everything, also food comes in and goes out of fashion. There was a time when everyone tried to roast watermelon. Then there was a time when everyone started to eat chia seed pudding for breakfast. And some months ago, in the food and beverage sector the Dalgona coffee made its way up the stairs of fame. I decided to go one step further and use this delicious beverage to make a sweet snack. So, let me introduce you to vegan Dalgona coffee cups!

The idea how to make vegan Dalgona coffee cups is taken from the recipe of peanut butter cups. In short, it’s a sweet treat that is made of chocolate in a form of a tiny cup and inside it there’s a creamy filling. Which, obviously, in this case is with coffee flavor. But in general, you can fill it with whatever you want, in case you’re not a big fan of coffee. In my house I’m the only coffee lover, while the bunny daddy never drinks it. But guess what? He loved my vegan Dalgona coffee cups! And I’m sure you will too!
What is Dalgona coffee
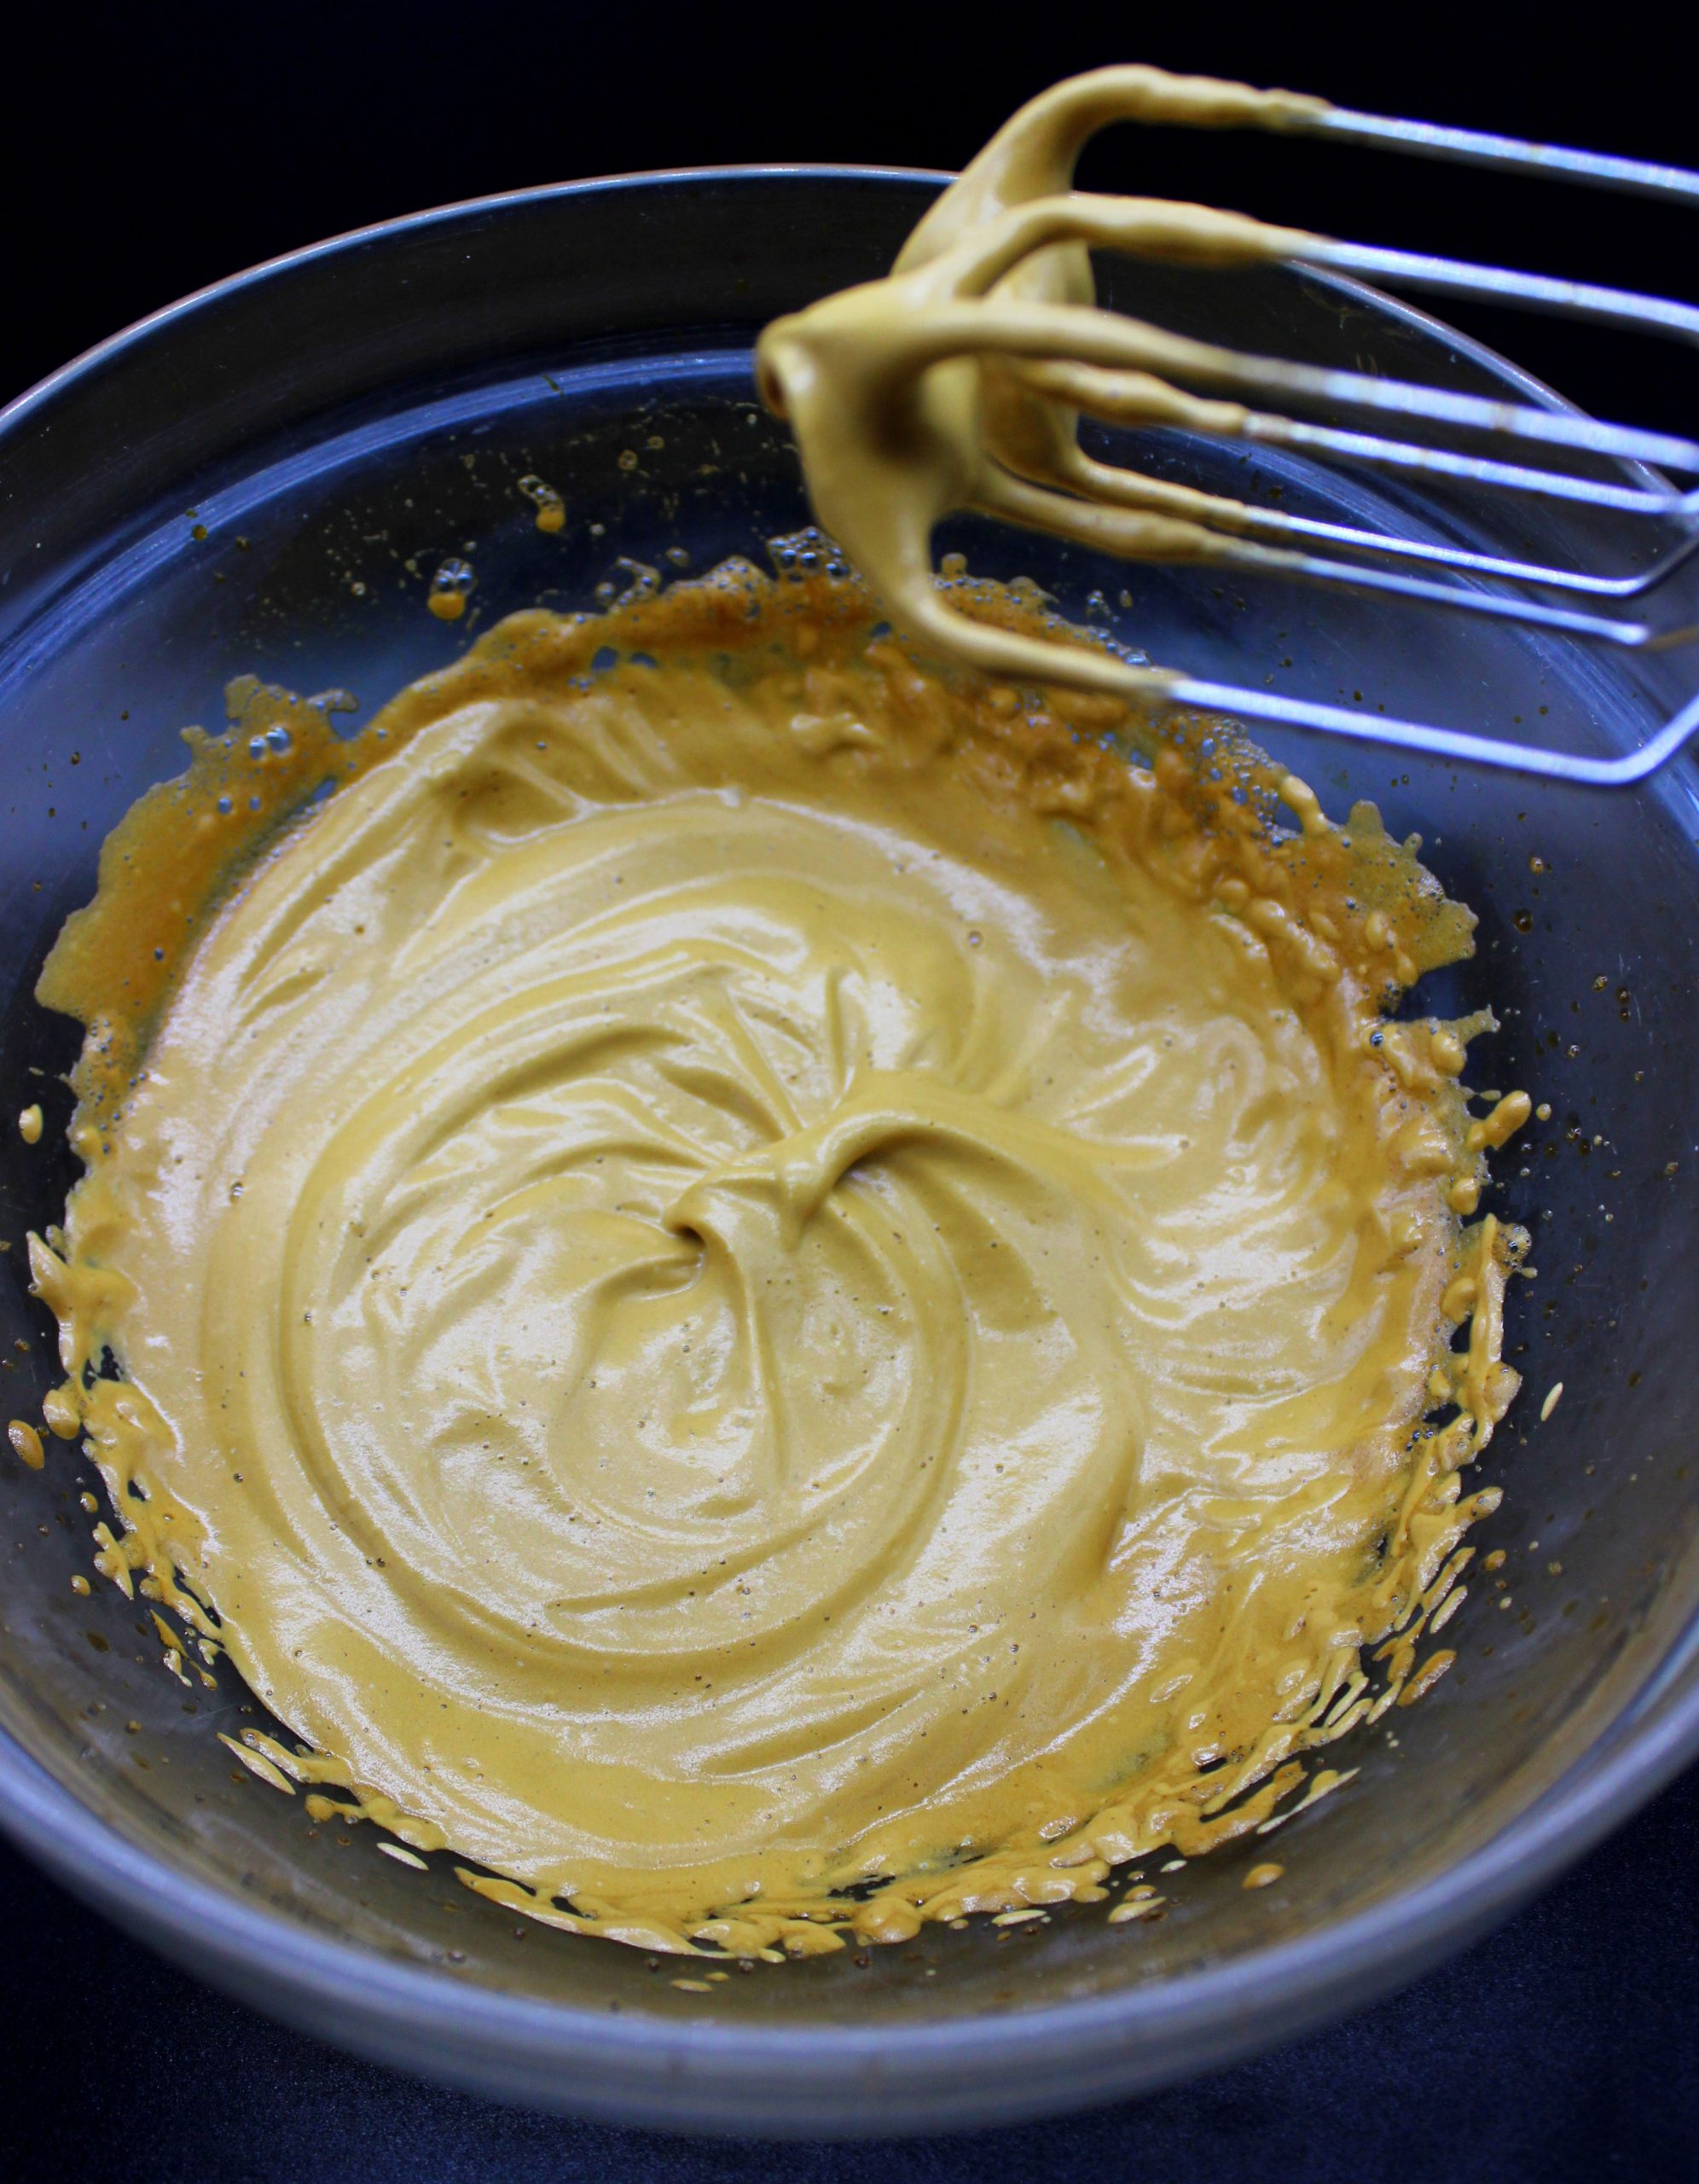
Dalgona coffee or whipped coffee comes from South Korea. It is made by whipping equal proportions of instant coffee powder, sugar, and hot water until it becomes creamy. Then the obtained cream is added on top of cold or hot milk – the temperature of milk is up to your choice. But I must admit that cold Dalgona coffee in a hot summer day is very refreshing! If you want to see my Dalgona coffee that I made during the quarantine in Italy, click here! In general, the preparation process of Dalgona coffee is very quick and easy, especially if you’re using an electrical hand mixer. You can also use a whisk to prepare it, but be aware that it will take more time!
How to make vegan Dalgona coffee cups
For this recipe, apart from the ingredients, you’ll need also silicone muffin cups or paper muffin cups placed in muffin pan to help the paper maintain its form. If you don’t have the muffin cups, you can still partially use this recipe to make yourself a delicious whipped coffee drink! Otherwise, if you have the muffin cups, you need to start with the sticky part! That is, you must melt together chocolate and peanut butter and coat with it the inside of each cup. While the chocolate gets hard, you must make the filling. That means you must whip together instant coffee, sugar and hot water until you get a light brown cream. Then you need to add to it the white solid part of full fat coconut milk and your cream is ready! But I warn you – it’s super delicious, so don’t eat it all right away!
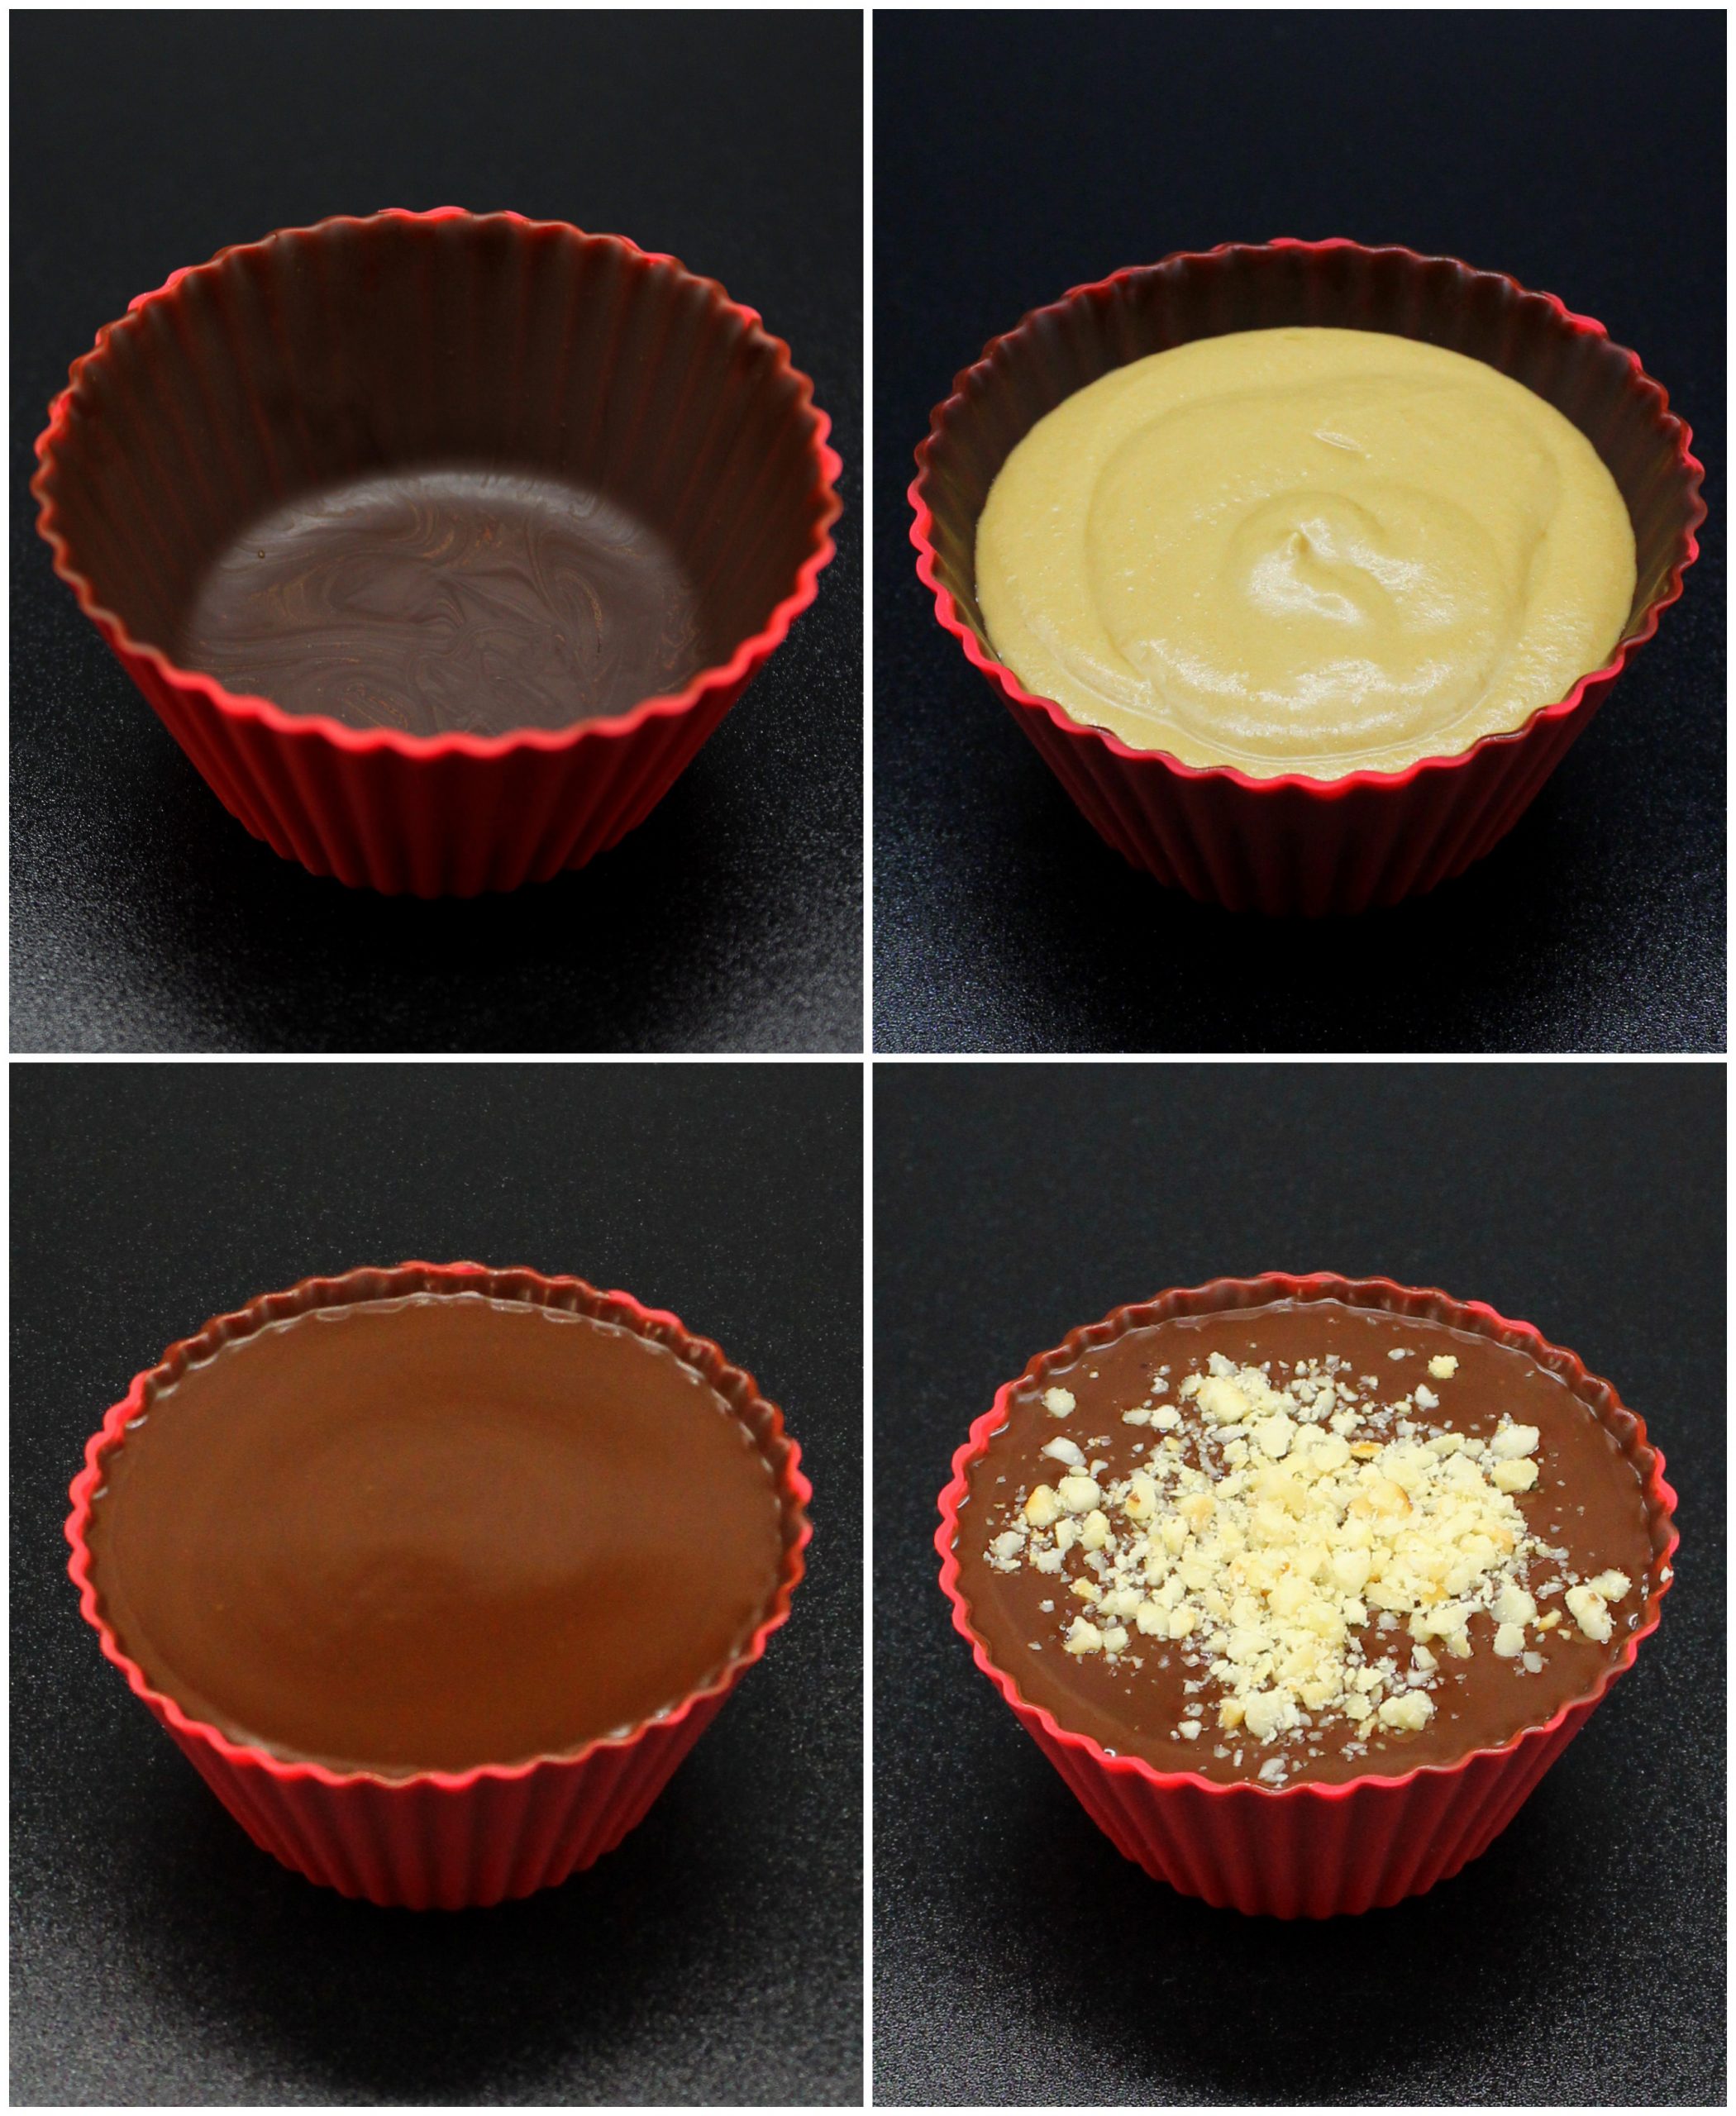
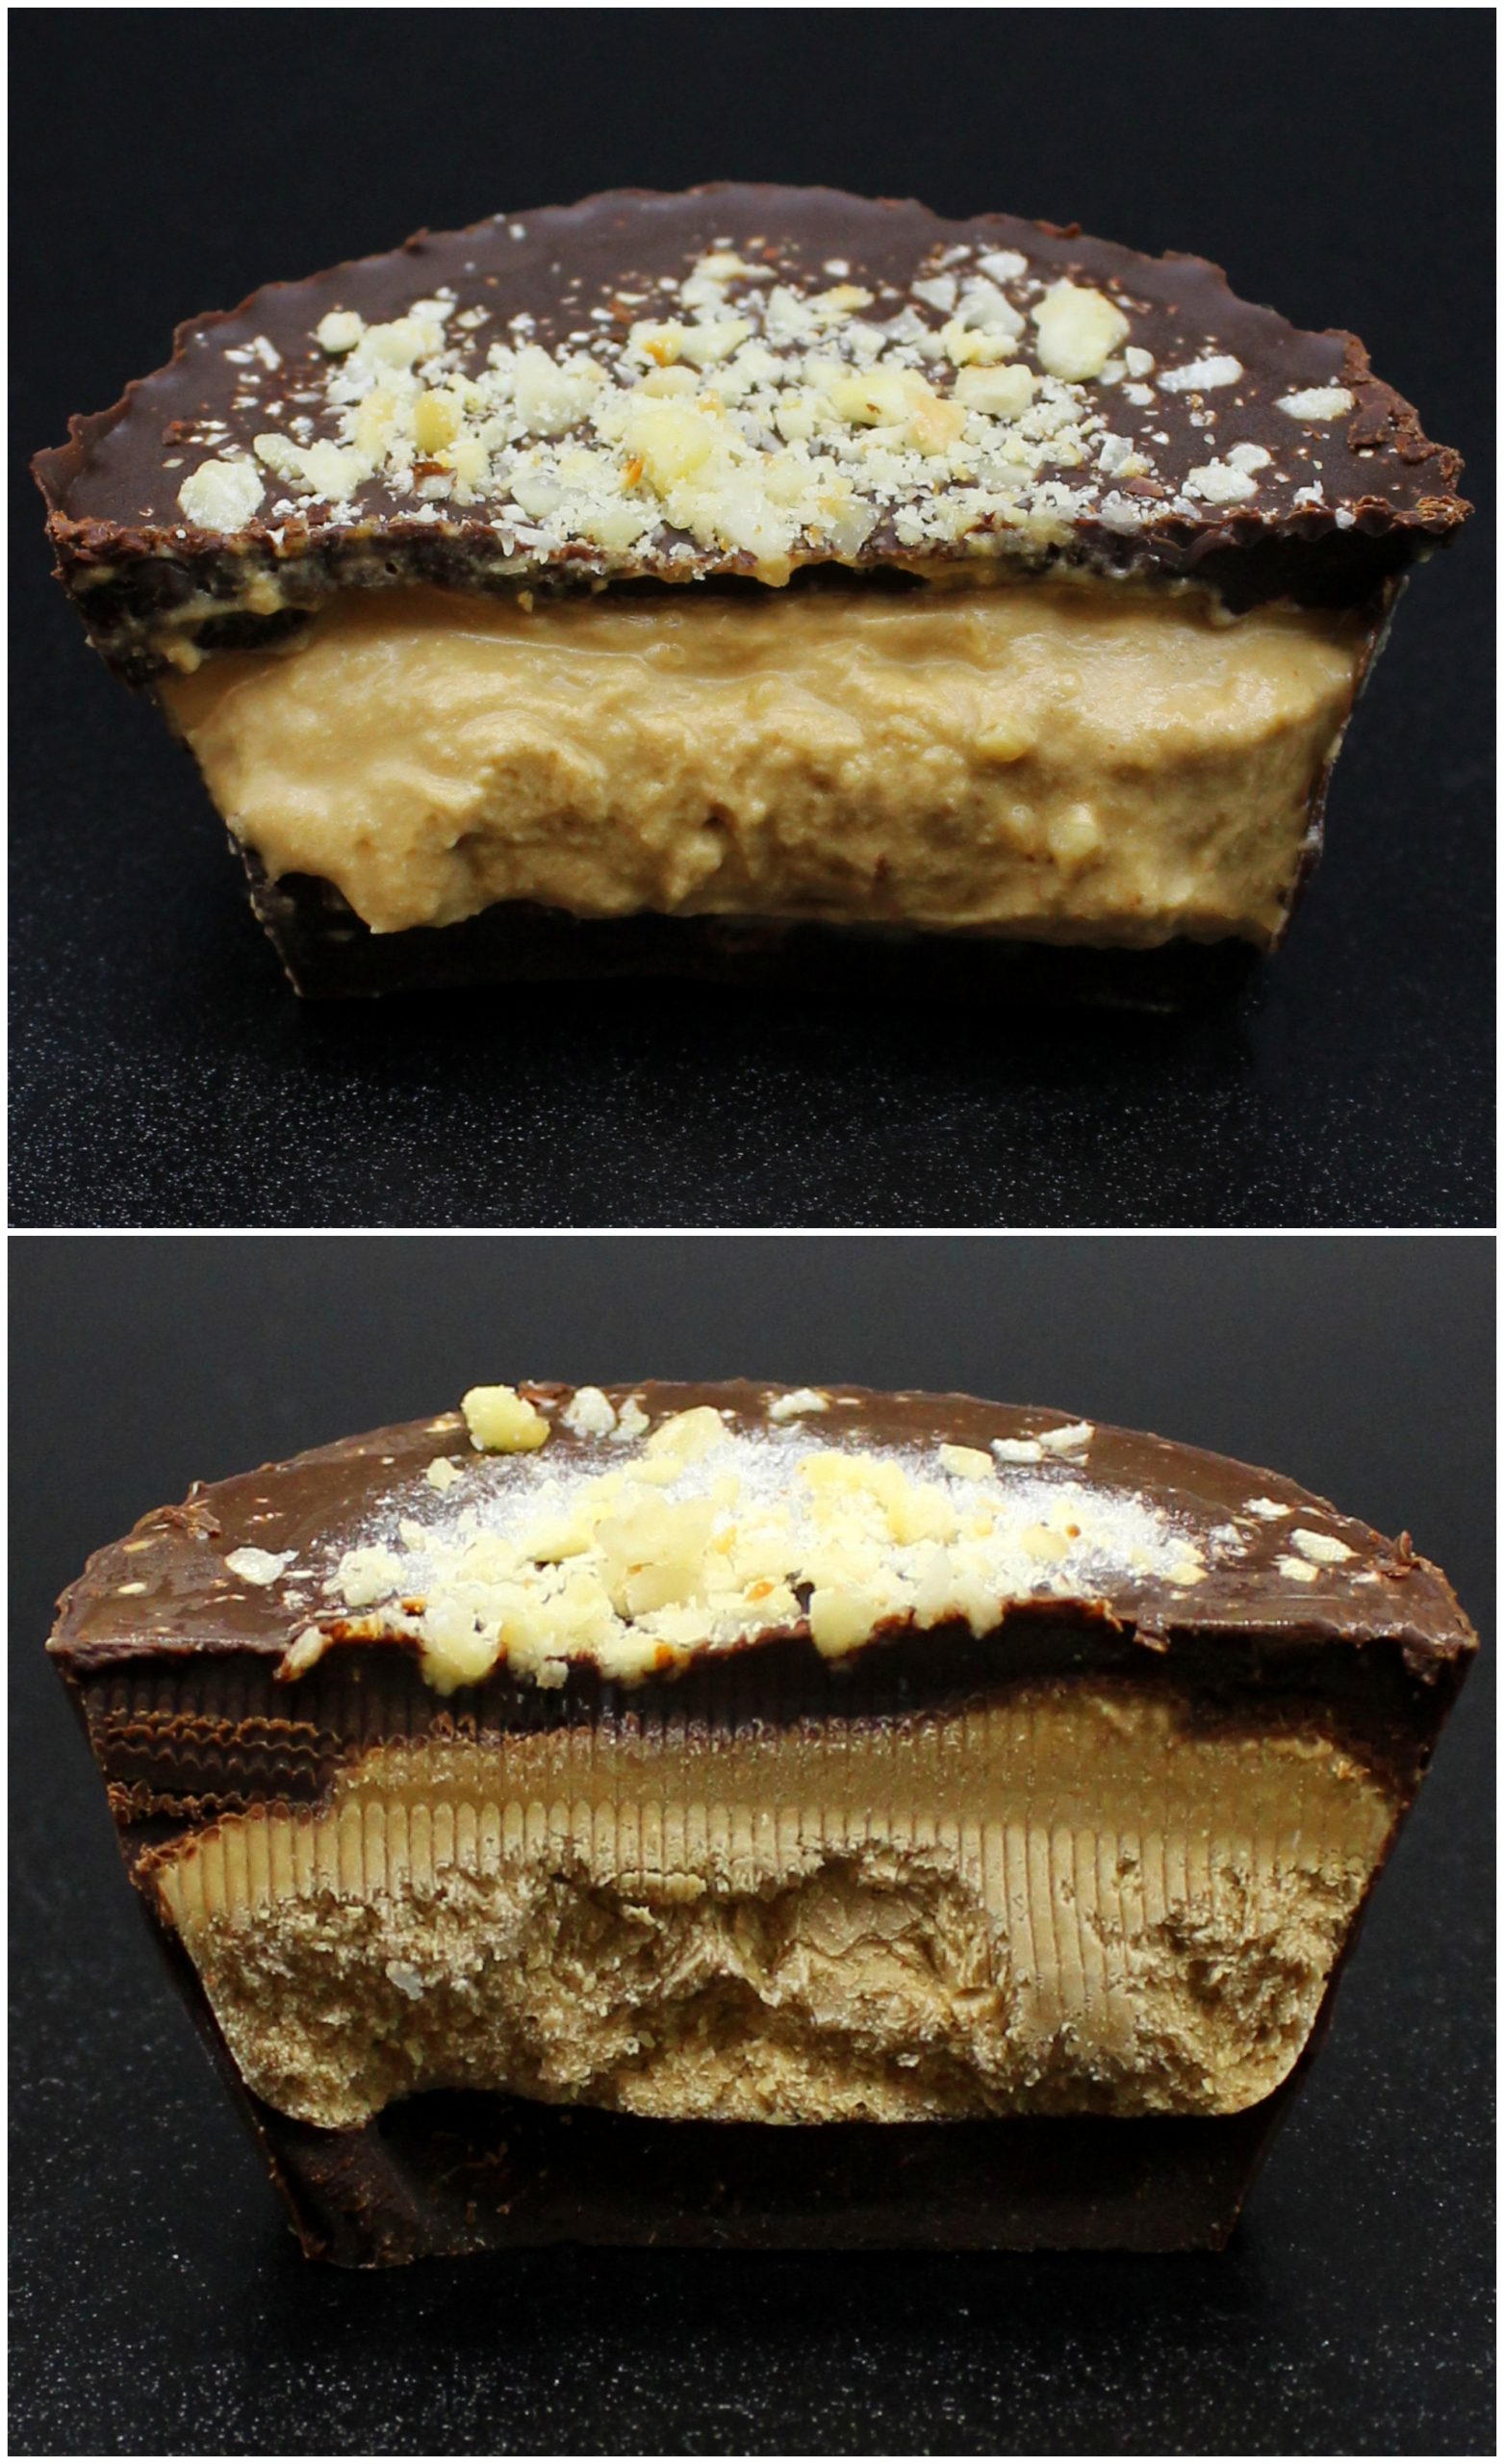
Once your chocolate cups have solidified, fill them with the prepared cream, cover with a small layer of melted chocolate and put back in the freezer. I decided to add on top of my vegan Dalgona coffee cups also some toasted hazelnut pieces. But that’s not obligatory! You can add on top anything you want or leave them without any topping. In any case the flavor will be amazing! By the way, you can also choose your preferred consistency of them. I mean, if you want your coffee cups to me more like an ice cream, keep them all the time in the freezer. Otherwise, after they have become solid, transfer them to the fridge. The chocolate will stay solid in any case, but the coffee cream inside will become more liquid. Yes, it will be a bit messier to eat them, but it’s worth it!
Sweet snack ideas for chocolate lovers
If you love chocolate as much as I do, you’ll definitely appreciate my other recipes that are easy to make, vegan and very chocolaty! For example, if you prefer simple flavors, you should definitely try my vegan Bounty bars! You’ll be surprised how easy it is to make them at home. Or, if you want to try something more unusual, make my fruit-filled vegan chocolate candies! The mix of sweet and sour will be a really surprising explosion of flavors in your mouth! Of course, none of these recipes are Specky’s “cup of tea”, but this time he didn’t care that I made something that he cannot eat. As long as he can share any snack with his girlfriend Vanilla, he’s more than satisfied!
No matter if you are a coffee lover or not, you will definitely like these Dalgona coffee cups that are:
-
vegan
- easy to make
- creamy
- chocolaty
- with coffee flavor
- dairy free
- nourishing
- comforting
- and simply yummy!
Let me know, if you try this recipe! Leave a comment or even more – make Specky happy! Snap a picture of your masterpiece and post it on Instagram or Facebook by tagging @bunnymommycooks. And feel free to let your animal family members join in the picture!
Easy vegan lemon tofu
This recipe was posted on: 18/08/2020
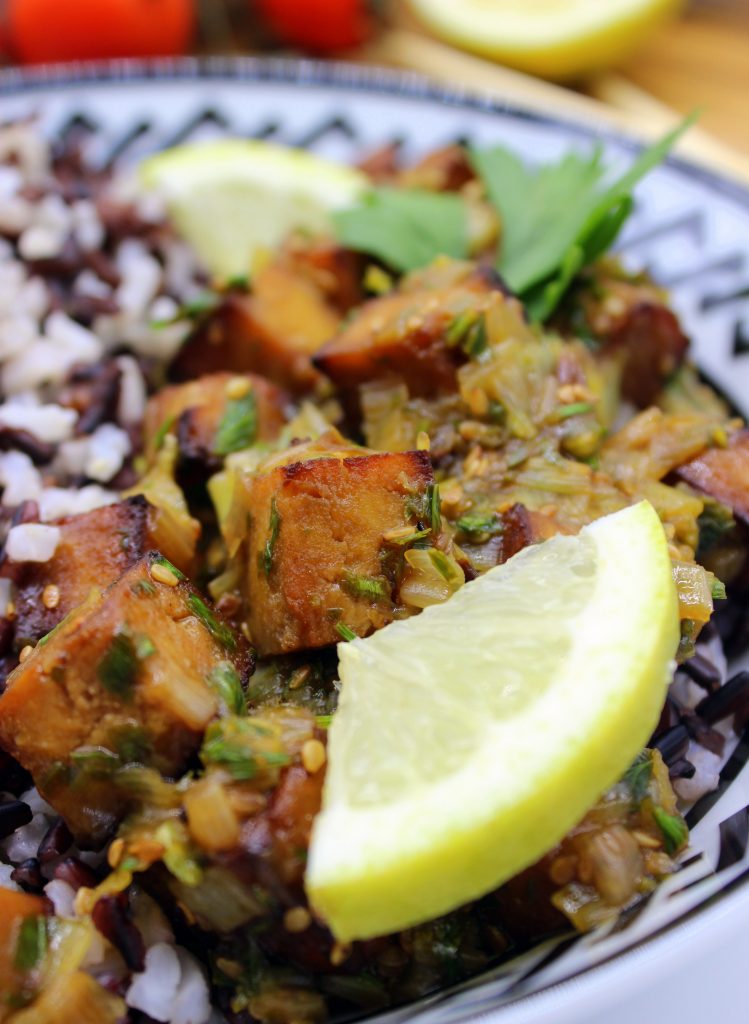
Probably every vegan has tried tofu at least once. Some people like it, but many say that it tastes simply terrible. Well, the secret hides in the way how you prepare it. The same goes for meat – I really doubt that there are many people in the world who’d say that unseasoned boiled chicken breast is crazily delicious. But once you add the right seasoning, the right vegetables and the right sauces, everything changes. That’s why I believe that even tofu haters could learn to love it with my easy vegan lemon tofu recipe!

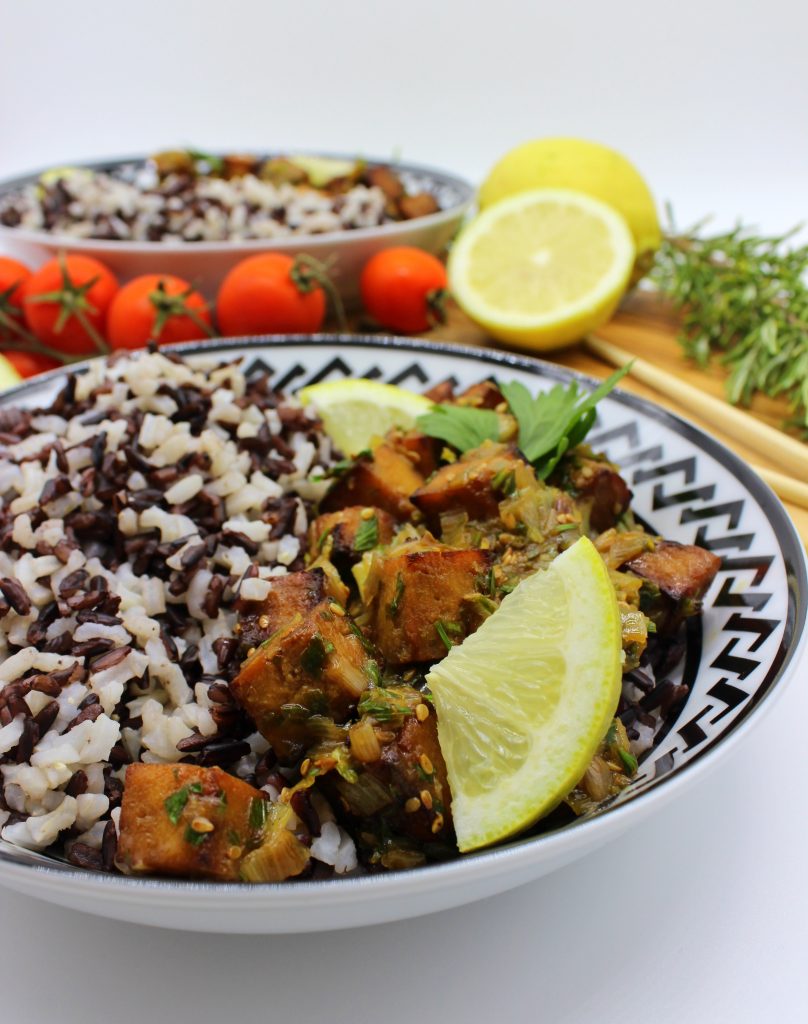
As you probably understand, the flavor of this dish is somehow sour. But I must admit that it’s not disturbingly sour, because with the added sweet and salty notes the outcome is really pleasant. Basically, the combination of the three flavors is given by lemon juice, agave syrup and soy sauce. I prefer to eat this easy vegan lemon tofu with rice, but you can eat it also with steamed vegetables, bread or even pasta.
How to make your tofu taste good
Tofu in general is like a sponge. The biggest mistake that first-timers usually do, is trying tofu that has not been pressed. Of course, some people like it like that, but in my opinion it’s one of the main reasons why other people hate it. The truth is that you can actually make tofu taste exactly as you want. Once you press it, that is, once you press out as much liquid from it as you can, it is basically tasteless. But because of its sponge-like texture it is ready to soak up any kind of marinades, sauces or other cooking liquids. So, basically, to make your tofu taste good, you need to press it and, most importantly, give it some flavor! Even a few drops of soy sauce can completely change the flavor of tofu.
How to make easy vegan lemon tofu
First, you need to press your tofu for at least 30 minutes before using it. If you don’t have the special tofu press, just wrap the tofu in some paper towel and place on top of it a heavy frying pan, some books or anything else that will provide pressure, but won’t crush it. Once the tofu is pressed, it’s time to give it some flavor! Cut the tofu block in small cubes, place them in a bowl and pour over some soy sauce and lemon juice. Mix and set aside. After some minutes you’ll see that tofu has soaked up all the liquid. Then it’s time to bake it in the oven. You can also cook it in frying pan in a bit of oil, but be aware that tofu will soak up also that oil. So, for a healthier version, I recommend you baking it in the oven.
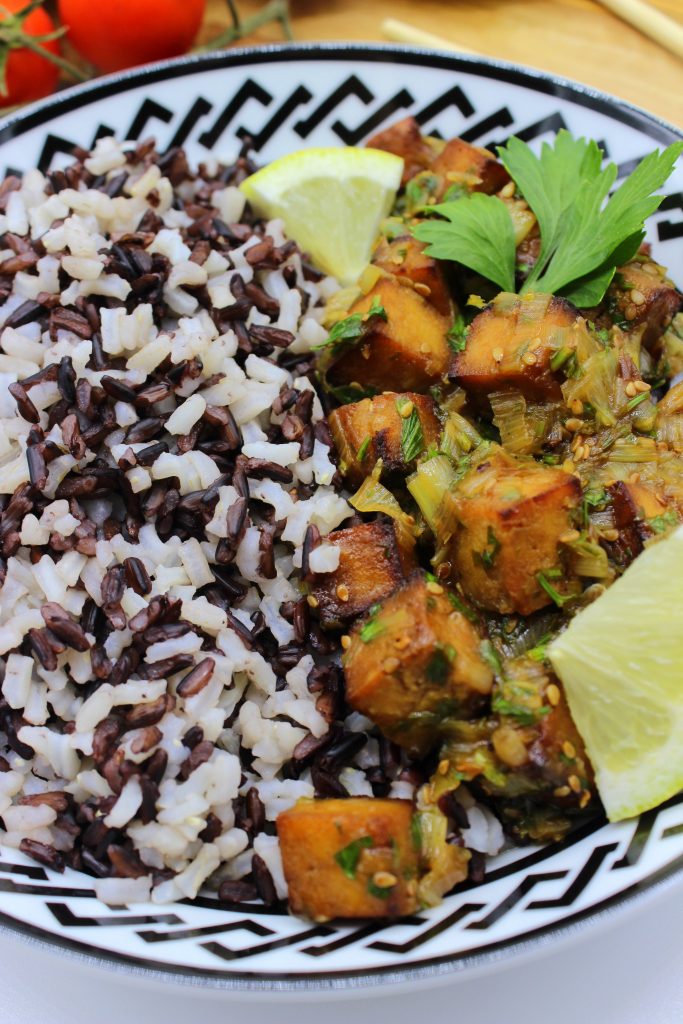
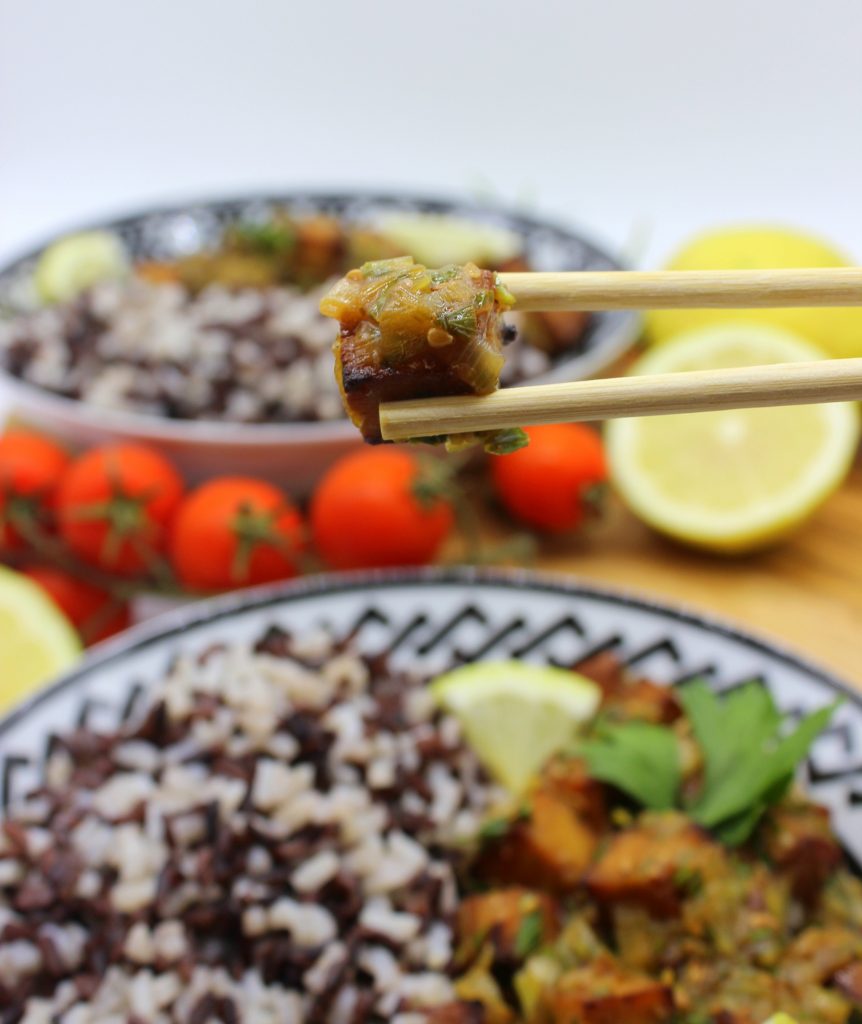
While tofu is baking, put your chosen side dish to cook, for example, rice. Then cut the leek in small pieces and cook it until soft. Then add lemon zest, lemon juice, soy sauce, agave syrup and vegetable broth and cook it on low heat/flame for a few minutes. Taste the liquid and, if necessary, regulate the salinity/sweetness/acidity by adding extra soy sauce, agave syrup or lemon juice. At this point tofu should be ready, so take it out of the oven. In a glass mix cornstarch with water and add it into the frying pan. Immediately add also chopped parsley and sesame seeds. Once the liquid starts to become thicker, add the tofu cubes and mix well in order to coat them with the lemon sauce. Serve immediately with the side dish of your choice.
Other refreshing vegan dishes
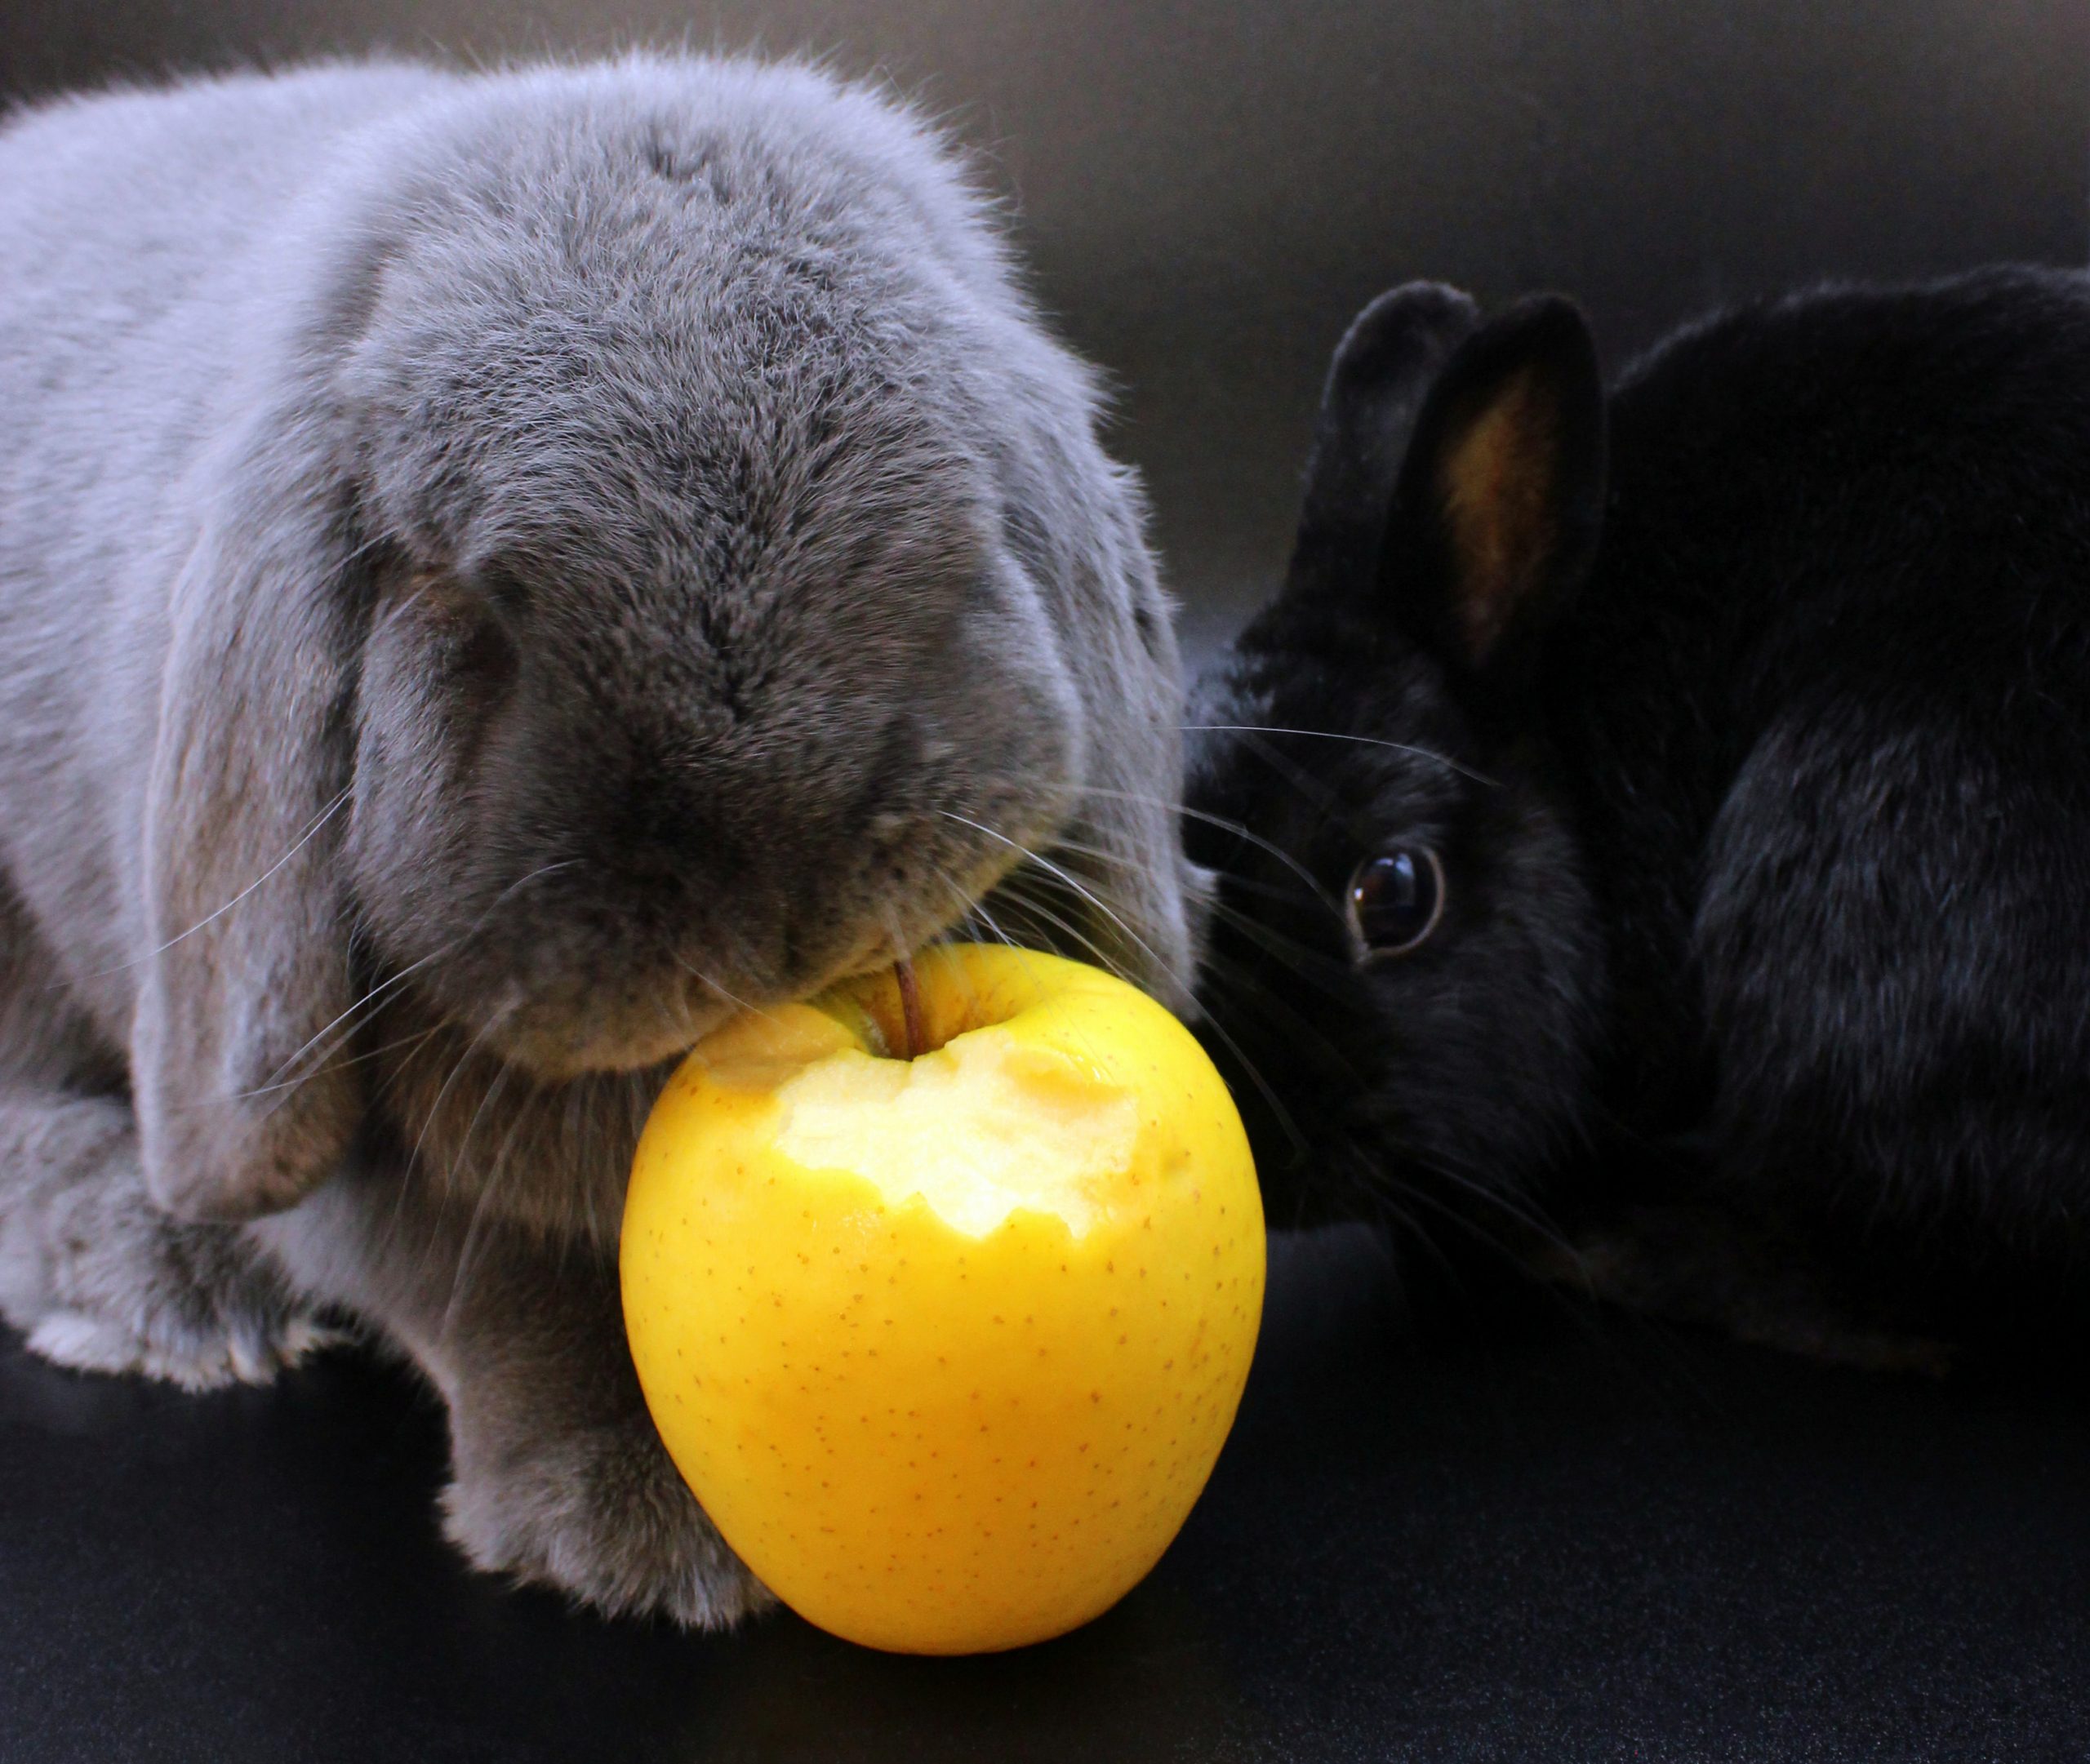
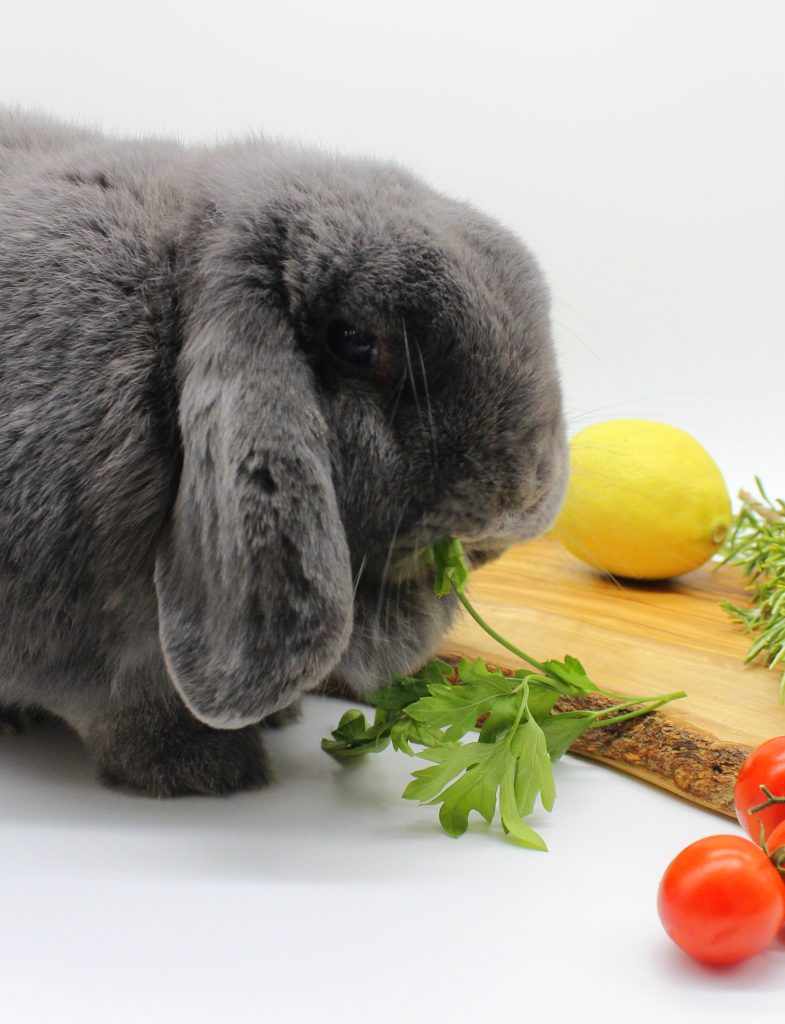
If you like lemon flavor not only in desserts, but also in main dishes, you should also try my vegan lemon garlic pasta. Or you can go for another interesting combination of flavors by trying my quinoa salad with pineapple and ginger. But if you prefer something more traditional that still includes citrus fruits, my creamy vegan lime and avocado cheesecake is perfect for you! Also Specky likes citrus fruits, but he’s more into oranges. That’s why from the ingredients for my easy vegan lemon tofu recipe he appreciated only the parsley!
If you’ve never tried tofu or if you’ve tried it, but you didn’t like it, I say – give it another chance with my lemon tofu recipe, which will surprise you by being:
-
vegan
- easy to make
- refreshing
- healthy
- flavorful
- low-fat
- pleasantly sweet & sour at the same time
- and simply yummy!
Let me know, if you try this recipe! Leave a comment or even more – make Specky happy! Snap a picture of your masterpiece and post it on Instagram or Facebook by tagging @bunnymommycooks. And feel free to let your animal family members join in the picture!
Cecina or traditional Italian chickpea flour flatbread
This recipe was posted on: 02/08/2020
Some people who are not familiar with vegan food tend to think that the food options are quite limited. The funny part is that usually such people think that almost no other food, except salad, is originally already vegan. Obviously, that’s not true. Even though a very big part of traditional Italian cuisine includes animal products, there are some very delicious things that are not only vegan, but also very easy to make. For example, Cecina or traditional Italian chickpea flour flatbread.
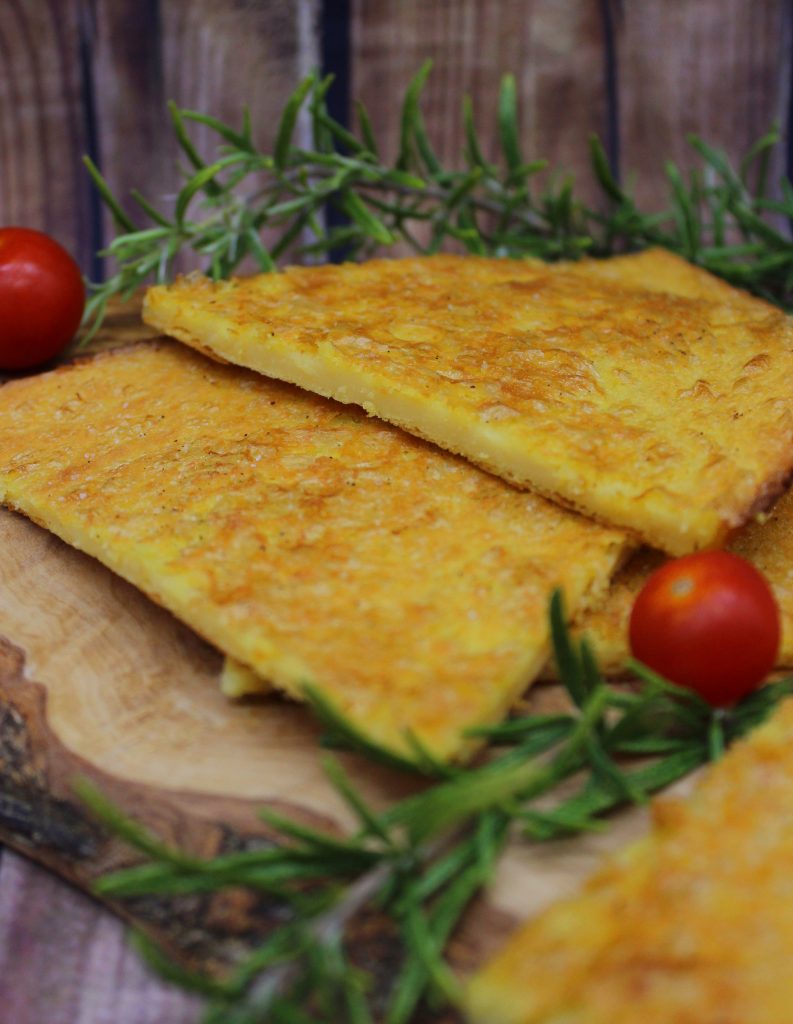
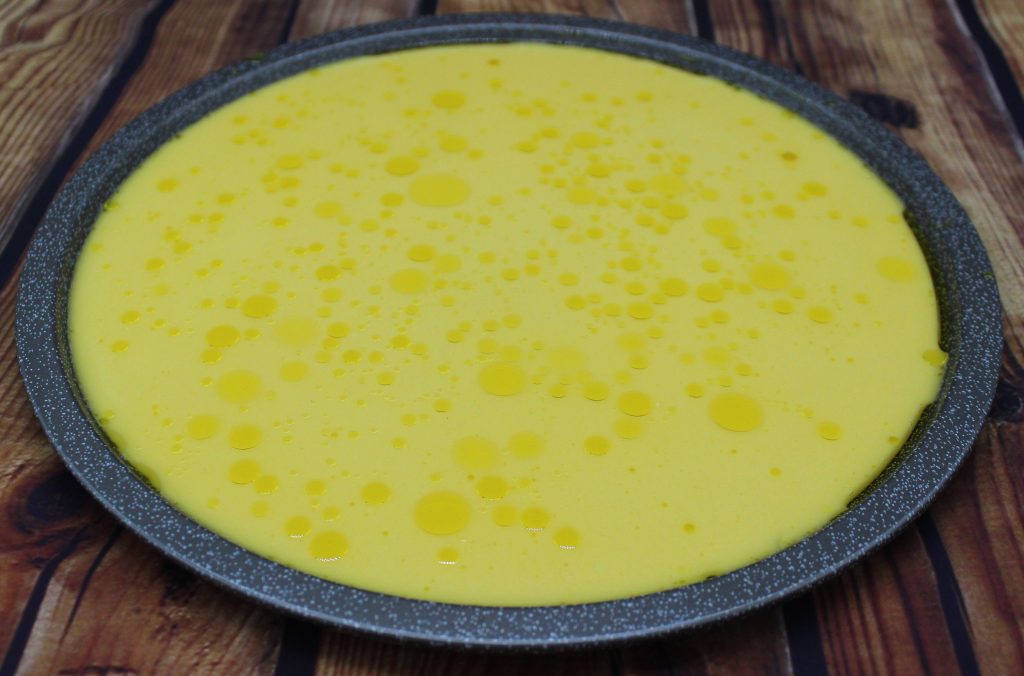
Cecina is a typical Italian dish that is very popular in the regions of Tuscany and Liguria. Even though it is made of four very simple ingredients, it has a very rich flavor. Apart from the chickpea flour, the other three ingredients are so basic, that I’m sure you already have them at home. They are – water, extra virgin olive oil and salt. In case you already have chickpea flour, you’re ready to make your Cecina or traditional Italian chickpea flour flatbread even now! Otherwise just run to your local supermarket. Nowadays chickpea flour can be found basically everywhere. In case you really like Italian cuisine, you should also try my vegan Cannelloni with roasted bell peppers and my vegan spinach pesto!

How to prepare Cecina or traditional Italian chickpea flour flatbread
Since the ingredients are only four, it’s obvious that the preparation process is very quick and easy. The only time-consuming part is the time that is necessary for the batter to rest. Which is at least 4 hours. But you can simply prepare the batter in the previous evening. Just let it rest overnight and in the morning enjoy freshly baked and deliciously aromatic Cecina.
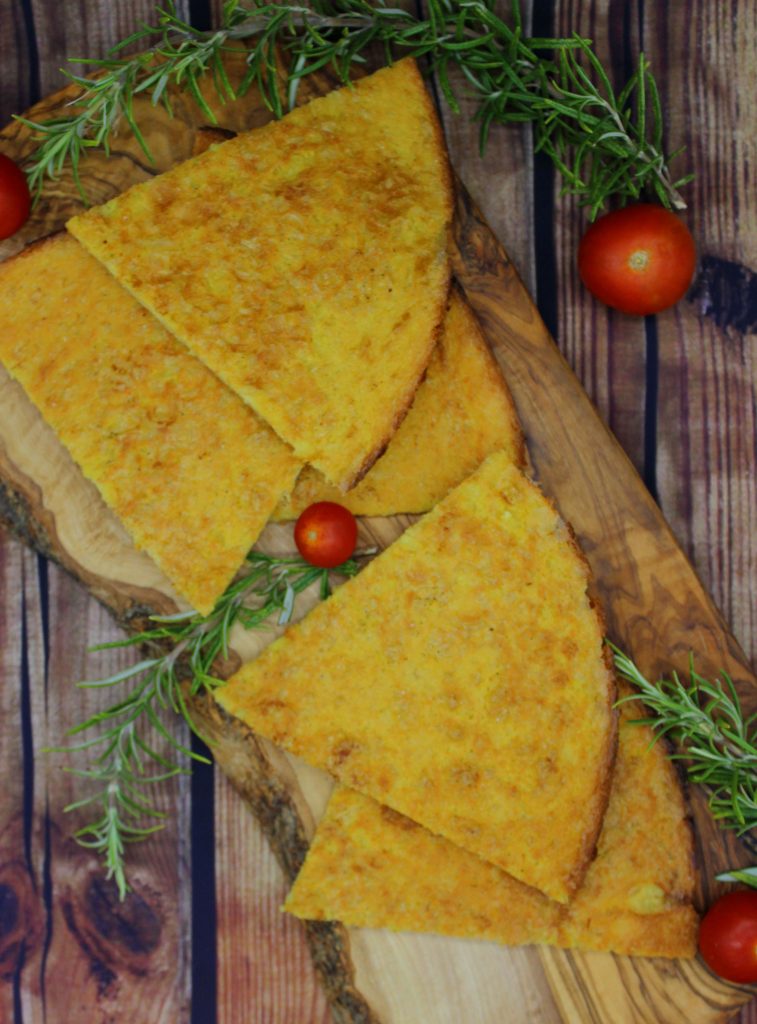
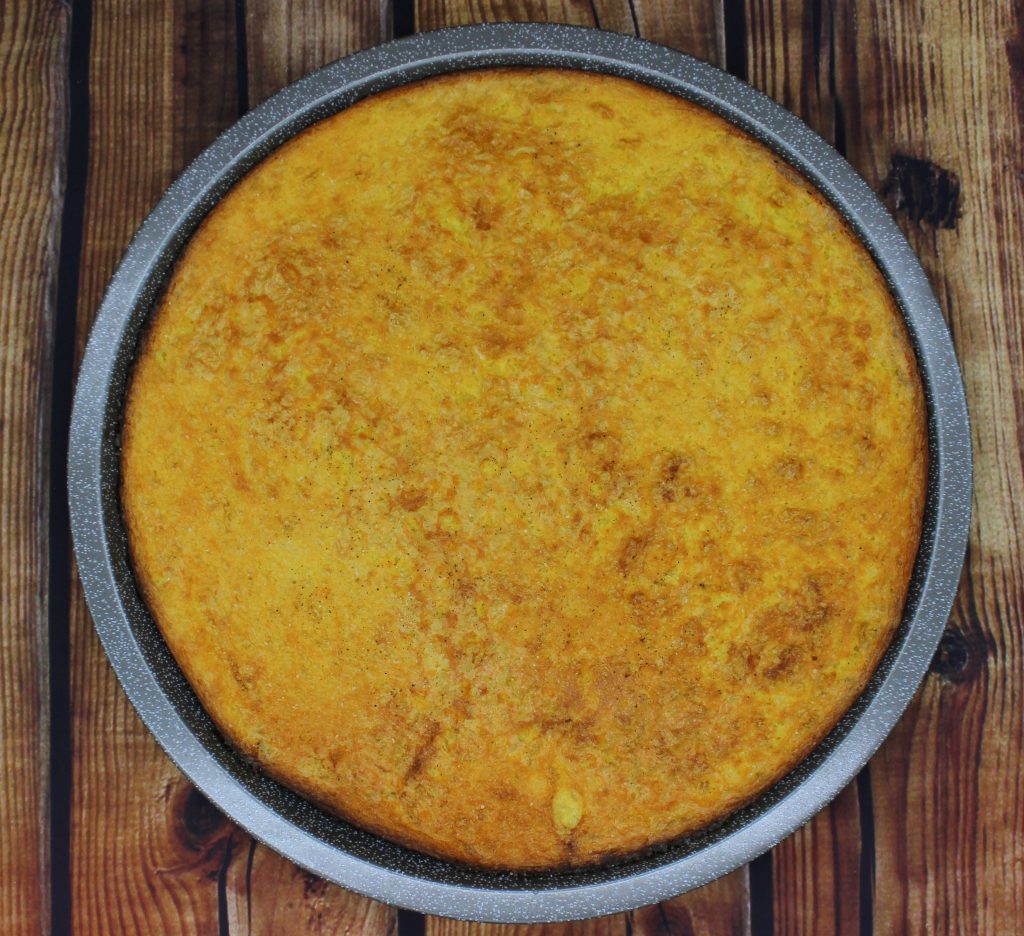
To prepare the batter you need to mix together olive oil and water. Then add to it chickpea flour, mix everything well and let the batter rest for several hours. Afterwards, you need to add salt, mix again, grease your chosen baking tray and pour the batter in it. Then make some drops of olive oil on the surface of the batter and it’s ready to go in the oven. Just be aware that the batter is very liquid. So, be very careful not to spill it, while you’re placing the baking tray in the oven. Bake Cecina for 20 – 25 minutes. Afterwards, immediately after taking it out from the oven, sprinkle over it some salt and pepper. Cecina tastes better hot, but you can also enjoy it cold.
Specky, as always, was not very satisfied that I prepared something that he cannot eat. For that reason, I was obliged to give him a tiny piece of parsley, out of which, as you see, he decided to make a parsley propeller!

Cecina or traditional Italian chickpea flour flatbread is a perfect snack to treat yourself. As well as it’s a great appetizer to offer your guests with a glass of wine. Once you try it, I’m sure it will become a regular in your kitchen since it’s:
-
vegan
- gluten free
- easy to make
- crispy on the outside and soft on the inside
- filling
- flavorful
- and simply yummy!
Let me know, if you try this recipe! Leave a comment or even more – make Specky happy! Snap a picture of your masterpiece and post it on Instagram or Facebook by tagging @bunnymommycooks. And feel free to let your animal family members join in the picture!
Vegan puff pastry apple buns
This recipe was posted on: 10/07/2020
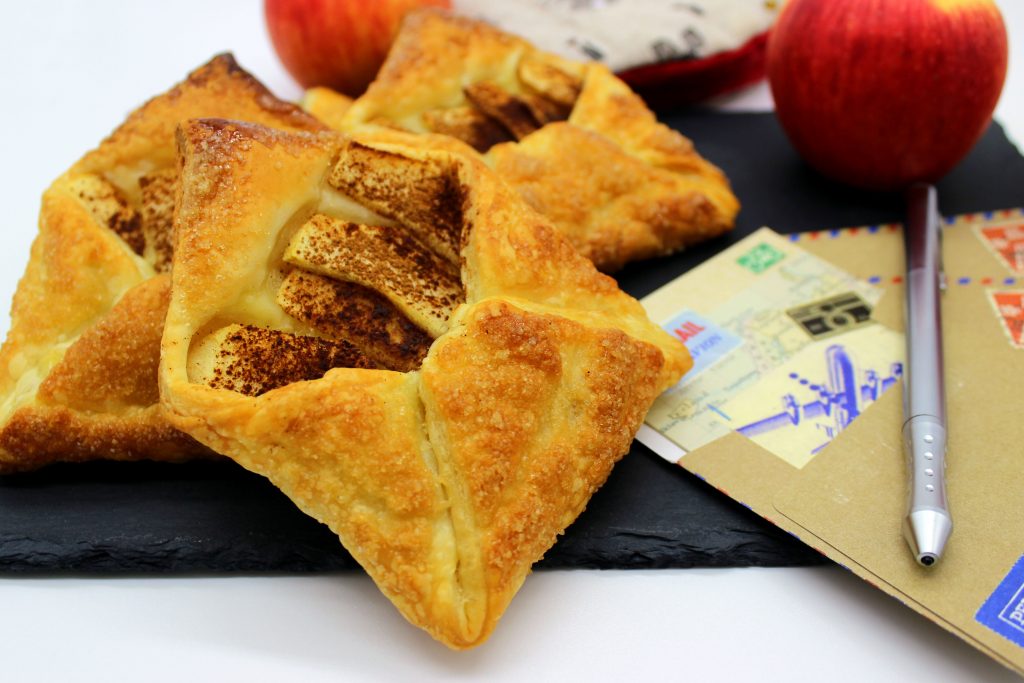
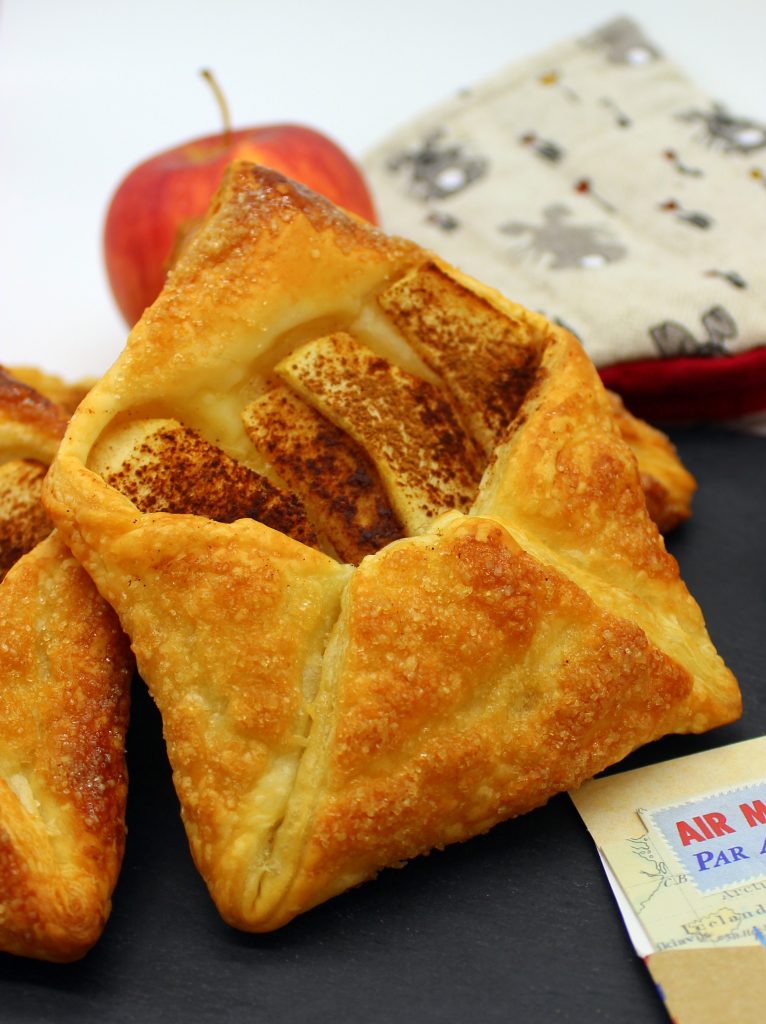
To always keep some vegan puff pastry at home might be a good decision, since it can become useful in case of unexpected guests. There’s nothing better than serving your guests something that is home-made and freshly baked. Also the wonderful aroma that fills your kitchen once you bake these vegan puff pastry apple buns will give that cozy home sensation.
These vegan puff pastry apple buns require only 5 ingredients that are easy to find basically in any food store. Also the preparation process is ridiculously easy. That’s why in my opinion this is the perfect sweet treat to make in case of a food-related emergency. No matter if it’s related to unexpected guests or simply to a sudden wish for something sweet and delicious.
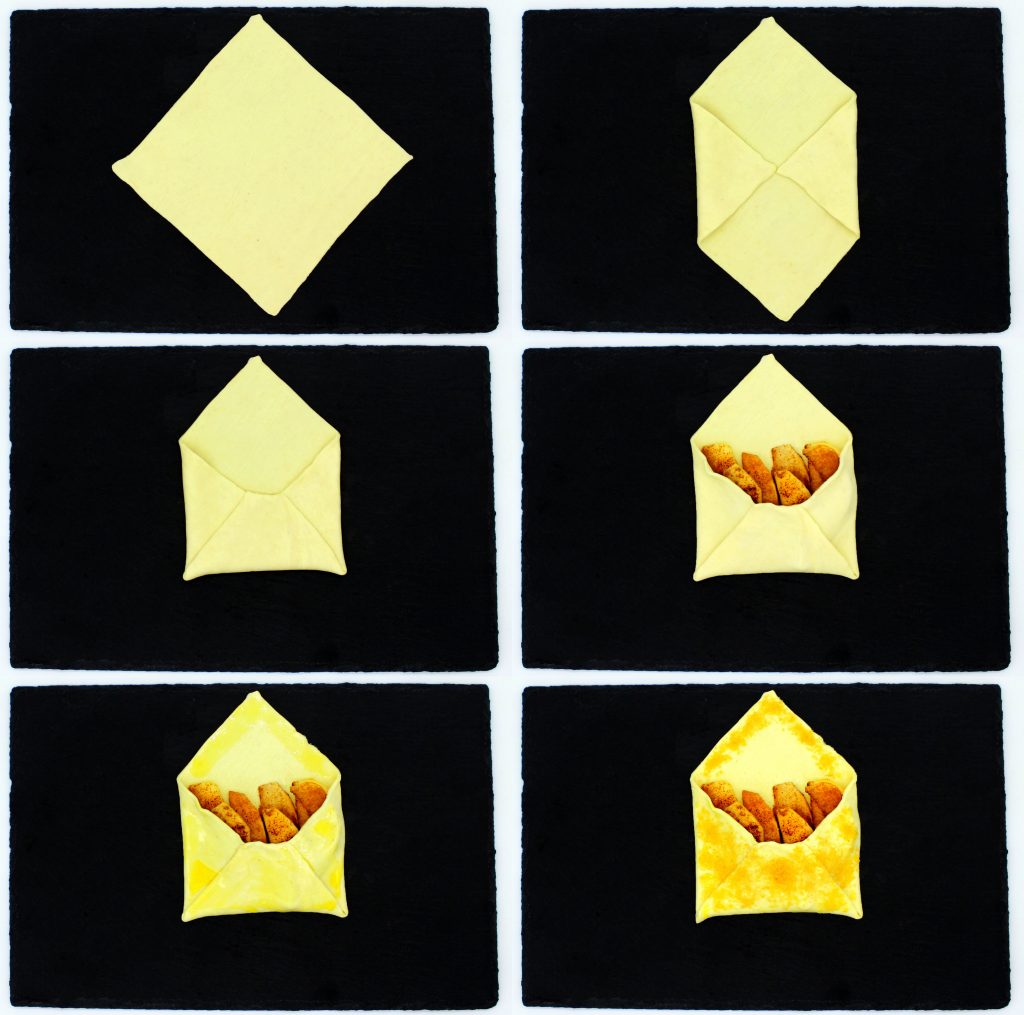
How to prepare vegan puff pastry apple buns
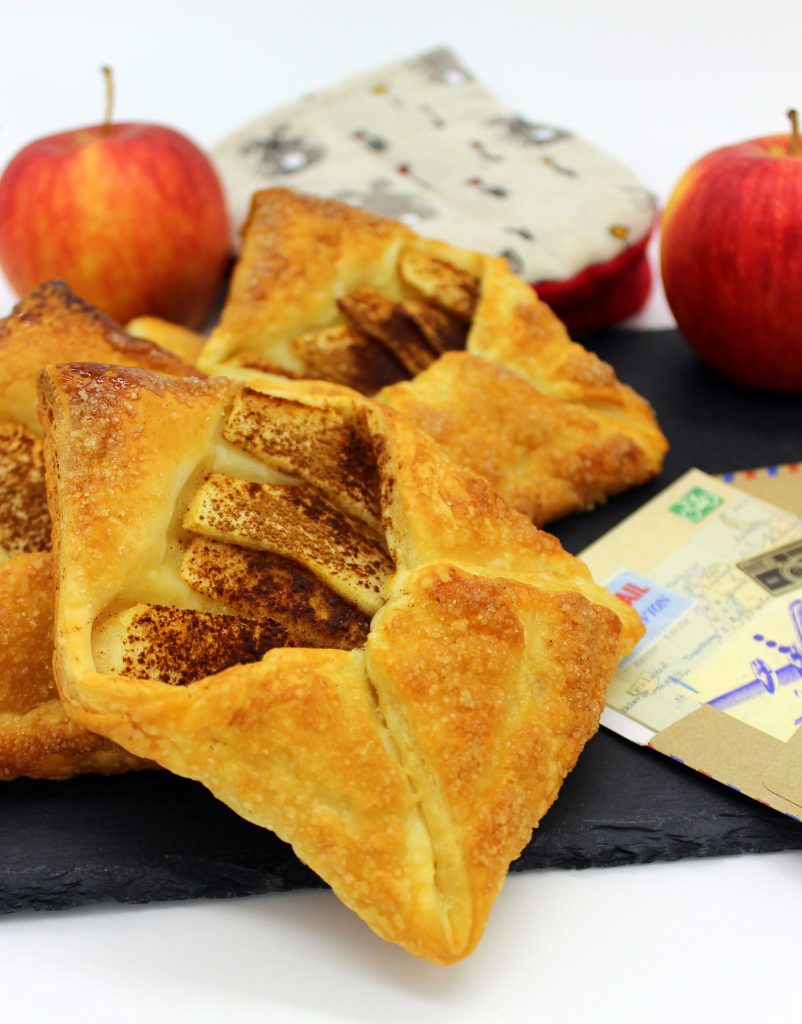
To make these vegan puff pastry apple buns you’ll need sugar, cinnamon, some oil and obviously apples and puff pastry. Just make sure that the puff pastry is vegan! First, you’ll need to cut the puff pastry in small squares and create envelopes from them. Then you’ll need to peel and cut the apples in slices, sprinkle over them a bit of cinnamon and place them inside the puff pastry envelopes. After that you must brush the puff pastry with oil and cover it with sugar. In conclusion, you’ll simply need to put your prepared puff pastry envelopes in the oven and bake for 12 – 15 minutes. Once they’re ready, you can enjoy them both warm and cold!
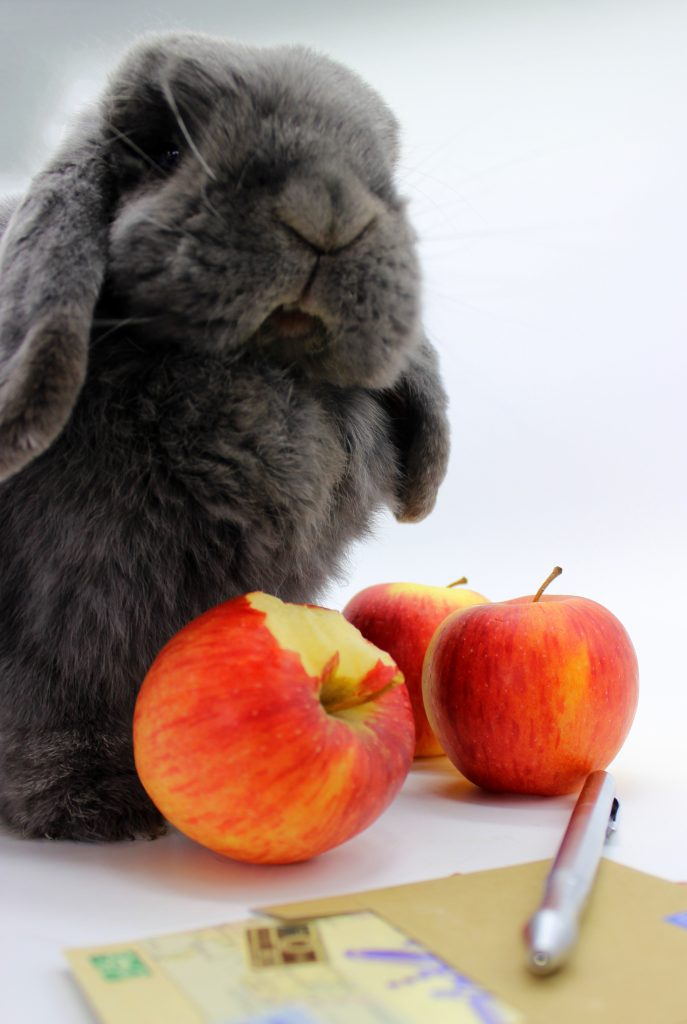
Specky thinks that this recipe is simply wonderful! Mostly because he can enjoy some juicy apple while I prepare these vegan puff pastry apple buns. But I must admit that also I think that this recipe is great. Not only because it’s another proof that also vegan sweets are very delicious, but also because this recipe is so quick and easy to make. By the way, if you like sweet buns made of puff pastry, I advise you to try also my vegan pecan braided buns!
If you like the mix of apples and cinnamon and if you are a fan of puff pastry in general, you must prepare these apple buns that are:
-
vegan
- easy to make
- sweet
- juicy
- deliciously aromatic
- flavorful
- nourishing
- comforting
- and simply yummy!
Let me know, if you try this recipe! Leave a comment or even more – make Specky happy! Snap a picture of your masterpiece and post it on Instagram or Facebook by tagging @bunnymommycooks. And feel free to let your animal family members join in the picture!
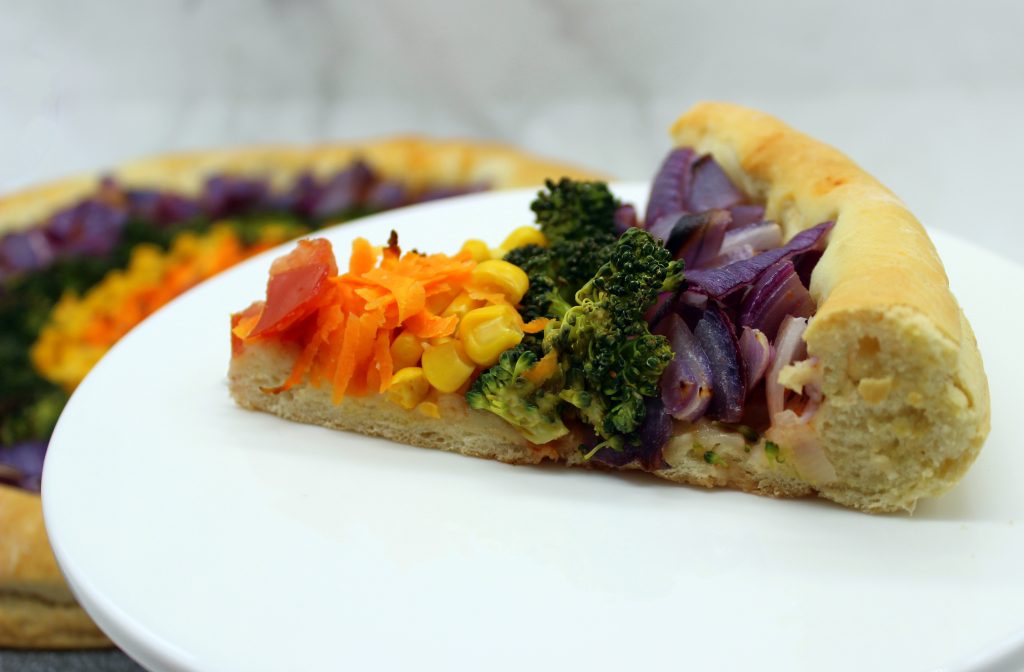
Easy vegan rainbow pizza
This recipe was posted on: 23/06/2020
Who doesn’t like pizza, right? Most probably you have tried at least once to make it at home. Of course, we can discuss if pizza with thin crust is better than the one with a thick crust. Or, if it’s normal to put pineapple on a pizza… Probably all the Italians are now pulling their face in disgust, ha ha! In other words, everyone has his or her own preferences. And my easy vegan rainbow pizza is perfect to be adjusted to your taste!
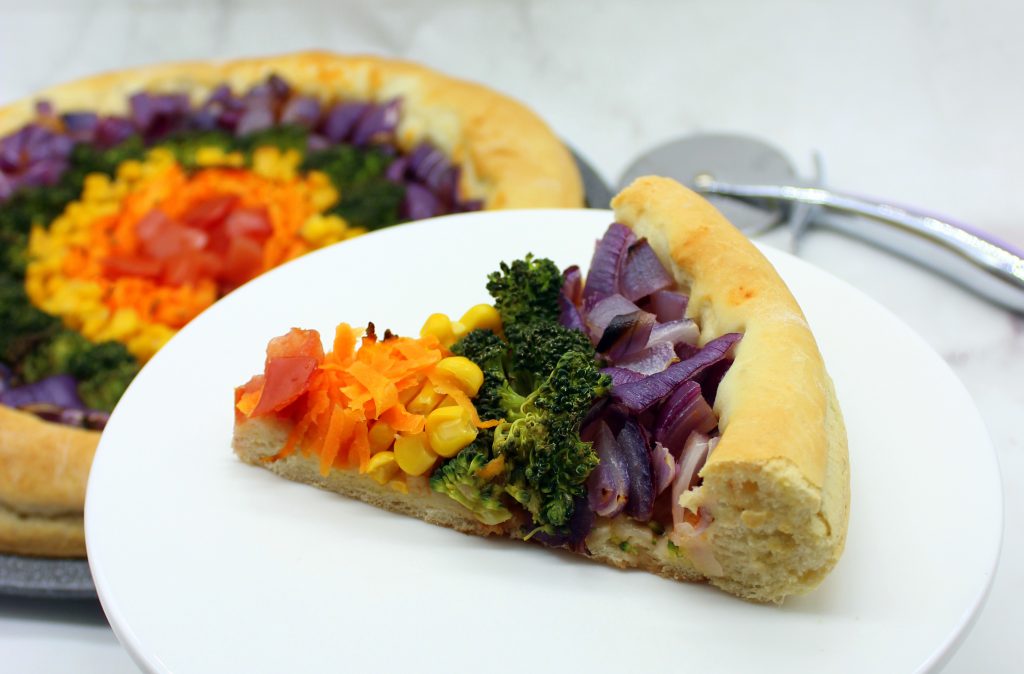
Basically, the toppings of this easy vegan rainbow pizza are completely up to you! If you want to substitute some ingredients with others, feel free to do that. Just, if you want to keep the rainbow pattern, make sure that your substitute ingredients are in the right color. Even more, you can also make two small pizzas with thin crust instead of one pizza with thick crust, like I did. In other words, you can play around with this recipe as much as you want. The important thing is that you achieve a result that satisfies your taste buds! Oh, and if you like colorful dishes, try also my rainbow pasta salad!
How to make easy vegan rainbow pizza
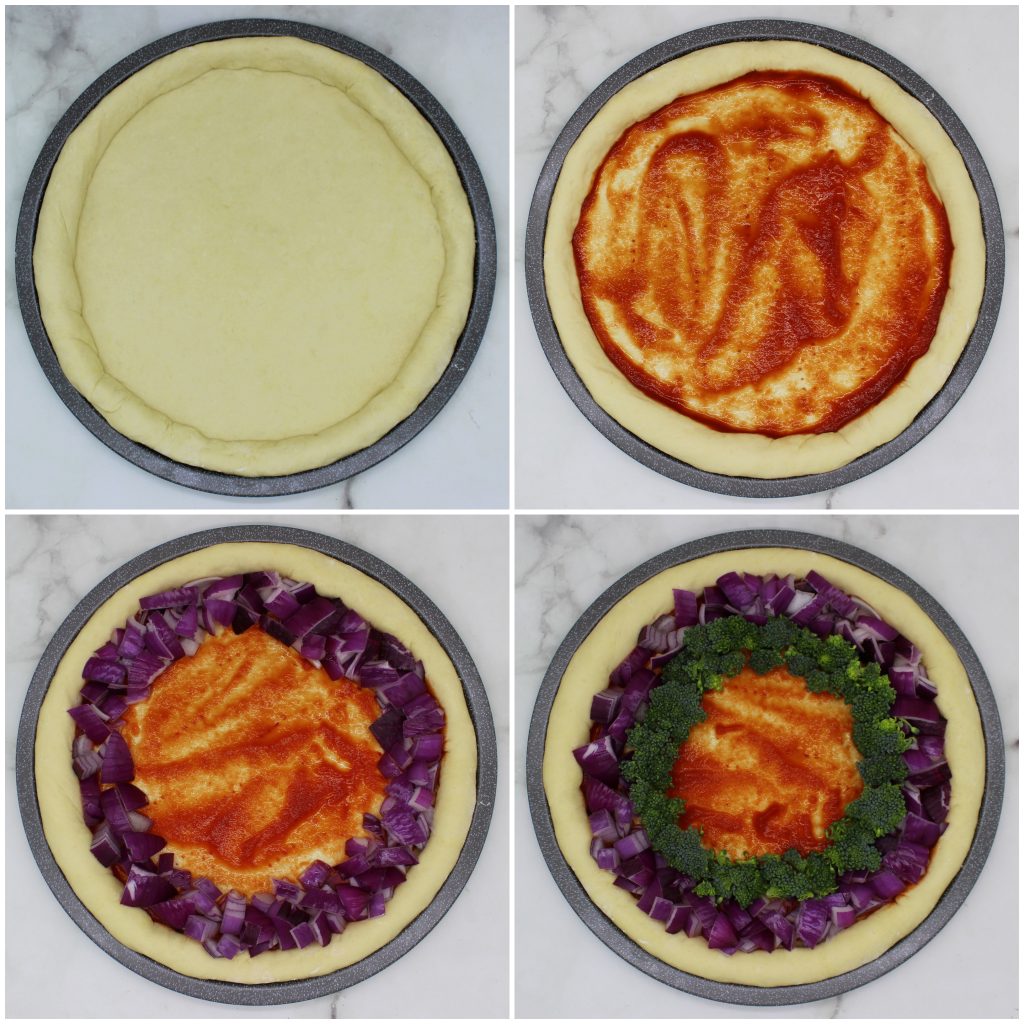
First of all, you need to prepare the pizza dough. Even though the preparation process is very easy, it will take some time, since you need to wait for the dough to rise. Therefore, it’s important to use yeast that you know is actually functioning. I’ve had some yeast-related failures in the past. That’s why, once I found yeast that works well, I keep using only that one in my kitchen. Basically, to make the pizza dough you need to pay attention to the instructions on your yeast package. I used instant yeast that can be mixed directly in the flour without dissolving it first in liquid. That means that you need to mix together flour, instant yeast, salt and sugar. Then add warm water and oil and mix everything well.
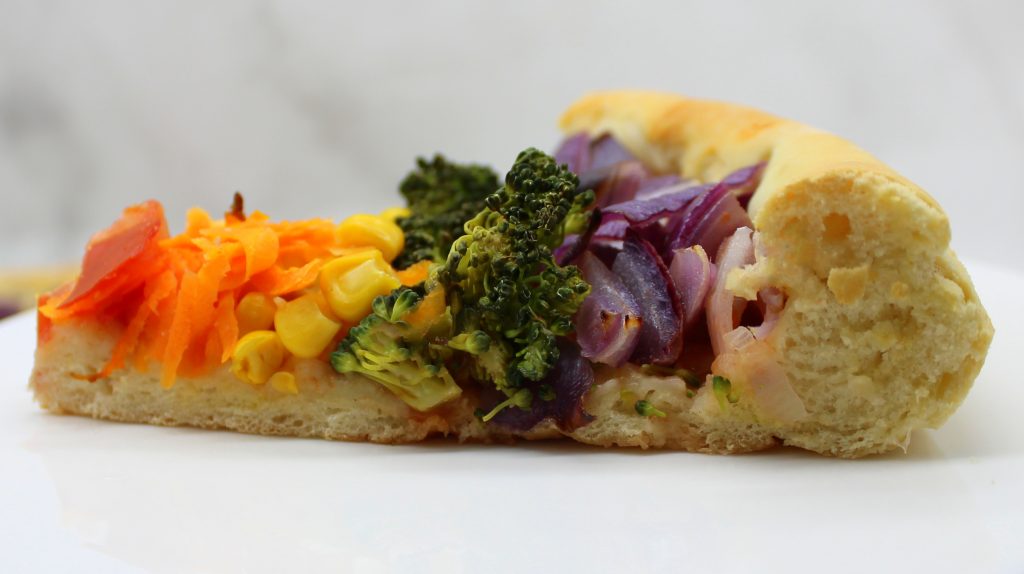
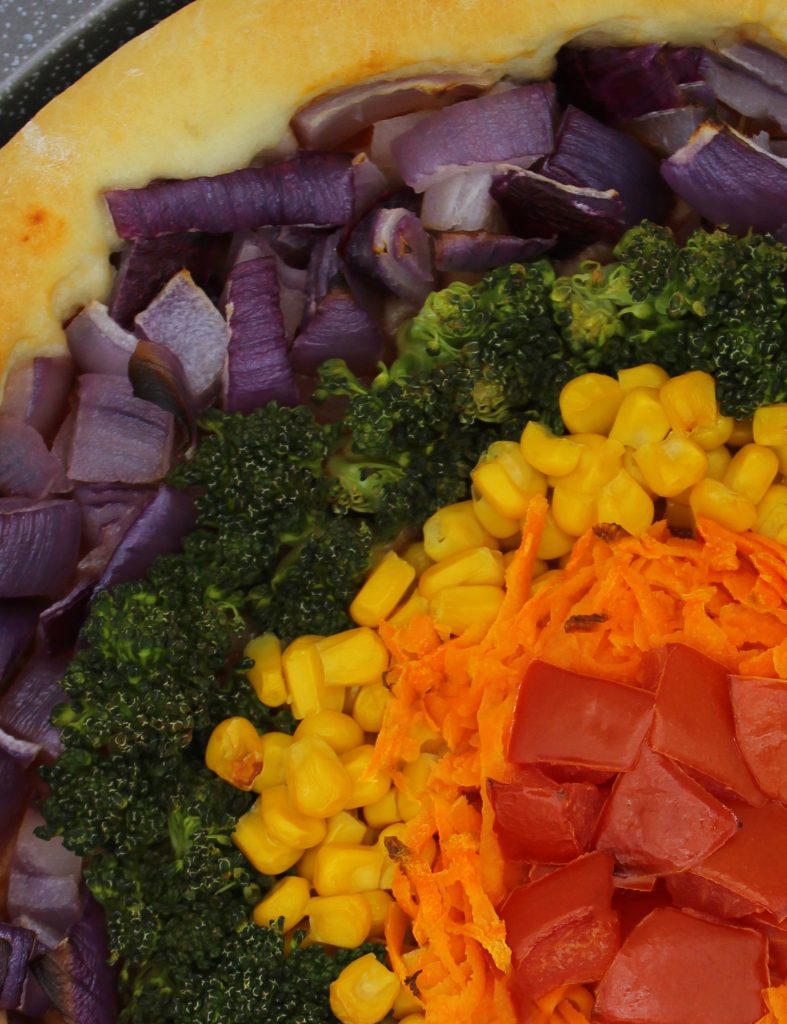
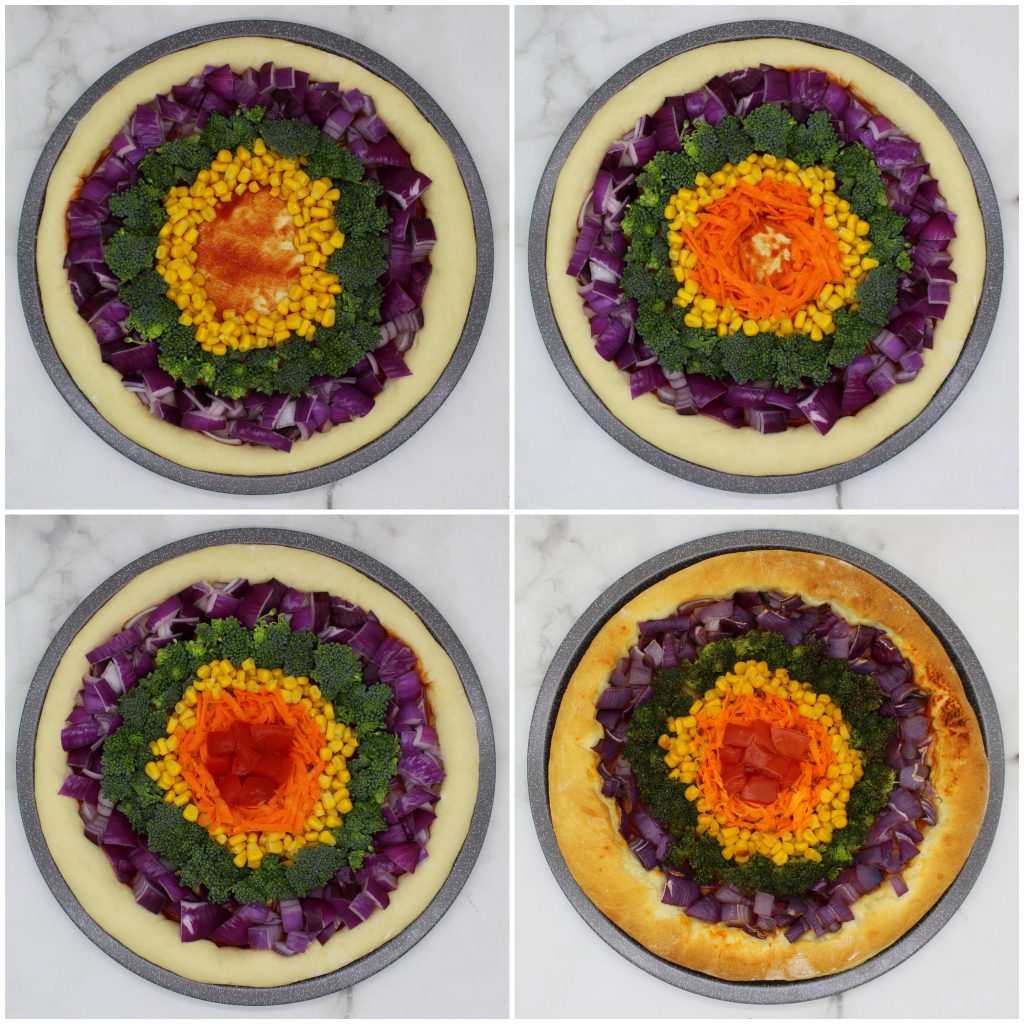
When the mixture starts to form into dough, knead it for a few minutes and then put in a bowl covered with plastic wrap. Then place the bowl in a warm place and let the dough rise for about 45 minutes. Meanwhile prepare the toppings. For the purple circle I used red (purple) onions, for the green circle – broccoli florets, for the yellow – corn, for the orange – shredded carrots and for the red circle – cherry tomatoes. Once the dough has risen, roll it out, place it in your chosen baking dish, cover it with tomato sauce and all the toppings. Afterwards put it in the oven for 12 – 15 minutes. Although this easy vegan rainbow pizza doesn’t contain cheese, it’s very filling and flavorful.
Ideas for substituting the rainbow pizza toppings
For the purple circle you can try to use small eggplant pieces by turning them skin-side up. Or purple cabbage. Or maybe you can even find purple carrots in your hometown. Then the green circle can be made also from green bell pepper, arugula or zucchini pieces skin-side up. For the yellow circle you can use yellow bell pepper, yellow zucchini or yellow tomatoes. The orange circle can be made of pumpkin pieces or orange bell pepper. While the red circle can be made also from red chili peppers or red bell peppers. For sure there are also other ingredients that you can use as a substitute and that I didn’t mention here. But hopefully these ideas will help you, in case you’re not a big fan of some of the ingredients that I originally used in my easy vegan rainbow pizza recipe.
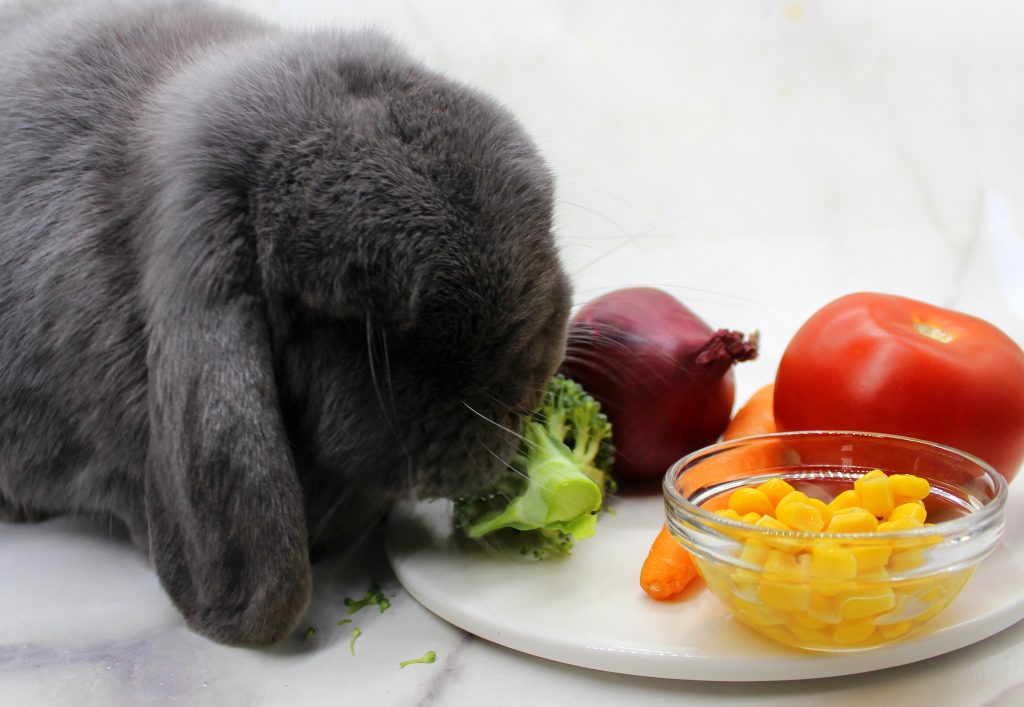
In Specky’s opinion, all of the ingredients are good. Some are better only for humans, like, red onions, but some are also a real treat for bunnies. For example, broccoli florets. Specky looooves broccoli! And if in big quantities it didn’t hurt his tummy, he would eat it every day. But since it does, he enjoys broccoli just occasionally.
In the end, did I tempt you with this recipe? Do you want to know how a pizza with so many delicious, healthy and colorful ingredients taste like? Well, try it and you won’t be disappointed, because this rainbow pizza really is:
-
vegan
- healthy
- easy to make
- juicy
- flavorful
- filling
- deliciously colorful
- soft
- and simply yummy!
Let me know, if you try this recipe! Leave a comment or even more – make Specky happy! Snap a picture of your masterpiece and post it on Instagram or Facebook by tagging @bunnymommycooks. And feel free to let your animal family members join in the picture!
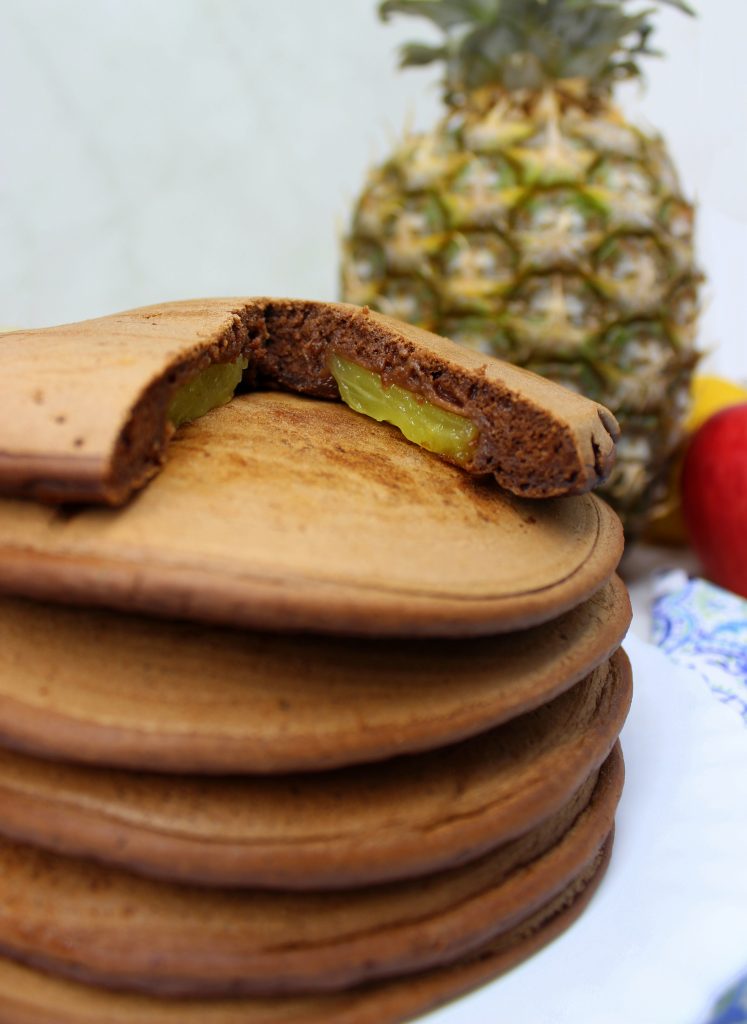
Vegan chocolate and pineapple pancakes
This recipe was posted on: 11/06/2020
Who doesn’t like pancakes, right? Ok, fine… Maybe not everyone loves them… But still pancakes are great as a delicious and easy to make breakfast dish. And the best thing is that they can be made in so many different ways – sweet, salty, with fruit, with chocolate, with vegetables… I mean, with whatever you want. Basically, I had the idea to make these vegan chocolate and pineapple pancakes on a day when I was cutting some juicy pineapple in slices. And this idea turned out to be a good one!
How to make vegan chocolate and pineapple pancakes
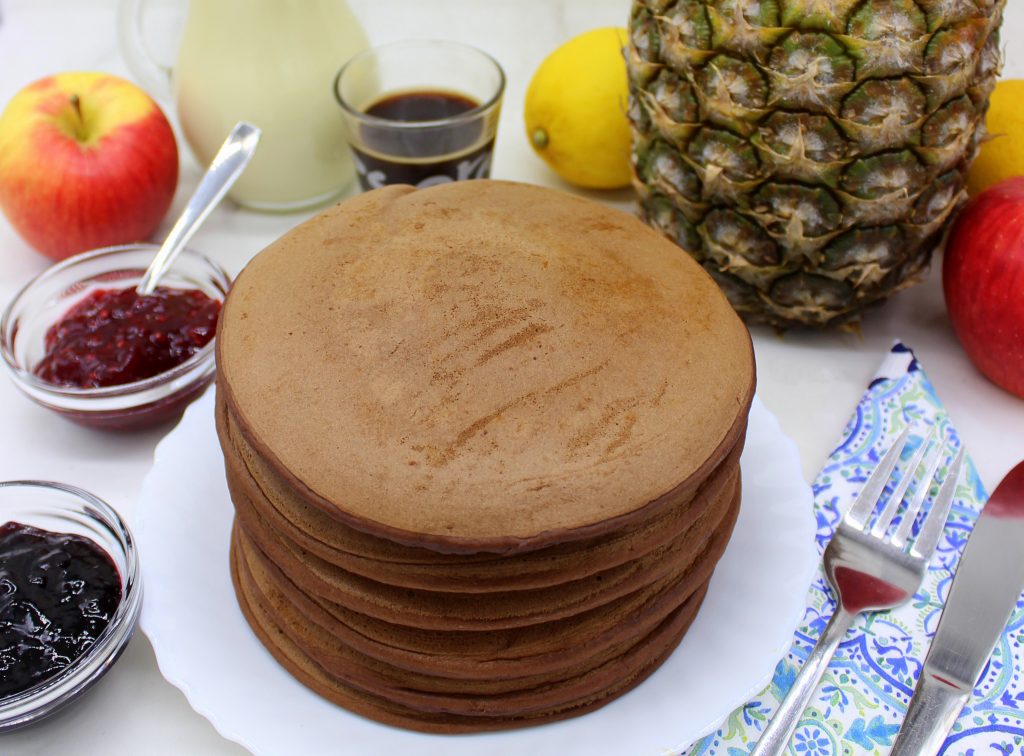
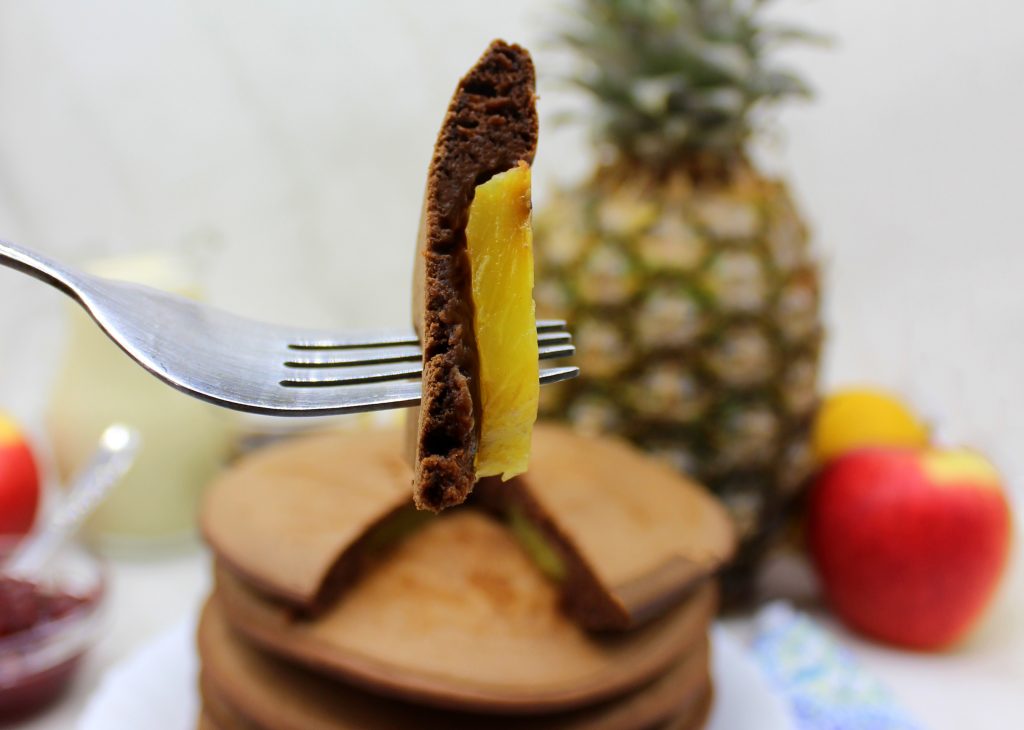
I like my pancakes big and fluffy (almost like Specky) and I prefer to prepare them without oil. I don’t use oil either to prepare the pancake batter or to bake the pancakes. Of course, to do that you need a good non-stick frying pan, but nowadays to get one shouldn’t be a problem. By not using oil, the outcome is fluffy, light and not sticky or greasy. Just the way I like it! However, if you want to bake these vegan chocolate and pineapple pancakes in oil, feel free to do that!
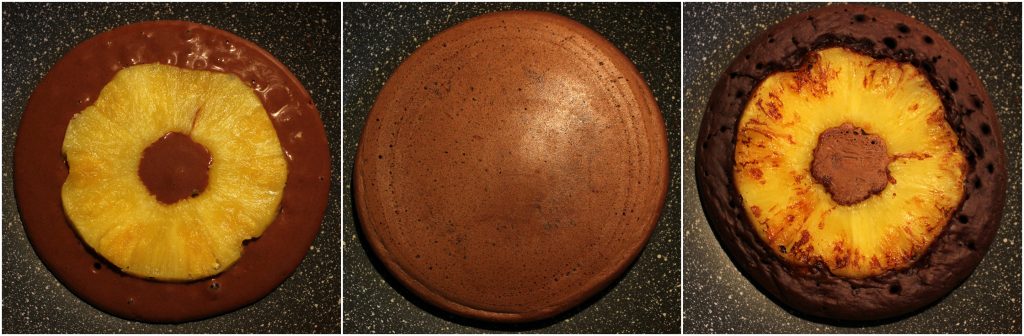
To make these pancakes you’ll need 6 ingredients. Five for the batter plus the pineapple. The ingredients for the batter are flour, sugar, cacao powder, baking powder and plant-based milk. All very simple and easy to find ingredients! In fact, the same goes for preparing these vegan chocolate and pineapple pancakes – the process is very simple and easy. To prepare the batter, just mix all five ingredients together. Then cut your pineapple in slices, cut out of each slice the central hard part and start to bake! Pour some batter in your frying pan, place on it a slice of a pineapple and bake on medium heat/flame for 3 – 4 minutes. When the surface of the pancake becomes bubbly/with small holes, check if the other side of the pancake is ready. If so, flip the pancake over and bake it on the other side for 3 – 4 minutes.
Inspiration for other vegan breakfast dishes
If you really love pancakes, you should try also my fluffy vegan coconut pancakes. They are soft as a cloud and super delicious! If instead you prefer something lighter for breakfast, try one of my puddings: my vegan raspberry-chocolate chia pudding or my exotic flax seed pudding with kiwi and mango. Both of them are very easy to make and full of fiber. The most favorite breakfast in my house is this healthy vegan granola with coconut and cranberries. Apart from the wonderful flavor that it has, you can make it in big quantities and store it in an airtight container. So that for a while you don’t need to worry about not having time to prepare something healthy for breakfast! However, if you prefer savory breakfast, there’s always the avocado toast with fresh radishes to start your day in a good way!
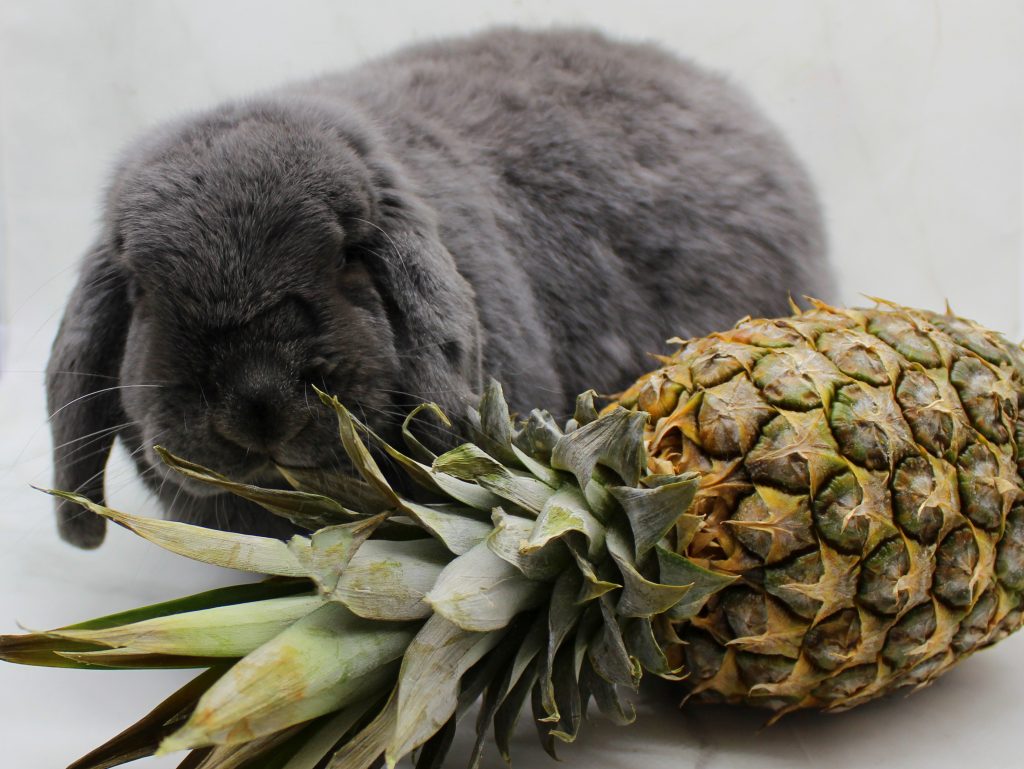
Specky would actually love if his breakfast consisted of all kinds of fruit… But it doesn’t! For his own good, of course, but unfortunately, he doesn’t understand that. Just like he didn’t understand why this time he needed to make pictures with the whole pineapple without actually getting to eat it!
Next time that you want to try something new for breakfast, make these chocolate and pineapple pancakes! In my opinion, even if you prefer savory breakfast, you might actually like these pancakes, because they are:
-
vegan
- fruity
- easy to make
- with chocolate flavor
- juicy
- fluffy
- soft
- oil-free
- flavorful
- and simply yummy!
Let me know, if you try this recipe! Leave a comment or even more – make Specky happy! Snap a picture of your masterpiece and post it on Instagram or Facebook by tagging @bunnymommycooks. And feel free to let your animal family members join in the picture!
Easy homemade vegan Bounty bars
This recipe was posted on: 27/05/2020
When it comes about veganism, some people as an excuse, why they could never go vegan, use the fact that all delicious snacks are not vegan. Partially it’s true, because most of them contain milk or butter. But what if I told you that it’s actually very easy to make your own famous sweets at home? Isn’t it great that you can not only prepare your favorite chocolate bars by yourself, but it also costs less to make many of them? I think that these are some of the reasons, why skeptical people should reconsider going vegan. Because it is really very easy to treat yourself with delicious sweets that haven’t caused any sufferance to animals. And my easy homemade vegan Bounty bars can prove that to you!
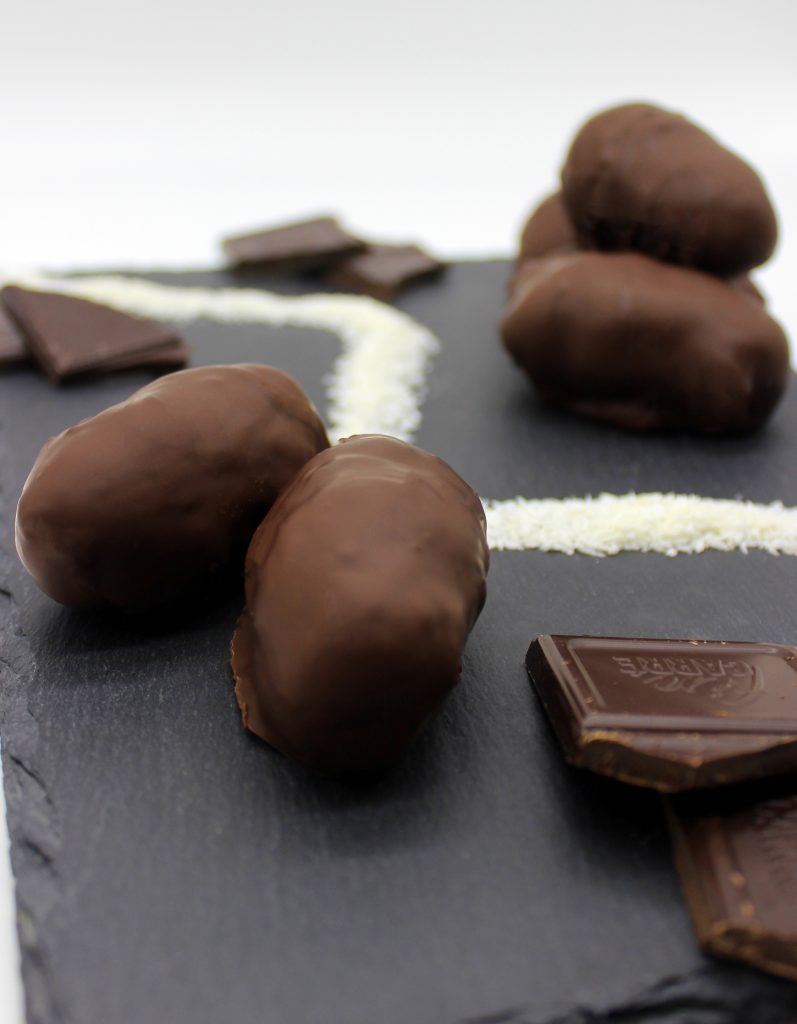
Don’t think that it’s possible to veganize only Bounty bars. The truth is that you can make also vegan versions of Snickers, Twix, KitKat and other famous chocolate bars. For me the making of vegan Bounty bars seems the easiest one. I mean, first, you need only 4 ingredients that can be easily found in any supermarket. And second, the making of these bars will take you only some minutes. To be honest – the necessary amount of time to make these easy homemade vegan Bounty bars is actually smaller than the waiting time until the chocolate hardens. But it’s all worth it – also the waiting!
Ingredients for the easy homemade vegan Bounty bars
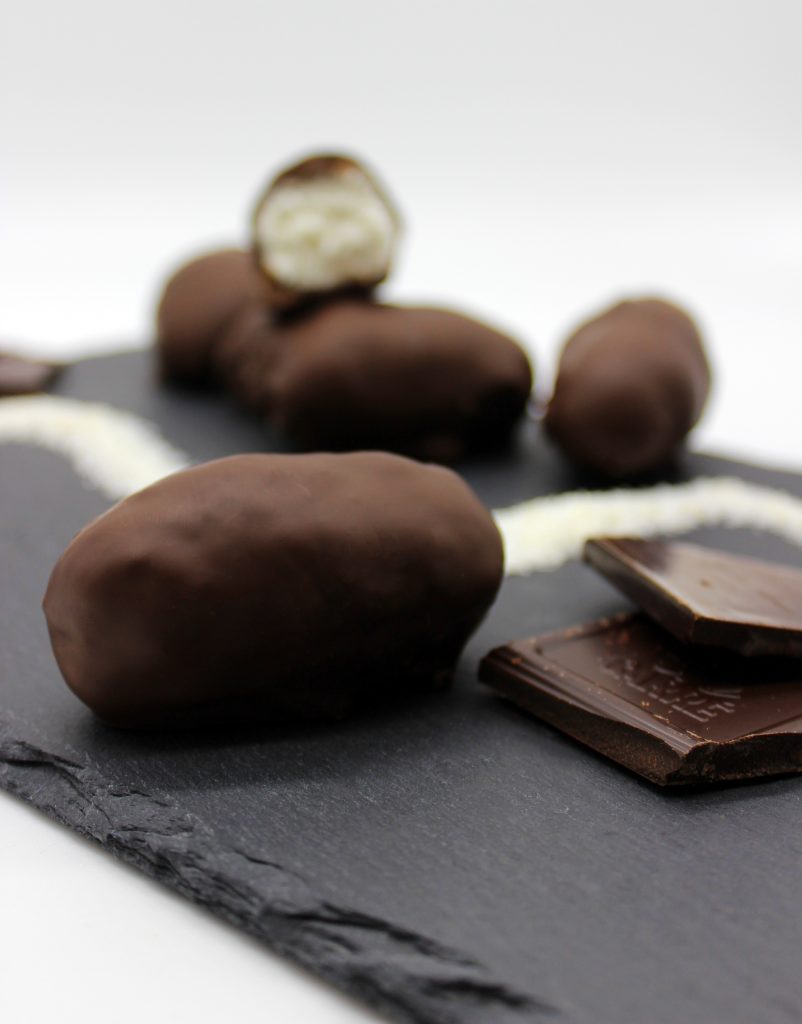
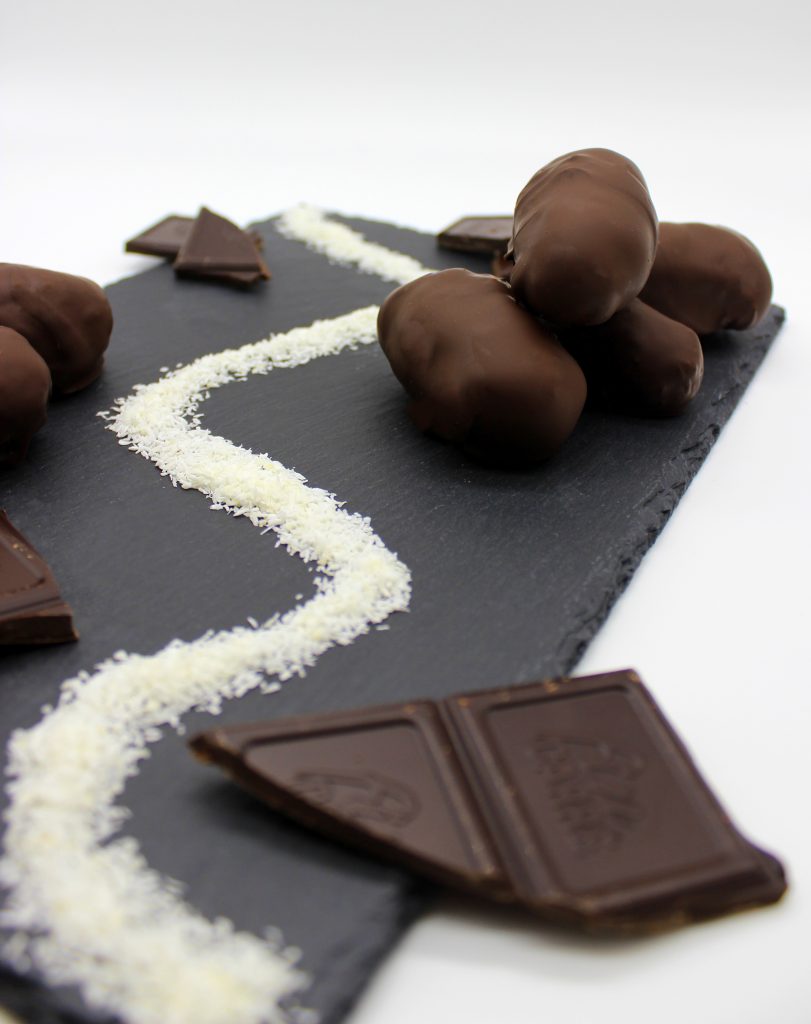
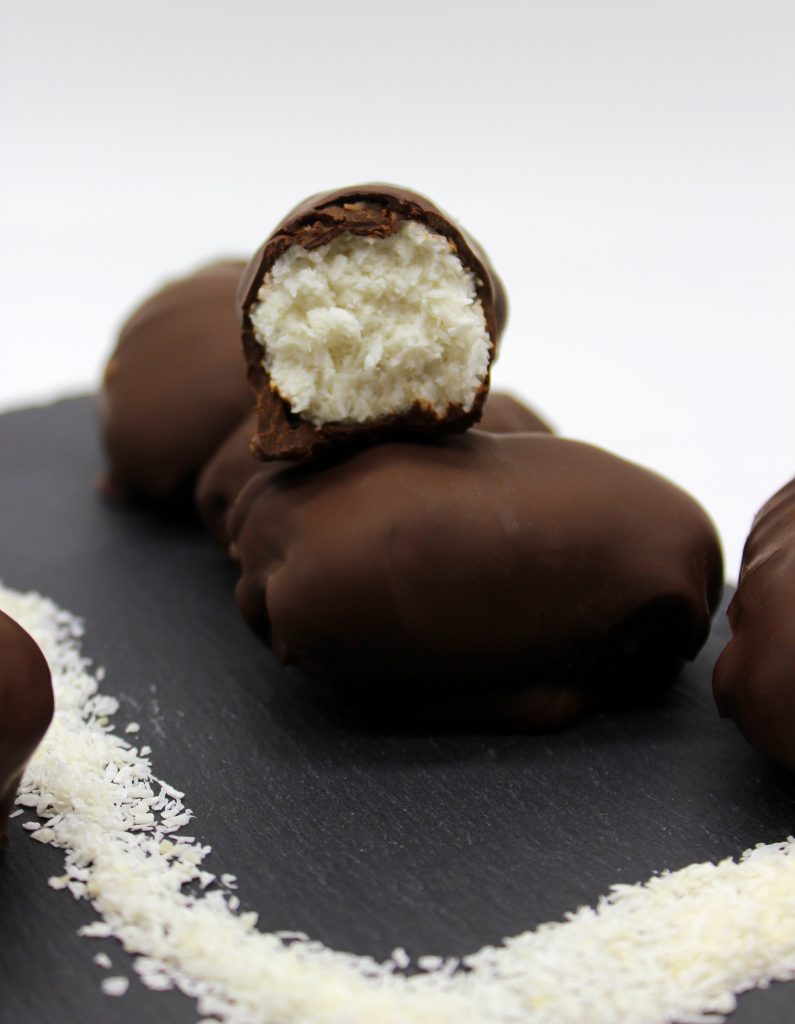
To prepare these easy homemade vegan Bounty bars you’ll need 4 ingredients: shredded coconut, the white solid part of canned full fat coconut milk, maple syrup and good quality dark vegan chocolate. If your full fat coconut milk has not been kept in fridge, you must place it there for 1 night before using it. That’s important, otherwise the white solid part won’t be separated from the liquid part. To avoid situations where you want to prepare something with just the solid part of coconut milk, I advise you to always keep the can in the fridge. In such a way your coconut milk will always be ready, in case you need it already separated. Or, if instead for some other recipes you need it homogenous, you can simply melt it. But not for this recipe – here we need only the solid part of the coconut milk!
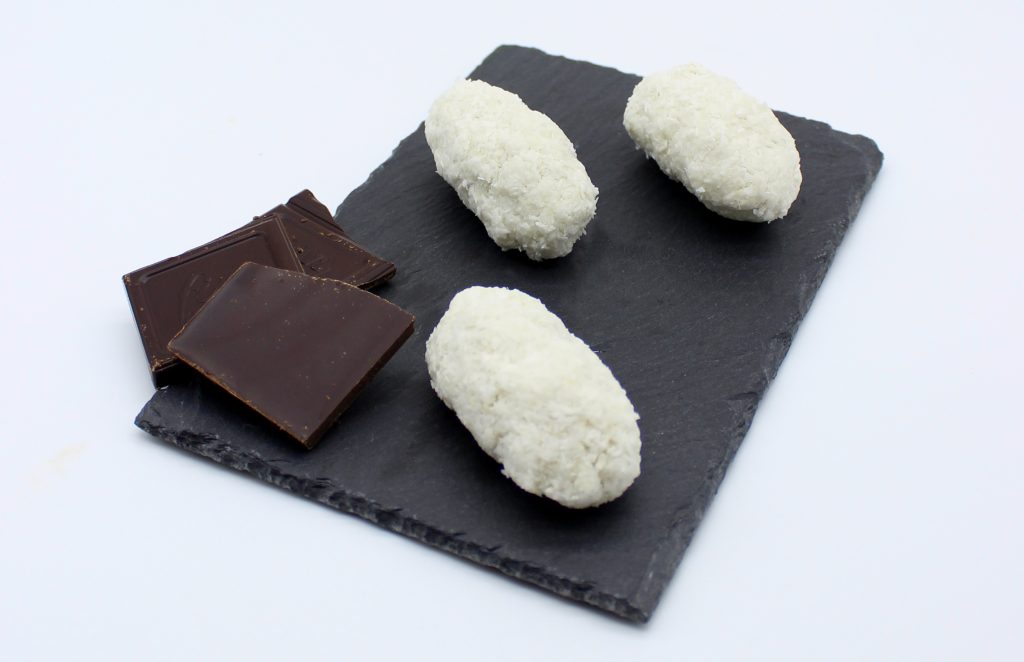
How to prepare easy homemade vegan Bounty bars
The preparation process itself is as easy and counting till three! First, you need mix together shredded coconut, the white solid part of full fat coconut milk and maple syrup. Second, you need to create bars from the obtained mixture by using your hands. And, third, you simply need to cover the bars with melted dark vegan chocolate. And that’s it! After that, the bars need to be placed in fridge until the chocolate hardens. And after that you can enjoy all the Bounty flavor magic – minus the cruelty against animals, of course!
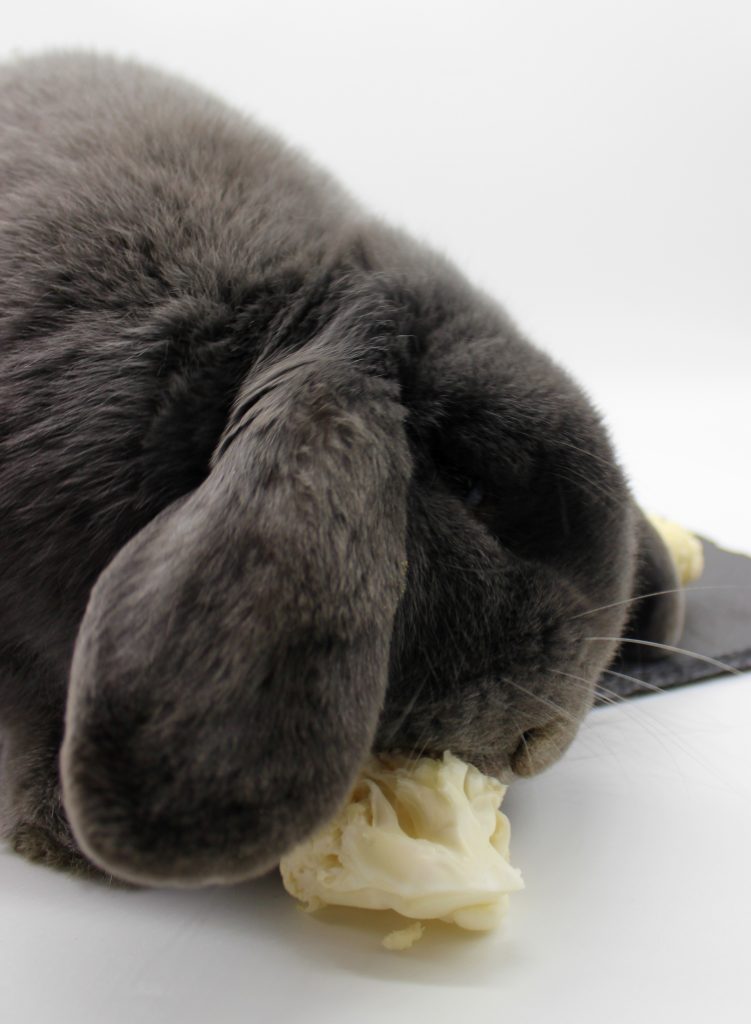
Well, Specky thinks that there is something tastier than these easy homemade vegan Bounty bars. And that is a fresh and crunchy floret of a cauliflower. What can I say… everyone has one’s own taste!
In case you’re worried that you’ll have some leftovers from all the necessary ingredients, I can help you with that! If after preparing these easy homemade vegan Bounty bars you have some extra shredded coconut, use it to try my fluffy vegan coconut pancakes or my healthy vegan carrot energy balls. If you have some coconut milk left over, use it to prepare my vegan pumpkin soup with roasted chickpeas and broccoli or my creamy vegan potato leek soup. Or if instead you have some chocolate left over, use it to treat yourself with these fruit-filled vegan chocolate candies or with my vegan coconut and blueberry donuts. But that’s not it! You can find many other delicious recipes suitable for any mealtime and occasion on this website.
Now it’s time to run to the kitchen, collect the few necessary ingredients and prepare yourself these homemade Bounty bars that are:
-
vegan
- easy to make
- healthy
- chocolaty
- flavorful
- oil free
- dairy free
- gluten free
- and simply yummy!
Let me know, if you try this recipe! Leave a comment or even more – make Specky happy! Snap a picture of your masterpiece and post it on Instagram or Facebook by tagging @bunnymommycooks. And feel free to let your animal family members join in the picture!
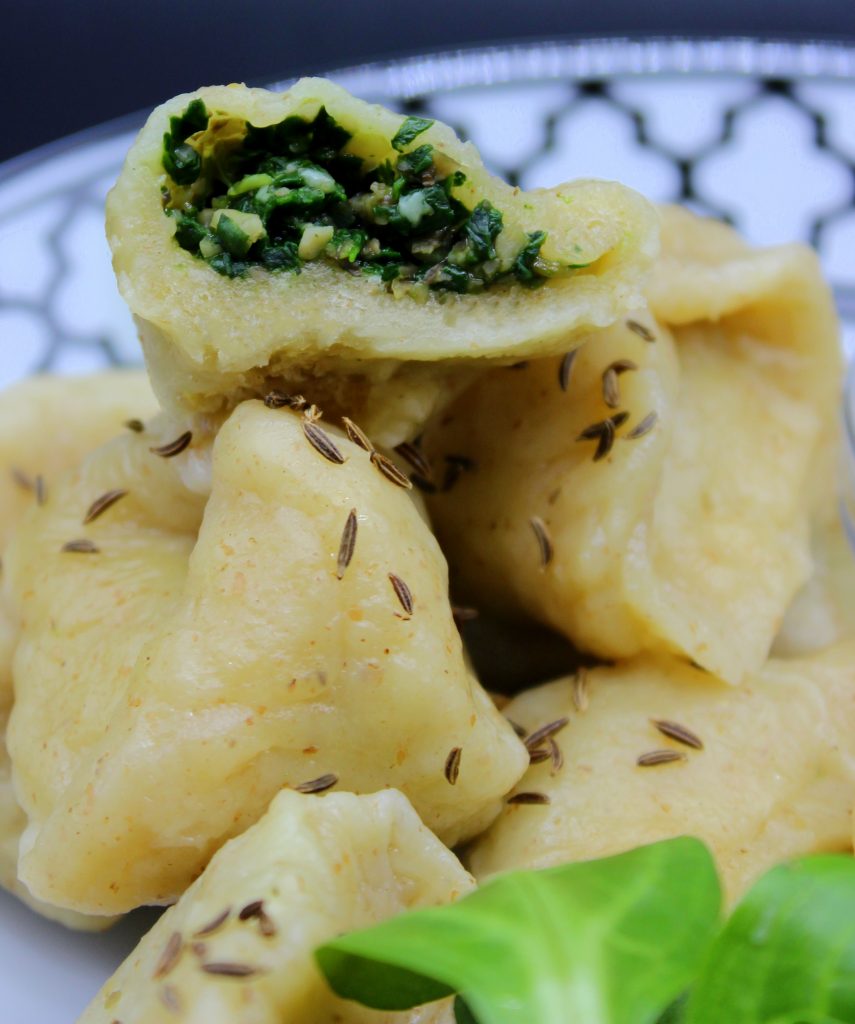
Vegan Russian dumplings with spinach and mushrooms
This recipe was posted on: 14/05/2020
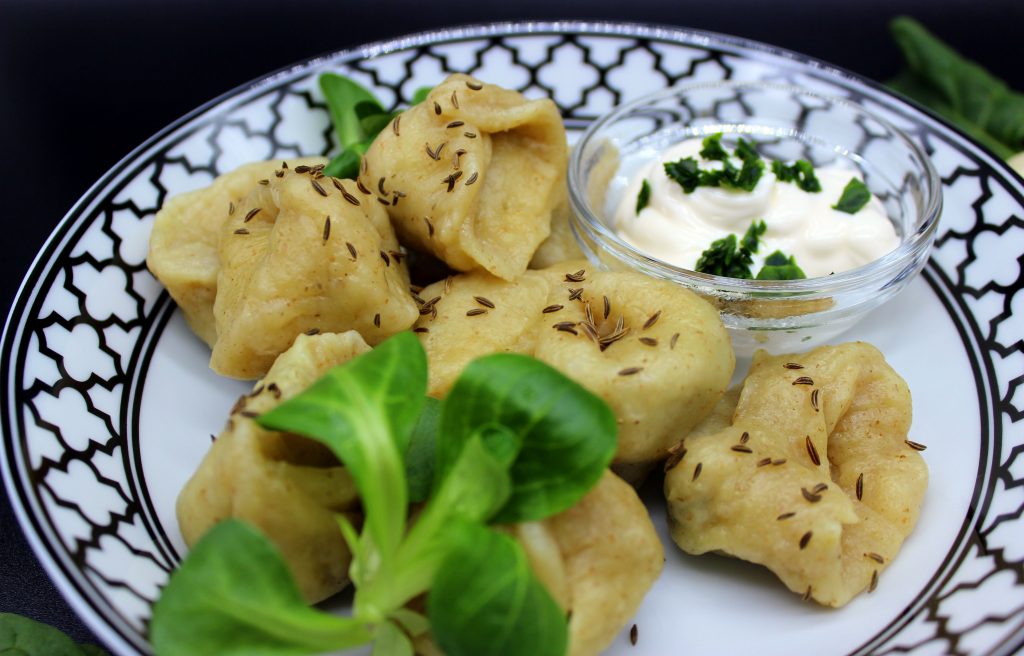
Have you ever tried pizza? – Most probably yes. Have you ever tried the Italian ravioli? – I’m quite sure that you have. But have you tried the Russian cousin to ravioli which is called “pelmeni”? – Maybe yes and maybe not. In case you haven’t tried them, I have an easy recipe for you to make a vegan version of pelmeni at home. So here they are – my vegan Russian dumplings with spinach and mushrooms!
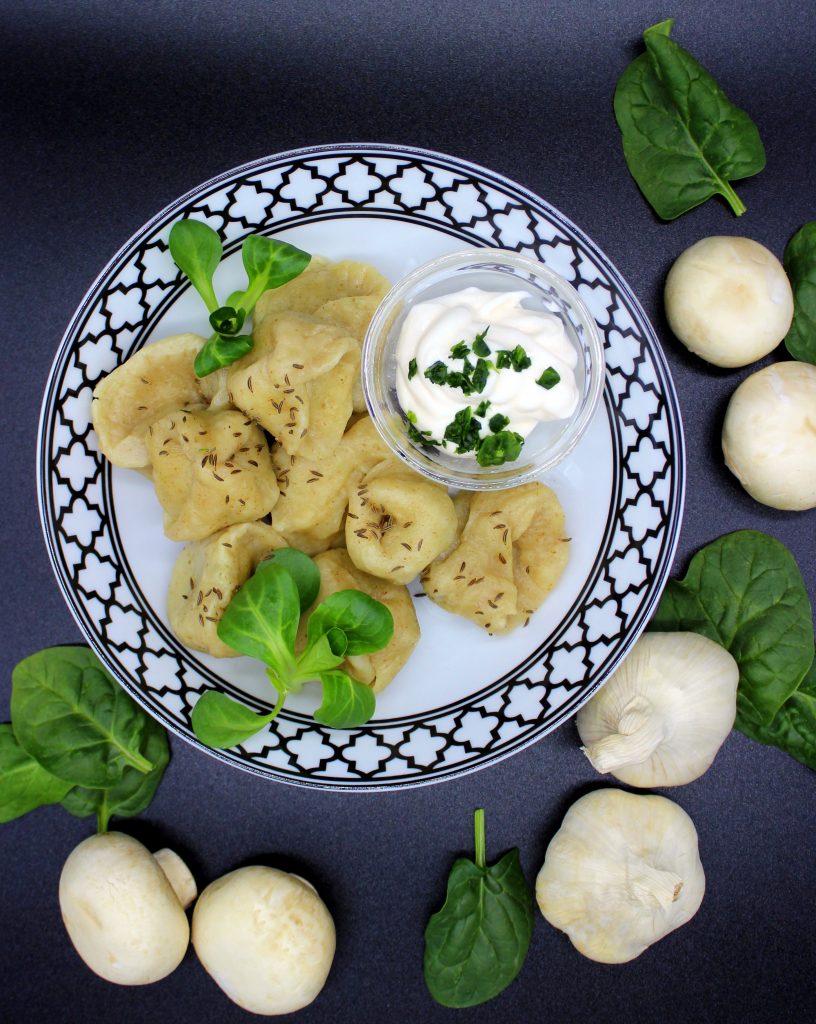
Originally Russian dumplings or pelmeni are filled with meat. But who said that you cannot fill them with whatever you want? I chose to fill my vegan Russian dumplings with spinach and mushrooms by adding also some garlic. In my opinion, the combination of these simple yet particular flavors is very pleasant for the taste buds. And in addition to that, all the necessary ingredients usually are quite cheap. So, basically you don’t have any reason not to prepare the vegan Russian dumplings with spinach and mushrooms!
How to prepare vegan Russian dumplings with spinach and mushrooms
To make these vegan pelmeni, you need to start by preparing the dough. Mix together flour, salt, oil and water until you get a sticky dough. Then knead it with your hands until it doesn’t stick anymore to your fingers. Then set it aside. Now it’s time for the filling! Cut in tiny pieces (or use a food processor to speed things up) spinach and mushrooms. Then cook them in a frying pan together with crushed garlic and salt until all the liquid has evaporated.
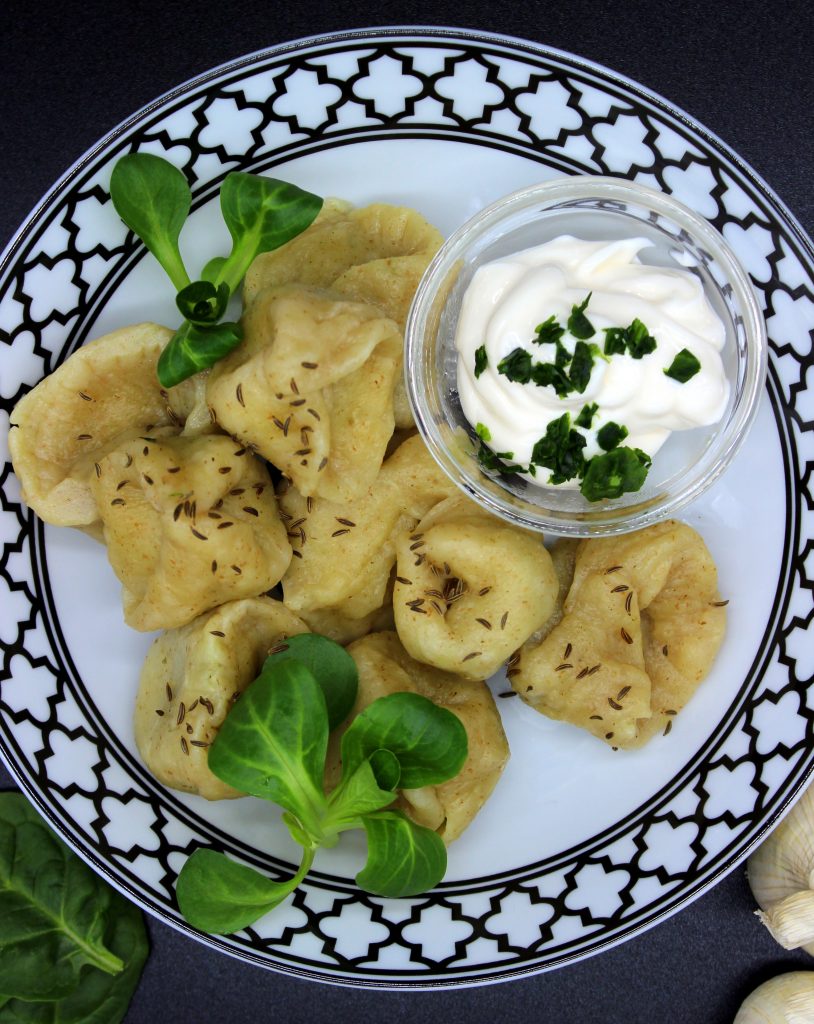
Then it’s time to create the dumplings! Roll out the dough until it’s very, very thin, but not transparent. With a big glass cut out circle shaped pieces. In the middle of every circle put a bit of the filling, fold the circle to create a half moon shape and then join the two ends together. Once you have used all the filling and dough, you have two options. You can place your vegan pelmeni in the freezer for later or you can cook them in vegetable stock for a few minutes. Once they’re ready, they will all float to the top of the pot. Enjoy them immediately while they’re still warm!
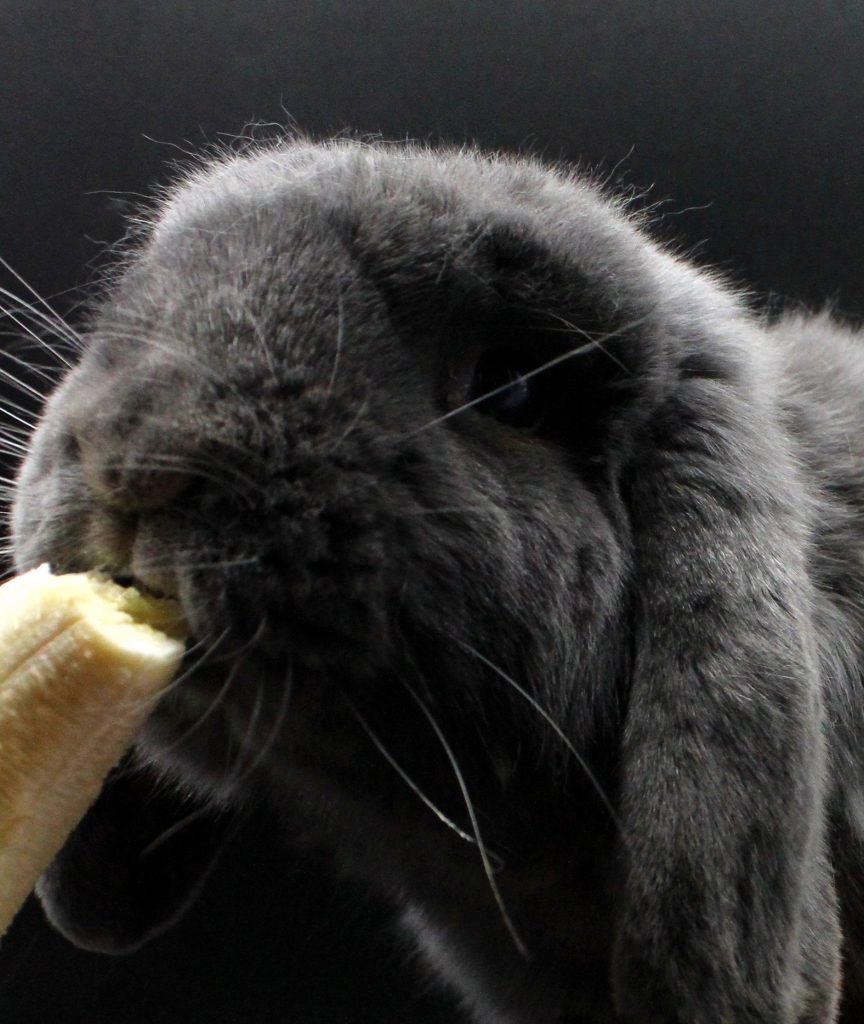
In case you like simple recipes that include spinach, I advise you to try my vegan spinach pesto. It’s perfect together with pasta! Specky was not that satisfied that I cooked again something with spinach or in general with ingredients that he doesn’t like… To fix this “error” of mine, I had to give him his favorite treat – a piece of banana!
But you’re not Specky! And you probably like spinach, if you’re looking at this recipe! So, try it out and discover that these Russian dumplings with spinach and mushrooms are:
-
vegan
- easy to make
- juicy
- filling
- flavorful
- hearty
- freezer-friendly
- and simply yummy!
Let me know, if you try this recipe! Leave a comment or even more – make Specky happy! Snap a picture of your masterpiece and post it on Instagram or Facebook by tagging @bunnymommycooks. And feel free to let your animal family members join in the picture!
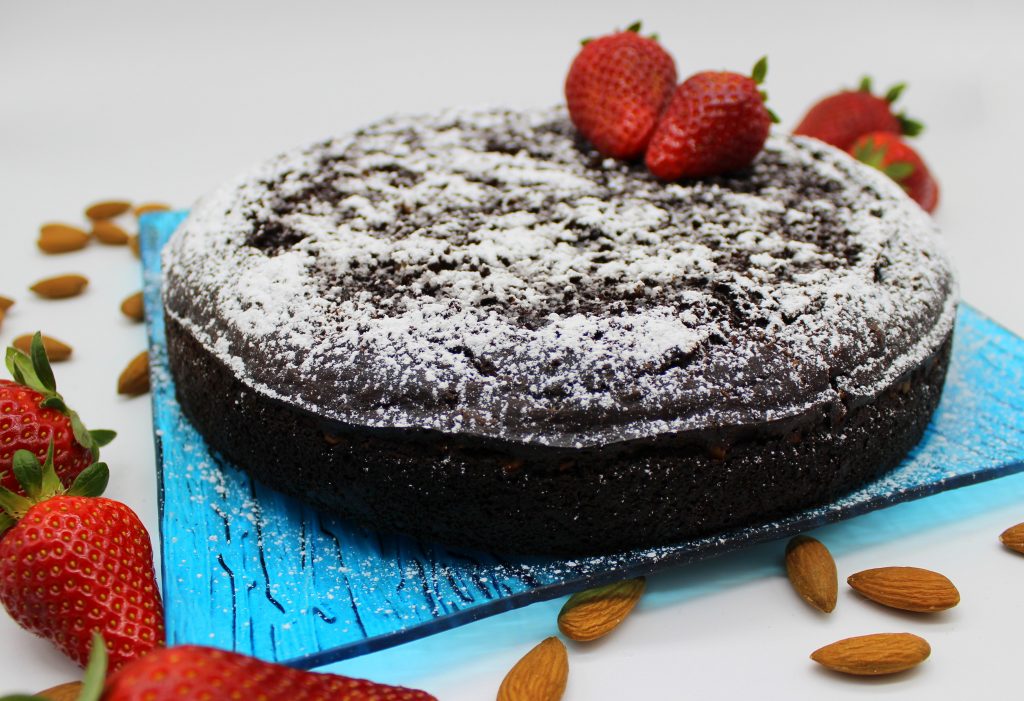
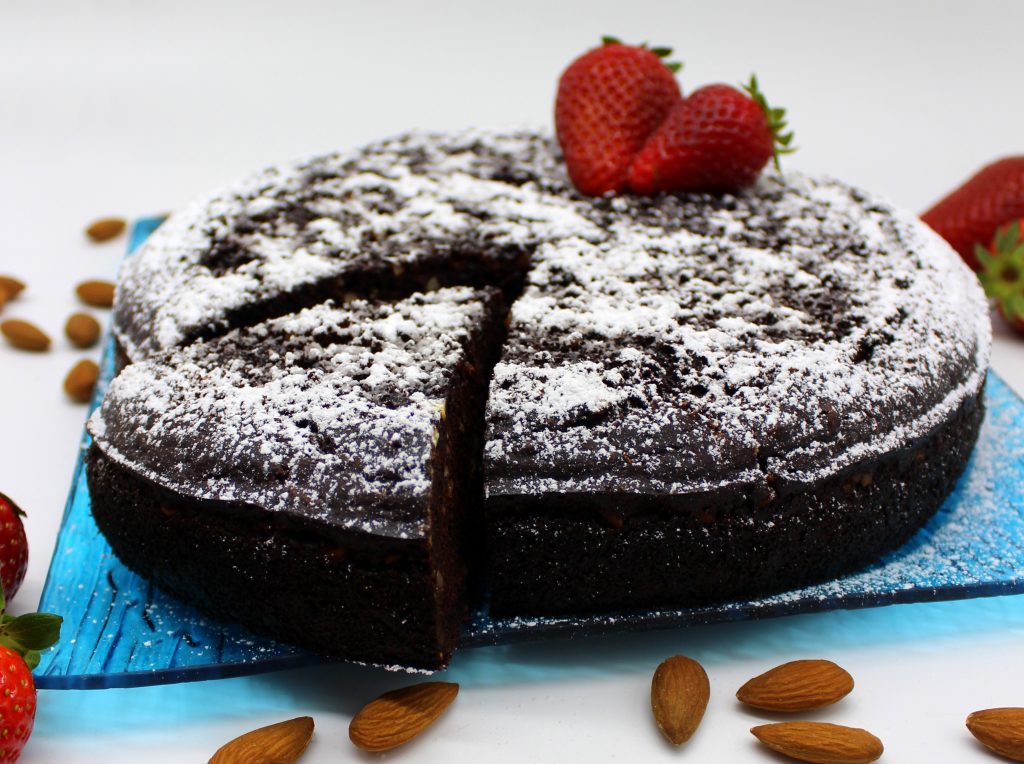
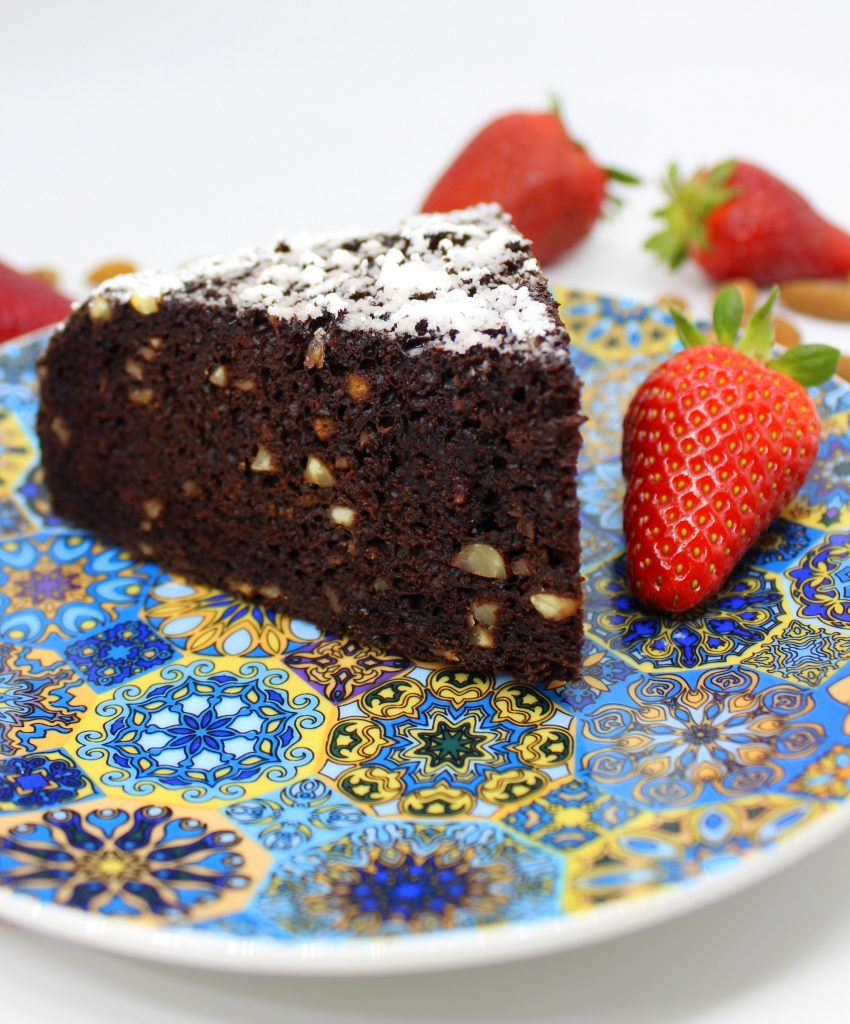
Easy vegan chocolate – almond cake
This recipe was posted on: 04/05/2020
Probably you know the situation when you’d like to eat something sweet, but it seems that there’s nothing at home that fits your wish. Moments like these tend to be the ones when we experiment in our kitchen with the few ingredients that are at our disposal. At least that’s what I did, when I made this easy vegan chocolate – almond cake. And I must admit that the outcome was even better than I expected!
What is necessary to prepare easy vegan chocolate – almond cake
As you probably already understood from the recipe title, the preparation process of this vegan chocolate – almond cake is very easy. Also the ingredients are quite simple and most probably they are already in your kitchen counter. Basically, to make this easy vegan chocolate – almond cake you’ll need flour, almonds, cacao powder, plant-based milk, sugar, baking powder, baking soda, apple cider vinegar and a tiny pinch of salt. If you are a real chocolate fan, you can also add some chocolate chips to the cake. I didn’t. But not because I don’t like chocolate. I love it! But this time I wanted to make a cake that is great in its simplicity. And that at the same time allows you to get creative with some additional ingredients up to your choice!
How to prepare easy vegan chocolate – almond cake
You start the process by toasting the almonds, in case you don’t use already toasted ones. Then you continue with mixing together plant-based milk with apple cider vinegar in order to make vegan buttermilk. It might sound strange to add vinegar to a cake, but it is necessary to avoid that your cake at the end tastes like soap because of the baking soda. To eliminate this possibility, the cake needs an acidic component. In this case it’s the apple cider vinegar. After the making of vegan buttermilk follows the mixing process. Mix together flour, sugar, cacao powder, baking soda, baking powder and salt. That tiny amount of salt helps the chocolate flavor be more powerful. Then add the vegan buttermilk and mix everything well until there are no lumps.
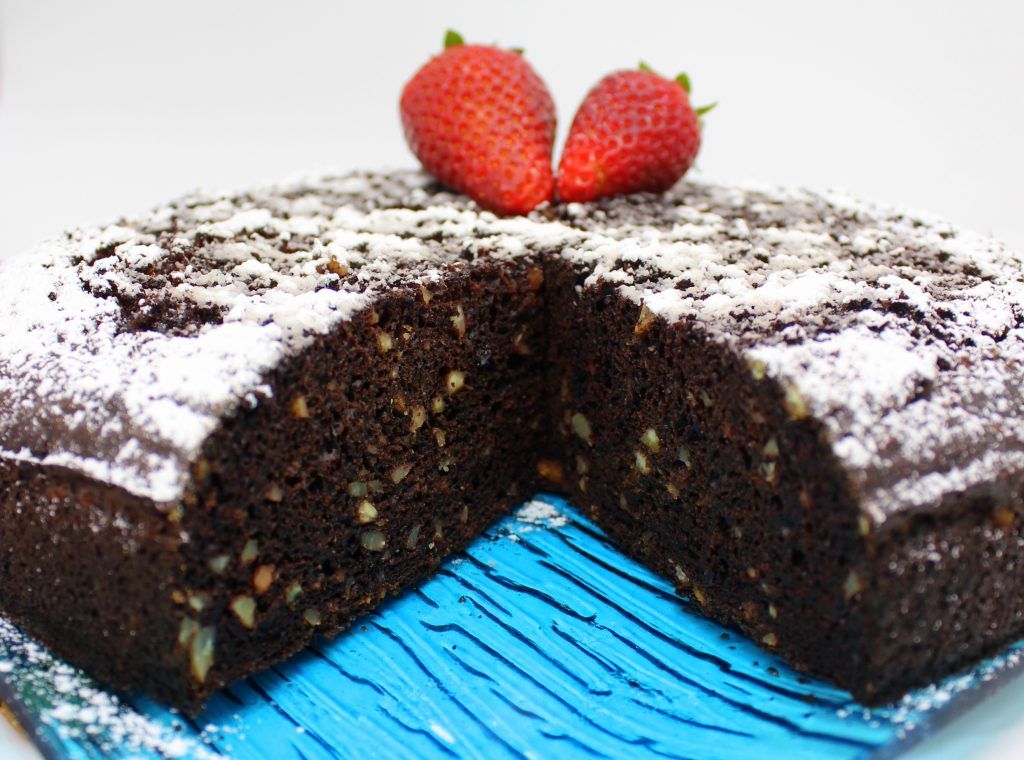
The final ingredient of this cake is toasted almonds. Chop them in tiny pieces (or, to save time, use food processor for this step) and then add them to the dough. Mix the almond pieces in the dough and then transfer all the dough to your chosen cake form. The necessary baking time may vary according to your oven, but in general it’s around 40 – 45 minutes. When the cake is ready, if you want, enjoy it while it’s still warm. But, if you want to decorate it with powdered sugar (like I did) or with anything else, it’s better to let it cool down completely.
Other vegan cakes and baked goods
If you like baked goods, I suggest you to try my vegan bundt cake with plums and chocolate chips. Or for a snack-size treats check out my vegan ginger and mango oatmeal mini muffins and easy vegan rye cookie sticks. But, if you like any type of sweets, not only the ones that require oven, you should definitely make my creamy vegan lime and avocado cheesecake. It will give you a sensation that your taste buds are on a summer vacation on a tropical beach… I think that something similar happens to Specky when he eats strawberries. He doesn’t just go crazy when I eat them – he literally starts to wrap himself around my feet when I simply wash the strawberries! I guess his love for the strawberries, that in this case I used only as a decoration for my cake, is clearly visible in the picture below.

No matter if you decide to add some extra ingredients to this chocolate – almond cake or not, it will in any case be:
-
vegan
- easy to make
- flavorful
- chocolaty
- nutty
- nourishing
- comforting
- made with simple ingredients
- and simply yummy!
Let me know, if you try this recipe! Leave a comment or even more – make Specky happy! Snap a picture of your masterpiece and post it on Instagram or Facebook by tagging @bunnymommycooks. And feel free to let your animal family members join in the picture!